Warbonnet Peak, SE Face (5.7) + Elephant’s Perch, Mountaineer’s Route (5.9)
After we found out Kylie’s foot was broken on the Grand Teton, Jacob was one of the first people I contacted. We had not climbed together since the spring, but I knew he would be ready for the call at any moment to come out and climb some alpine rock in a new place. There are certain people you can count on to be ready at any moment for the mountains, and Jacob is one of them. We quickly arranged to meet a week later in Idaho for a three day trip in the Sawtooth Mountains for some adventurous alpine rock climbing in a lesser-known but amazing area. Our goal: The SE Face of Warbonnet Peak and the Mountaineer’s Route on Elephant’s Perch.
Jacob and I met the night before at the general store in Stanley and caught up on our summer experiences while brewing some filling stew. Then, like we had many times before, we went over our trip plan, packed our gear, and made preparations for our return together to the alpine realm.
Day 1: Into the Jaws of the Sawtooth
We woke around 6 am and stepped out into the cold Idaho air. Although it was still mid August, the morning temperature was down around freezing, even at the lower elevation of Redfish Lake Resort (6500 ft). We ate a quick breakfast of pop tarts and peanut butter bagels and walked down to the lodge, where we paid our tickets for the 7 am boat ride across the lake. The boat ride would save us about 5 miles of hiking each way, so we felt it was worth it. There was one other duo joining us on the ride. The boy worked for the resort, so he got free boat rides, using most of his free days to get out to Elephant’s Perch for day climbs. Although he lived in the area, he admitted he had never done the SE Face of Warbonnet Peak but had heard great things about it. This jived with what we had read online: everyone seemed to know of Warbonnet Peak, but few had actually done it because of its longer approach.
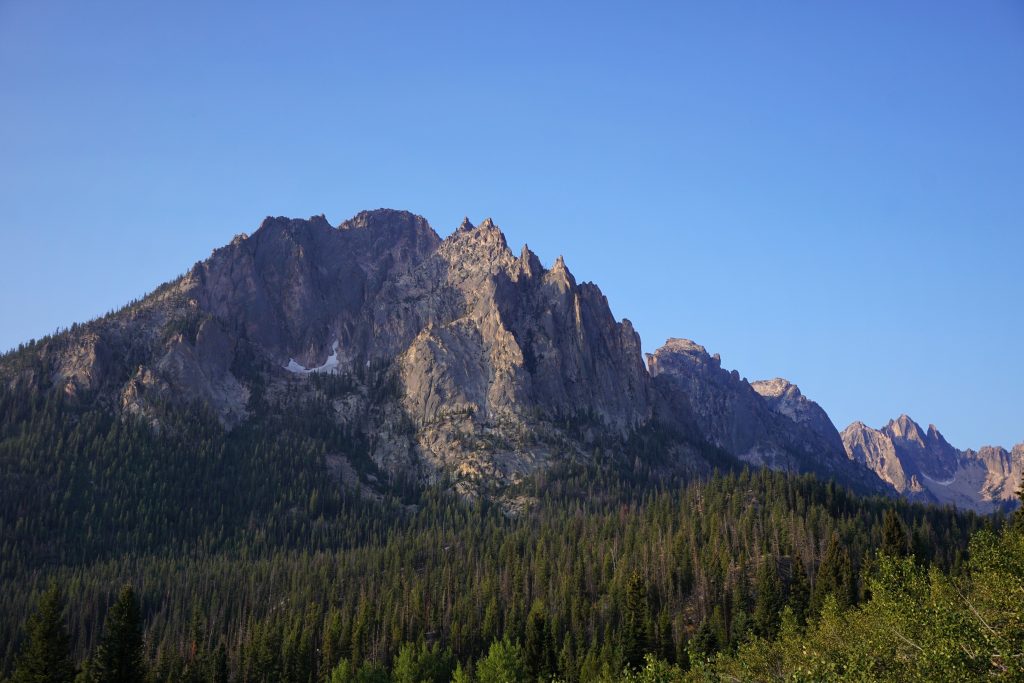
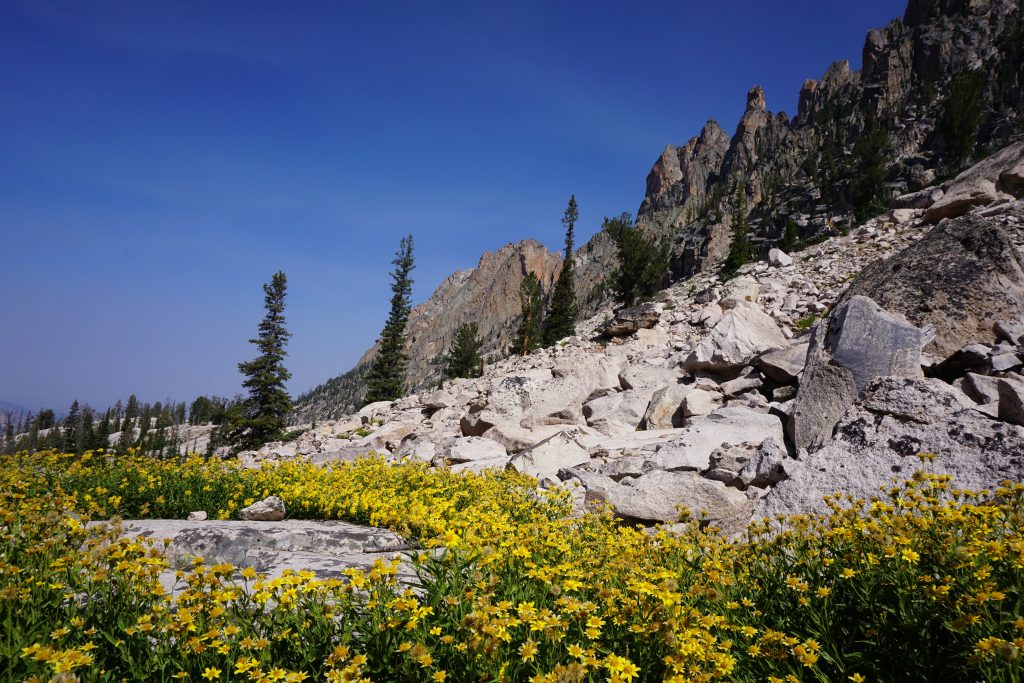
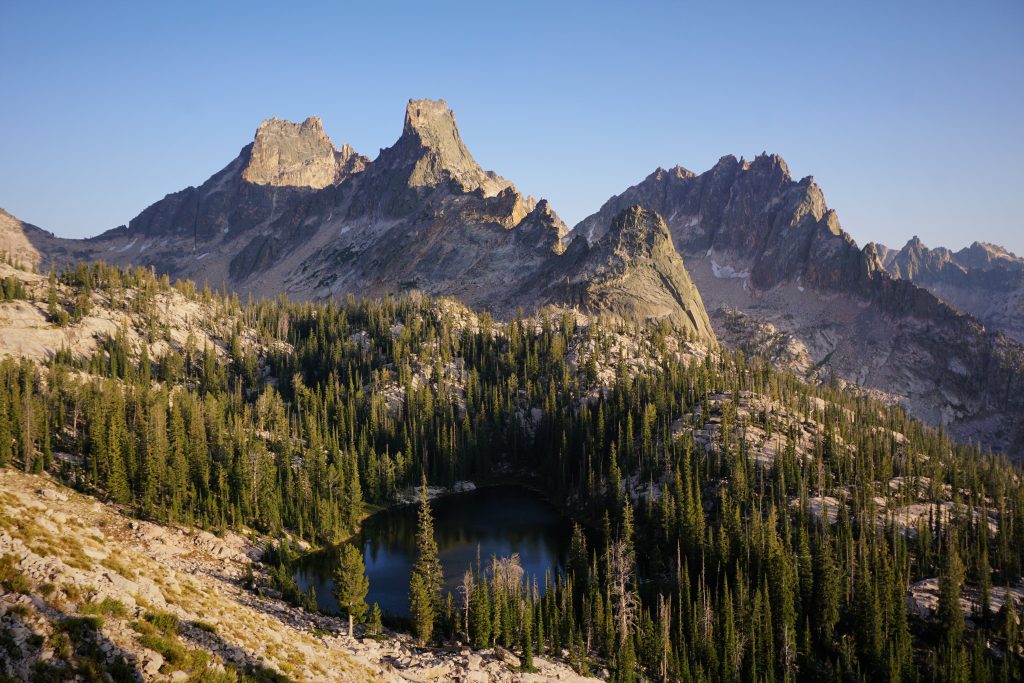
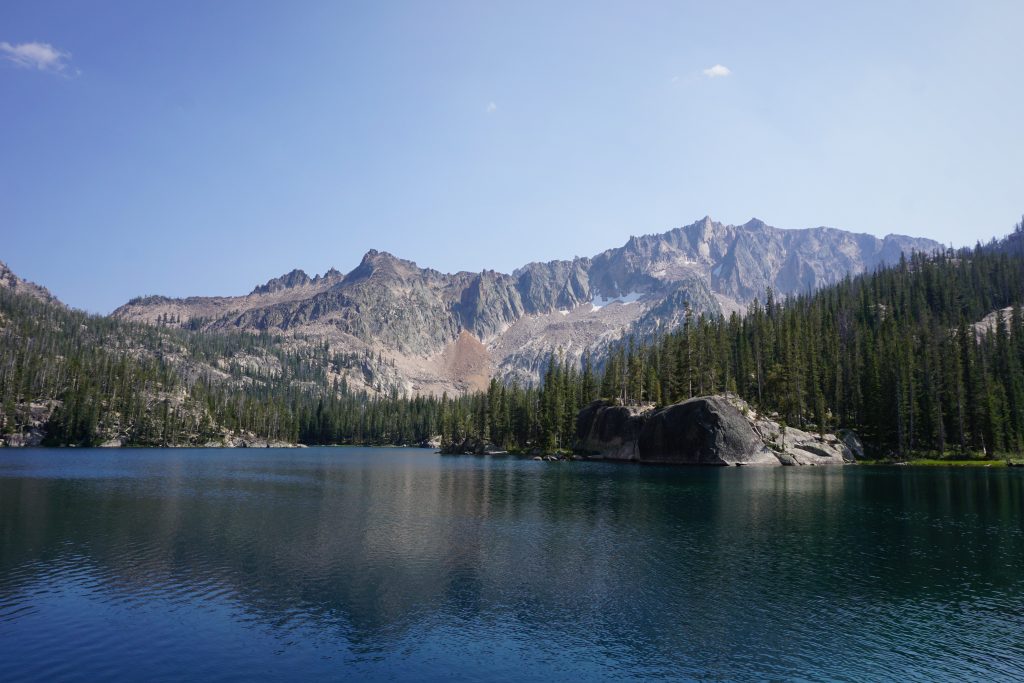
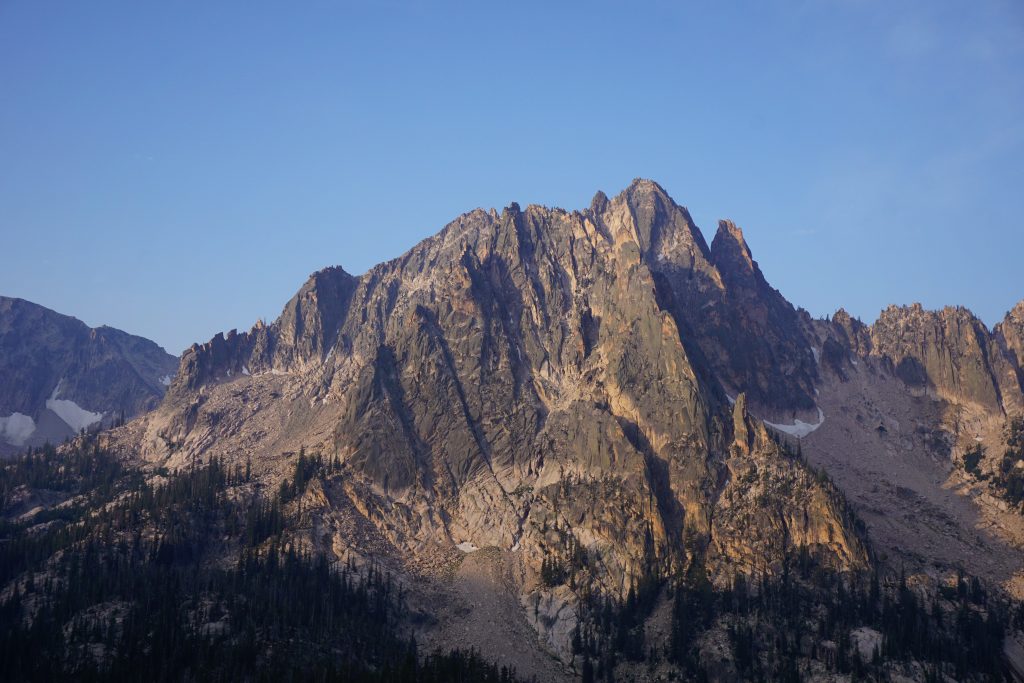
The ride was cold and pretty in the early morning. As we crossed Redfish Lake, huge rock spires crystallized out of the smoky haze. I had been in the northern and southern Sawtooth before, but here the rock appeared much more consolidated and attractive. It once again had the distinctive brown-orangish tinge that we had only ever seen at Washington Pass. If the rock was anything like Washington Pass, this was going to be an incredible trip.
Once on the other side, we departed the boat and began hiking up the valley. We were already getting excited with the huge rock faces around us. They seemed to form a passageway, inviting us further in the jaws of the Sawtooth.
A few miles in, we took the turnoff to Alpine Lake and began hiking uphill. There was nothing particularly alpine about Alpine Lake, so we continued to where we had read to leave the trail, at about the third switchback. Traversing and gradually gaining elevation, we soon popped out of the trees and got a view of the pass that would lead us to the next drainage.
On the other side, we descended some loose dirt/scree into the Feather Lakes drainage. We traversed to the north of the lakes across boulder fields and through some nice meadows. Meadows are rare in the Sawtooth, but they are usually vibrant and full of butterflies.
We crested another little knoll and descended through forested slabs, scrambling our way down to the Bead Lakes. These lakes were very calm and saw little evidence of previous human footprint. At the outlet of the lower lake, we found a nice campsite and decided to set up here. It was only noon, so maybe we would actually have time for Warbonnet in the afternoon! We had been warned of the long, arduous approach to the Bead Lakes, but it had only taken us under 5 hours from the boat.
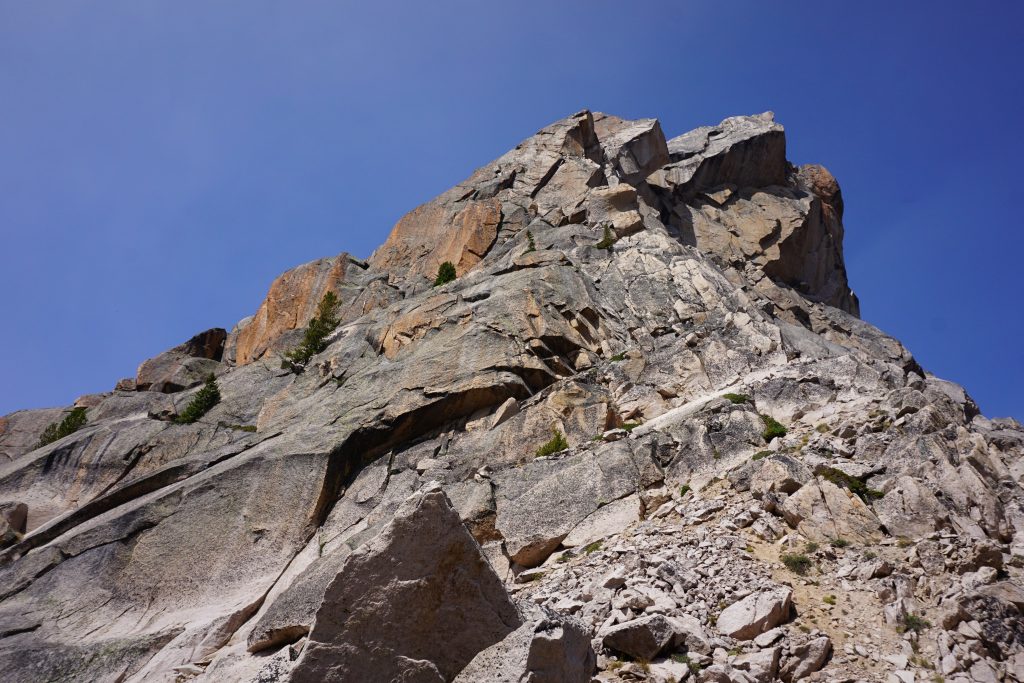
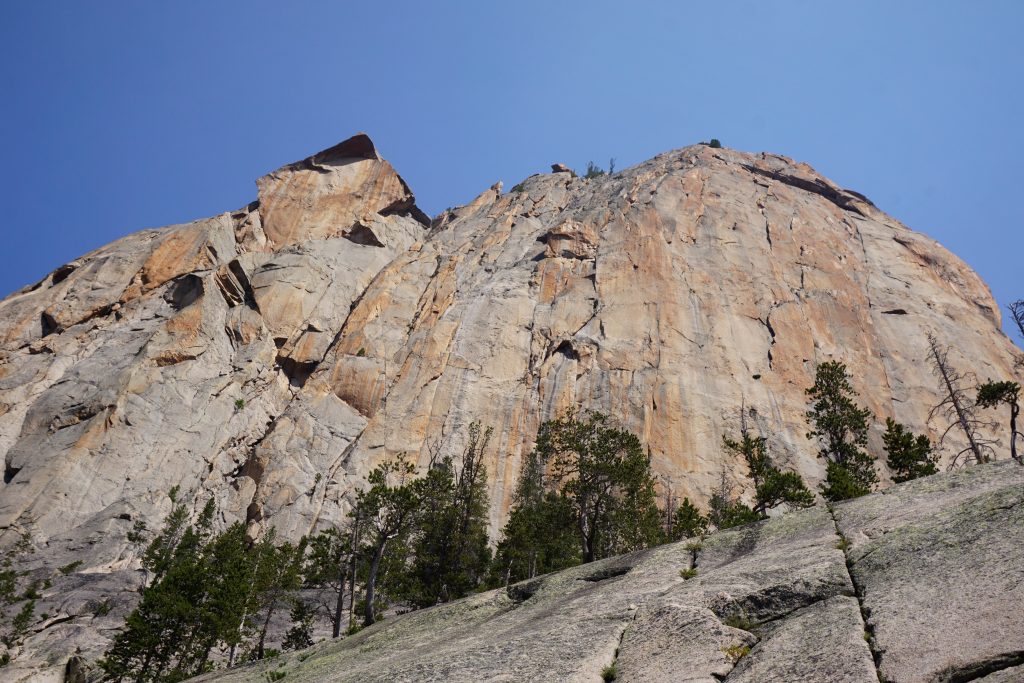
After lunch, we hiked up to the base of Warbonnet. Surprisingly, there was another party on this route during the middle of the week! They seemed to be most of the way through the route, so it would be little issue for us. The SE Face of Warbonnet is known as an adventurous, exposed climb that plays out more like a mountaineering, routefinding route than a normal technical rock route. The face has no clear line and a massively exposed, overhung summit block.
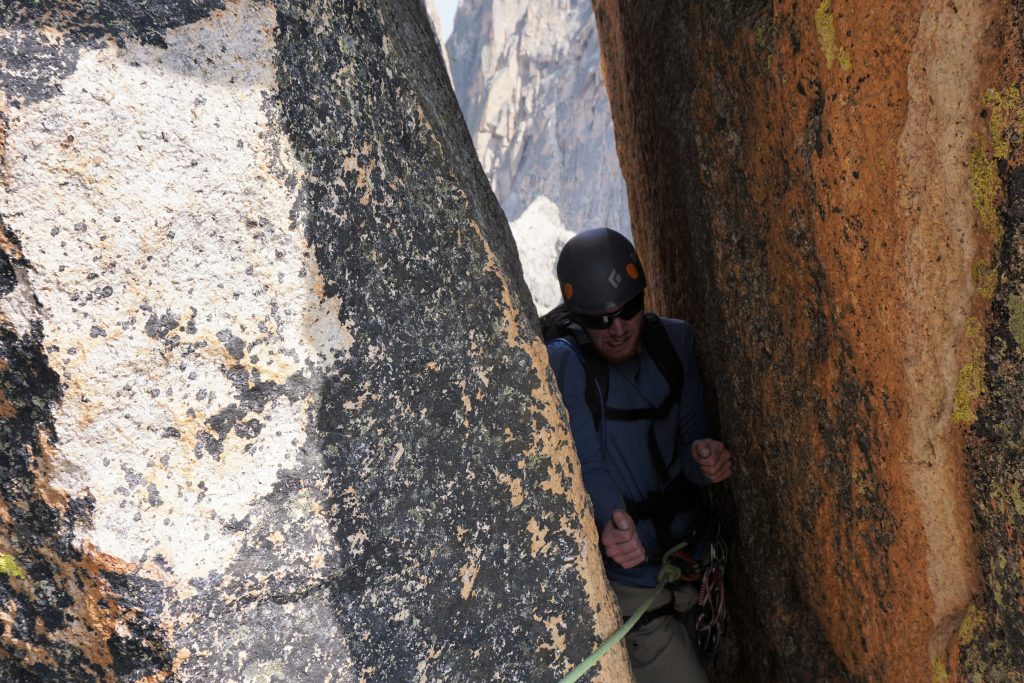
Jacob led the first easy pitch. He had not led any 5th class rock all summer, so it was good for him to start out with something chill. I led the second pitch, which traversed left and went through a tight tunnel, which felt like awkward 5.4. Jacob was even more awkward with the squeeze.
The next pitch featured some more delicate 5.7 face climbing through flaring crack systems. We were quickly getting high on the face, which dropped away quickly because we were now climbing above a very steep portion of the lower face.
Somewhere on the fourth or fifth pitch, there was a money 5.7 handcrack, so I had to give this pitch to Jacob, the crackmaster! He scrambled across a gully and found the handcrack like it was magnetic. He cruised up the handcrack on bomber jams high up on the face. It was an awesome pitch, and a pleasure to follow.
At the top of the pitch, we were greeted with a few surprises. First, we were apparently now at the summit pitch, so somewhere along the way, we had skipped the fourth or fifth pitch! We checked the topo a few times, but we were not sure where the fourth pitch went (we assume the handcrack was the fifth)… Second, the other party that we had seen earlier was also waiting at this point, too intimidated to lead the final pitch.
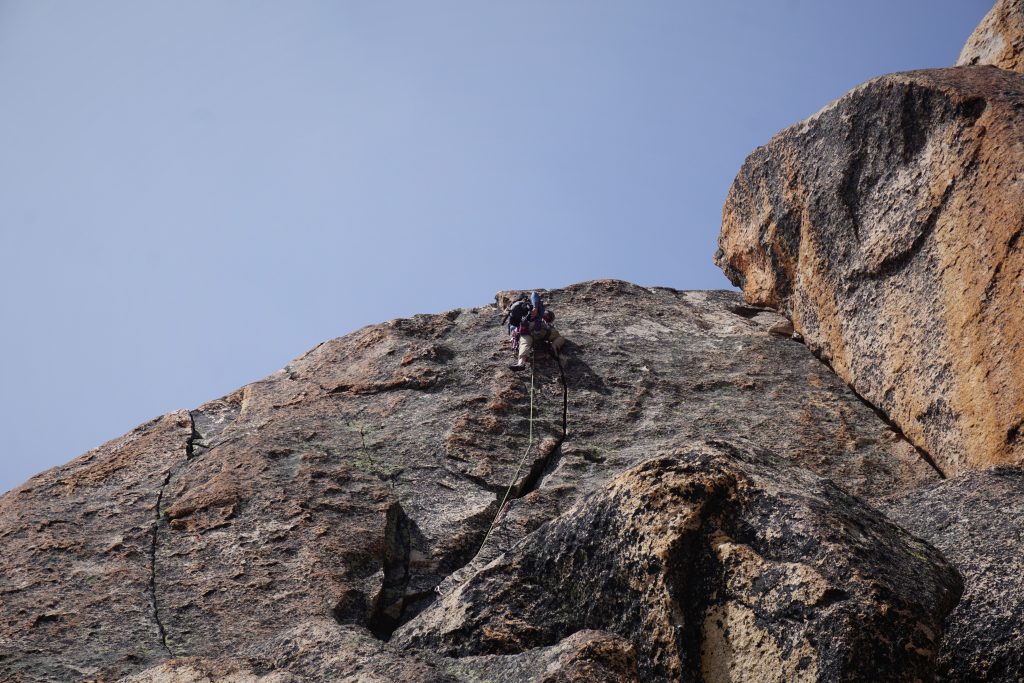
The summit pitch is probably the most famous part of this route. Supposedly only 5.4, it traverses and ascends a seemingly blank face for 50 feet laterally before finally reaching the security of bolts near the summit. The entire summit block hangs above the lower valleys like a diving plank above thin air. Put simply, a fall here would mean a bad day. But it was only 5.4, so how hard could it be?
I volunteered as tribute to lead the pitch, since I seem to have specialized in easy(ish), super exposed leads throughout the summer. One of the two women in the other party offered to take photos in case anything happened of the epic lead. With no protection from just past the belay, I made some awkward traversing moves until I was at the bottom of the blank face. I scoured the face, finding a small depression where I actually could slip in a tiny tricam against a single crystal in the rock. Beta unlocked! The tricams come clutch again!
Looking above me, I saw some previously hidden face holds. I planned a sequence in my head and went for it! A few small crimps, tip-toe edges, and a solid reach to the arete. I was on top of the ridge!

I clipped a solitary bolt and scrambled up the ridge to the bolted anchors. I shouted down to the two women that we could trail a rope and belay them up to the summit also, and after some waffling, they accepted. I belayed Jacob up next.
One of the women struggled with the exposure of the moves, but both eventually safely made it up. They were very appreciative of our belay for them. Next, Jacob and I took turns tagging the true summit, which was still a 15 foot exposed slabby scramble past the anchor!
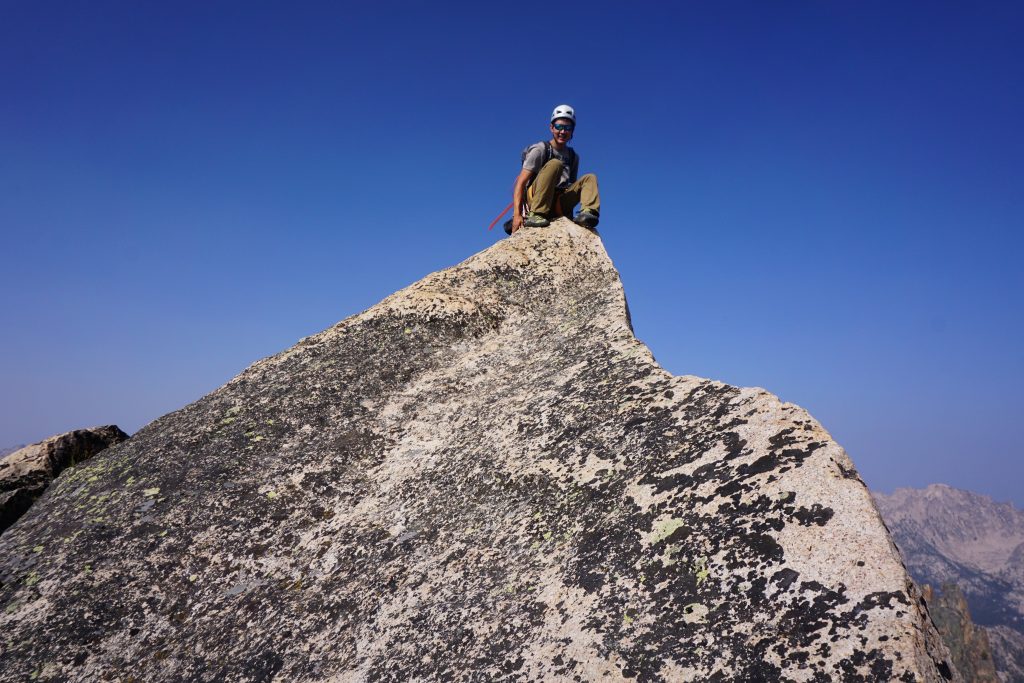
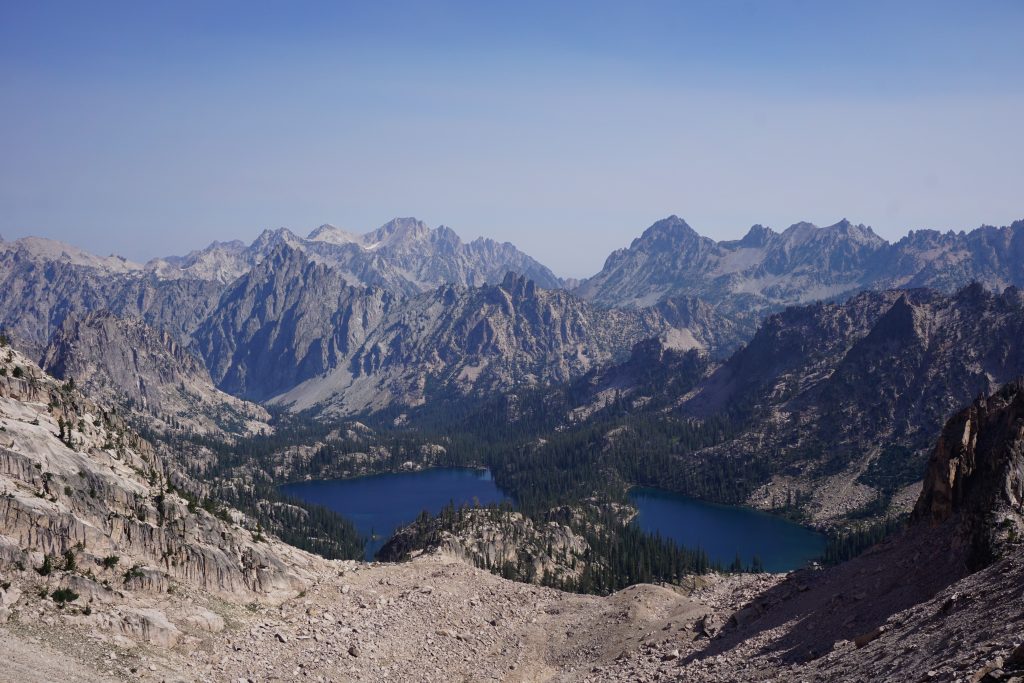
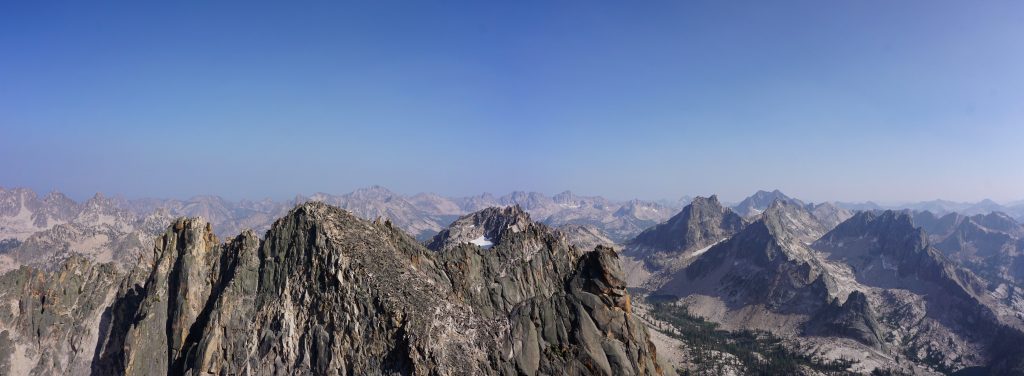
Back at the anchor, we had to wait for the two women to make a very slow sideways rappel back to the notch at the start of the pitch, so Jacob and I soaked in the views. Although Warbonnet Peak is not as tall as some of the other Sawtooth peaks I had scrambled previously, its views and location in the range were unsurpassed!
As we began our rappel down the route, we noticed that the two in front of us seemed to be looking for a different rappel line further south. Jacob and I shrugged and simply took the opportunity to get ahead. We rappelled basically down the line that we climbed, reversing the 2nd pitch traverse along the way. In only 4 rappels, we were back at the base of the route. On our way down, we looked up and saw the two women, about 110 ft above the ground with their rope not reaching the ground for the final rappel! We think they ran into the 70m rappel line, while they only had a 60m rope. We were out of vocal range, but could only hope that they would climb back up and find the rappels that we used. There was still a few hours of daylight left, but the evening light on the Bead Lakes was stunning. Later, past sunset, we would see headlamps descending the scree field beneath Warbonnet, meaning at least they got off the face by dark.
In the cooling air, we arrived back at camp, dropped our packs and immediately dove into the lake. It was an refreshing way to end the first day of our trip. If the other days were half as good as this one, we would be in a great shape.

Day 2: Just Float Away
I woke up once or twice during the night as my sleeping pad seemed to be leaking slowly. I almost made it through the whole summer without a leaky pad! I’ve had some awful experiences with failing pads on overnight trips in the winter, so this was not a big deal by comparison.
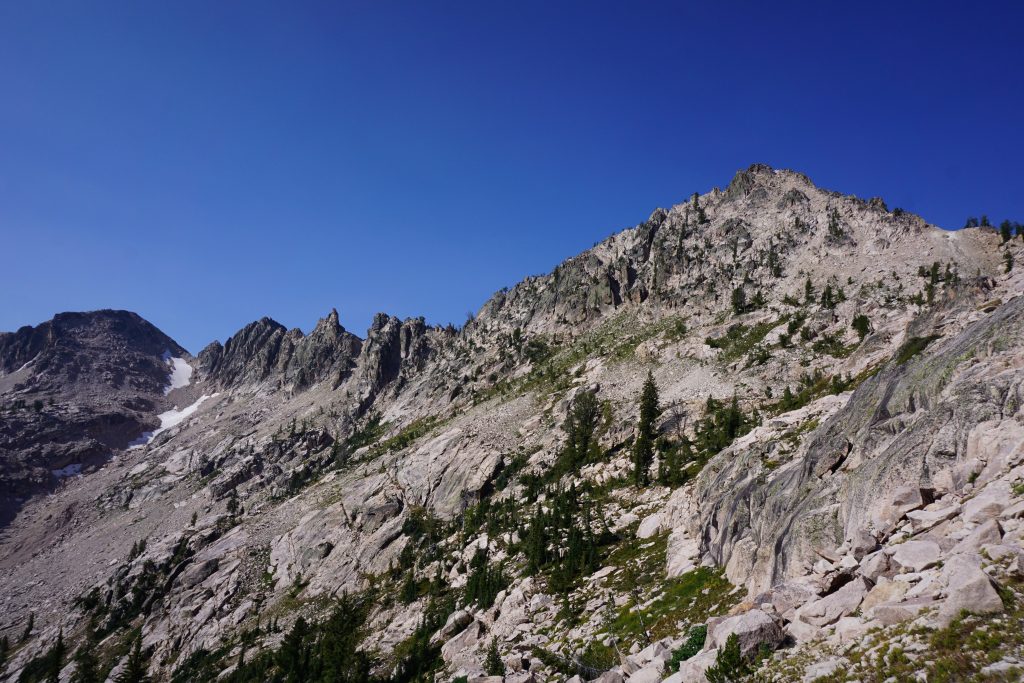
We slept in, packed up, and hiked back to the pass above Warbonnet Lake. Here, we dropped our packs and walked to the top of point 9769, which offered great views of the surrounding area. Packrat Peak and Mayan Temple, along with the towers on Cirque Lake Peak, looked like they have some great rock routes. They probably do, but as the local told us on the boat ride in, people do not tell others about new routes here in the Sawtooth. They want to keep it uncrowded, their little playground. They just drop off a topo with one forest service ranger, who has this secret master topo book. If alpine rock was this hush-hush here, alpine ice beta must be top-secret classified, to be protected with one’s life.
From here, we reversed our route past Alpine Lake into the valley. At the turnoff to the Elephant’s Perch climber’s trail, we took an extended lunch break next to the river. After thinking about it all summer, I finally found the courage to try one of the perfect looking granite waterslides. It dumped me out into a near-freezing pool of perfectly clear water. Delightful!
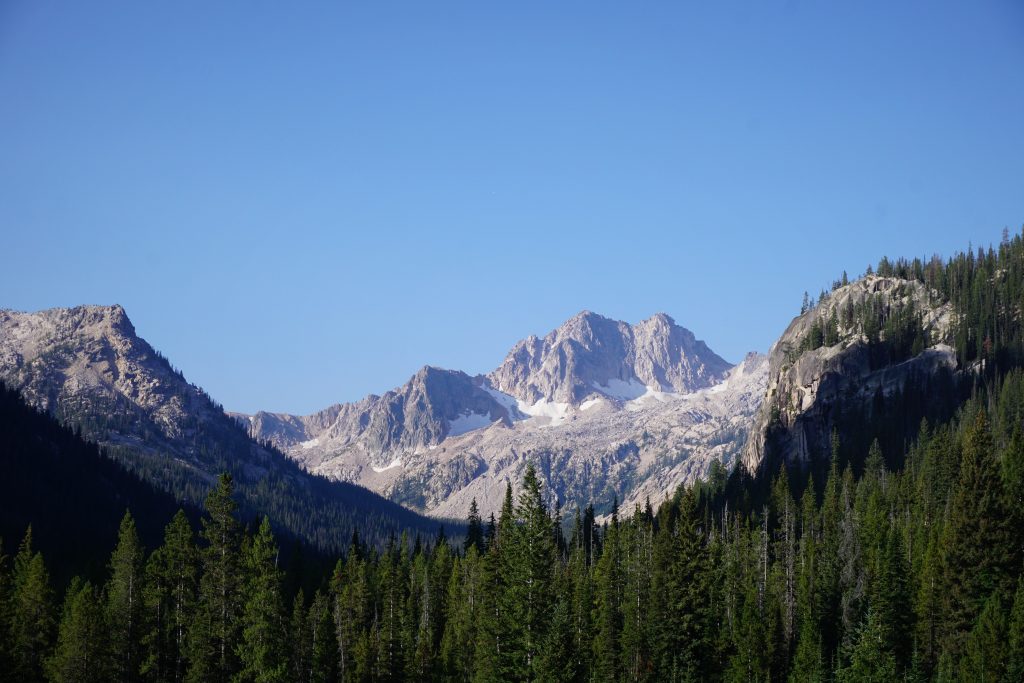
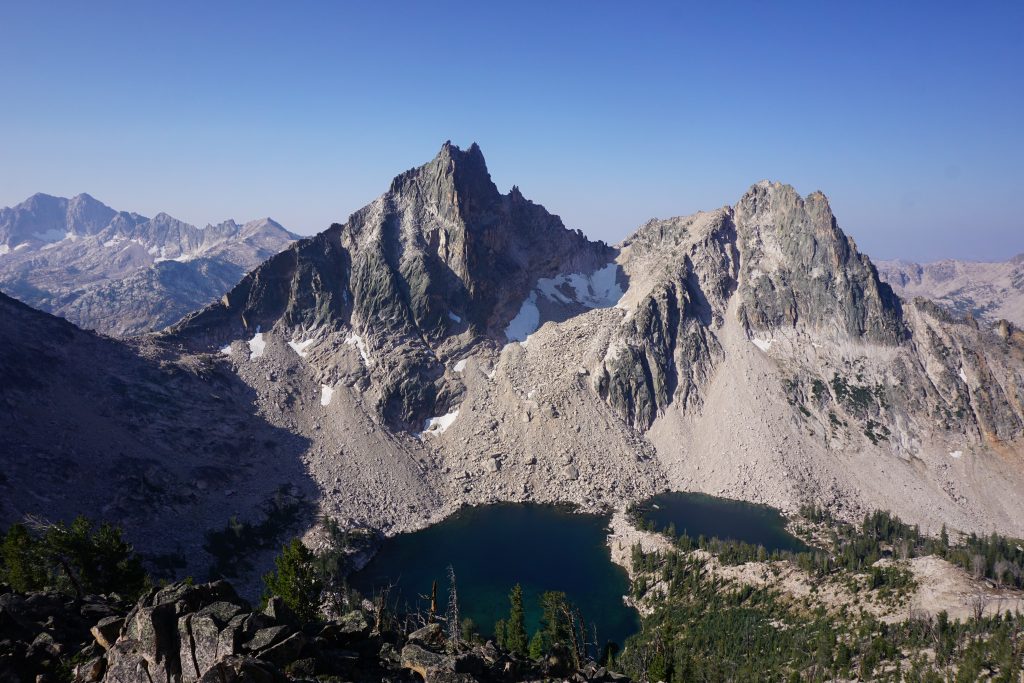
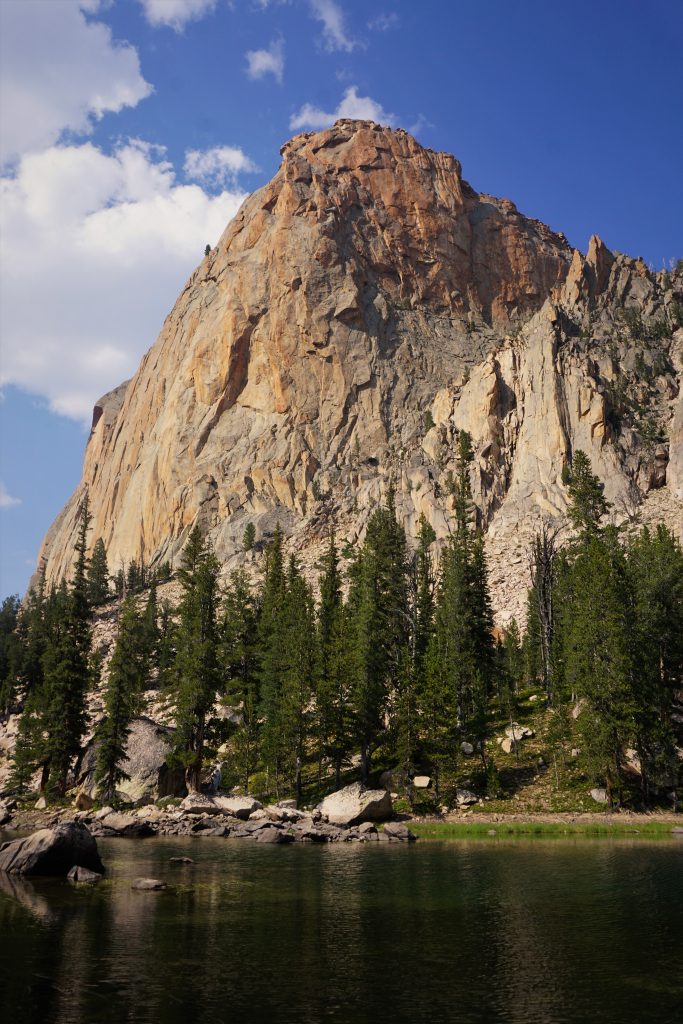
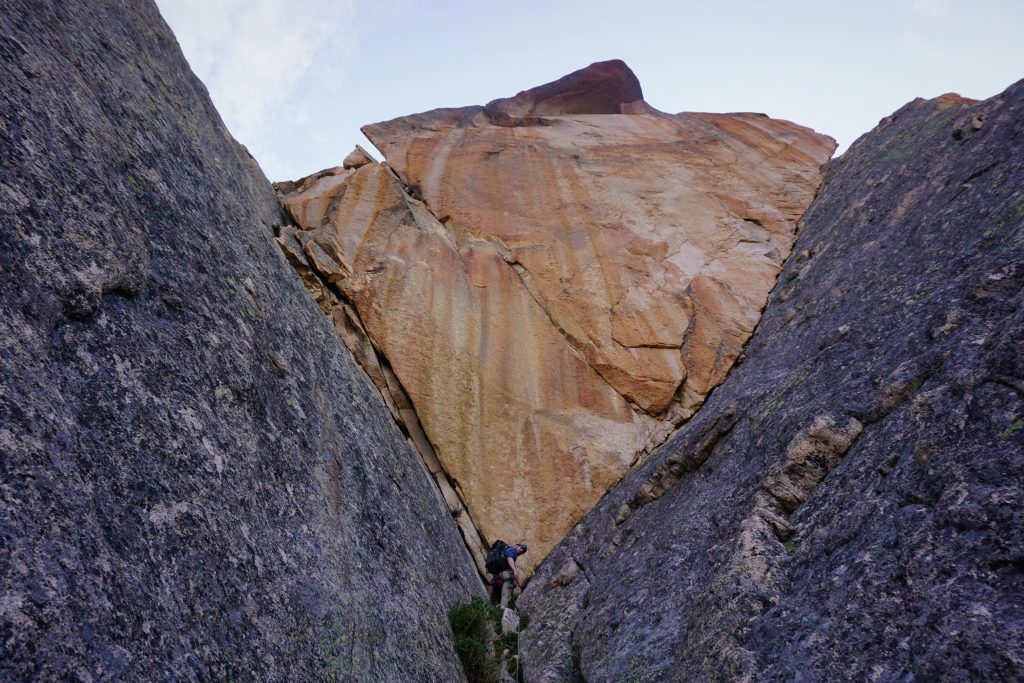
We huffed up the climber’s trail in the early afternoon. Breaking out of the trees, we had an incredible view of the Elephant’s Perch and the flying diamond, a distinct rocky polygon that would feature prominently in our climb the next day.
Eventually, we reached the first of the Saddleback Lakes at the base of the Perch, overlooking the hanging valley. This campsite was very hyped, maybe over-hyped, on Mountain Project. It was very nice, but not more incredible than other spots I had visited this summer.
After a quick afternoon swim, we hiked up to the base of the face to scout the climb for the next day. We traversed down and left along the base of the face until reaching the gully that marked the start of the Mountaineer’s Route. Rated at 5.9, people often complain that this route is very easy, loose, and generally sub par compared to the other routes on the Perch, but this is mostly 5.11 climbers speaking, so we felt it would still be a great moderate climb. We were taking it very seriously. Jacob specifically had never done an alpine rock route of this length (8-9) pitches and difficulty.
We ate a delicious dinner of add-water mashed potatoes and beans (you’re the best Kylie), my last of the summer in the backcountry. It was a bittersweet moment. Tomorrow would be my last big alpine rock route before heading home. I was ready for familiar faces, fresh food, a comfortable bed, and a reliable toilet, but I was also sad to say goodbye. I crawled into my quilt for my last time of the summer, and said goodnight to Jacob.
Day 3: We are Climbers, not Just Mountaineers
We woke before sunrise and quickly got the base of the route. We wanted to start early to make sure we had time to get down and catch the last boat at 7pm back to Redfish Lodge in case the climb took longer than expected. Thanks to scouting the day before, we knew exactly where to start. Jacob led the first pitch up an easy gully. I led the second, which had an interesting 5.8 face move but was otherwise straightforward.
The next section was critical. Although many climbers talk trash about how easy this route is, we knew for a fact that someone had died on the next section in the last few years. This section, call the Triple Roofs, was notable because of a huge exposed 25 foot traverse left underneath a roof. When leading, one’s natural tendency is to place gear at the start of the traverse. However, this leads to a 90 degree angle in the rope and dangerous rope drag. A fall during the traverse would then result in a massive pendulum fall for the leader into a hard face. We think this is what caused the fatality. Even if one does not fall, the rope drag causes difficulties when finally turning the roof. So, after analyzing Mountain Project comments, we decided we would take a different approach: place no gear throughout the traverse. Although this may seem counter intuitive, it is actually safer because a fall during the traverse would thus result not in a bad pendulum fall into a wall, but (just) a massive 50 ft whipper downwards onto two bolts over a clean face. Terrifying, but much safer because the fall would be clean.
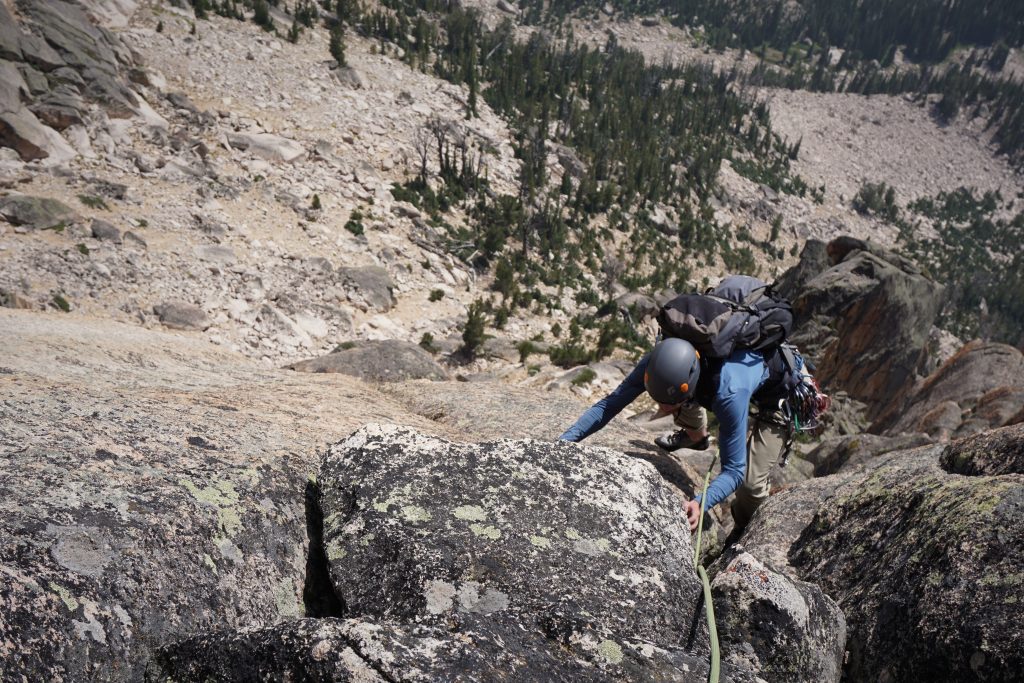
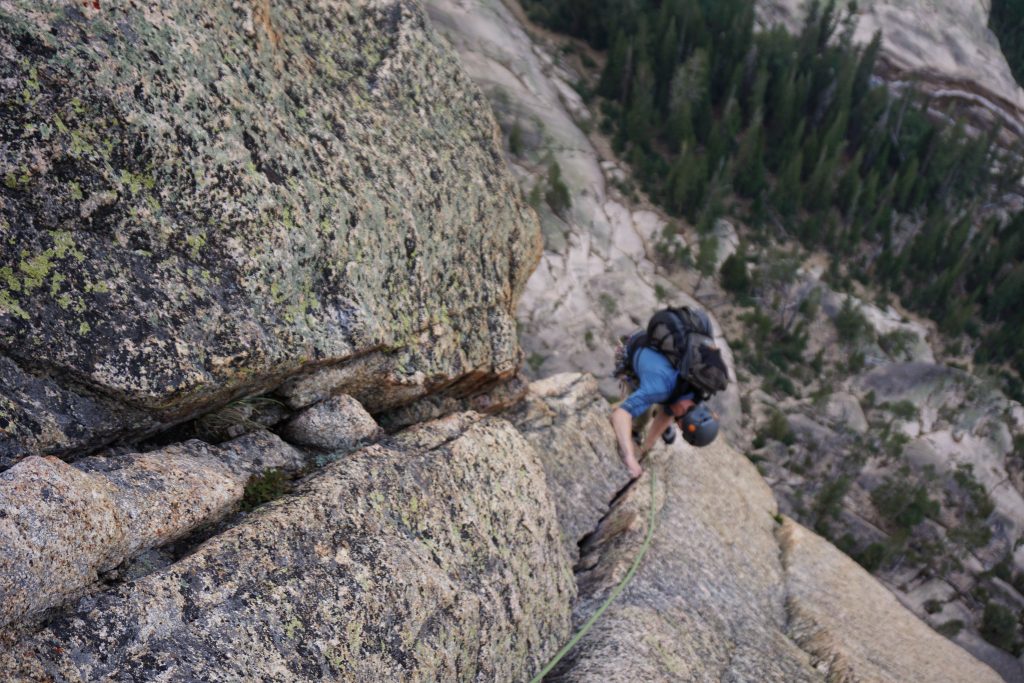
On my way up, I clipped the two bolts with a long runner and climbed another 20 ft or so to the roof. Then, I began the famous traverse. It had incredible exposure, but was very easy, probably only 5.5 at the hardest. My feet had small holds and my hands had great underclings and hand jams. Beneath my feet, the ground fell away 1000 ft below. It was awesome. I pulled the roof, plugged in the some gear, and rambled 20 ft higher, and made a nice hanging belay over the edge of the entire face.
Upon arriving at my three-piece anchor, Jacob remarked that he had never been at such an exposed gear anchor. He led the next pitch up to the base of the flying diamond.
The start of the next pitch had some delicate 5.8+ face climbing, which is supposedly the crux of the route to shorter climbers. I continued up some awesome cracks and dihedrals before making yet another exposed gear anchor. This route was impressing us more and more each pitch!

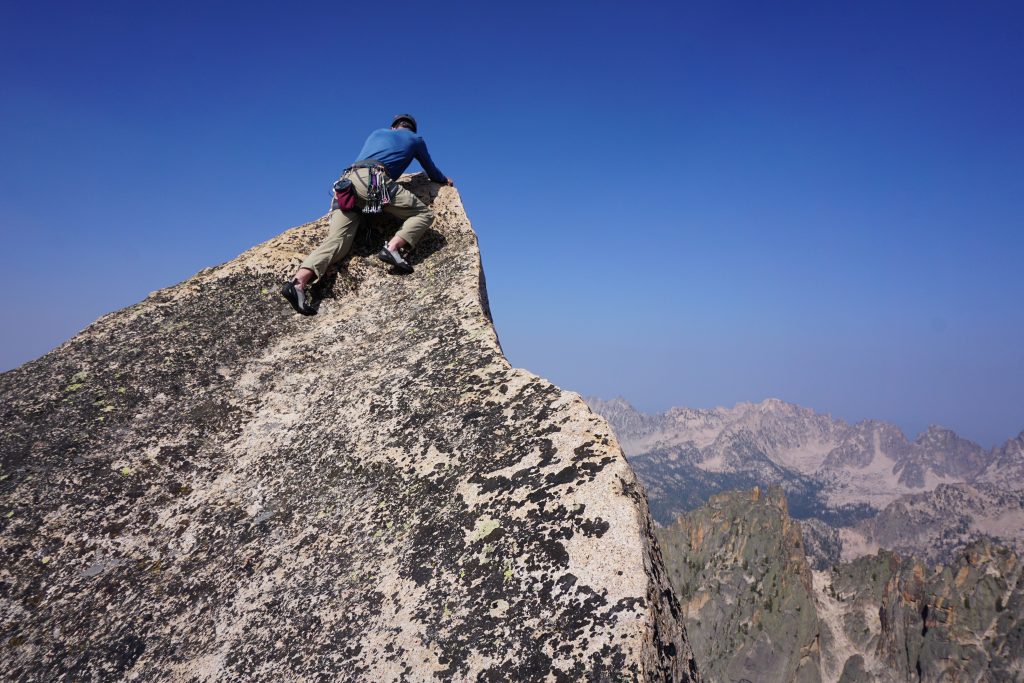
After a few more pitches, we reach the base of the supposed final pitch of the route. On the topo, it looked like a series of 5.8 cracks. I led a short section of fun fingerlocks, into a corner, and then into a crack that quickly widened to fists. Thinking that this crack would be pretty short, I plugged in my only #3 cam and proceeded upwards. After a few moves, I realized that not only would this crack be sustained, it was going to get even wider! I shoved my whole right arm into the rack, groveling up the flaring off-width crack and finding breaks wherever I could. At one point, I managed to stick a tipped-out #2 cam deep inside. Still, after a summer of alpine climbing all kinds of weird cracks, I felt totally comfortable. After a few more grunts and thrusts, I finished the crack and also ran out of rope! A full 60 meters of finger to off width climbing, with a solid 40 ft of 5.8+ wide crack climbing to top out! I love that kind of finish!
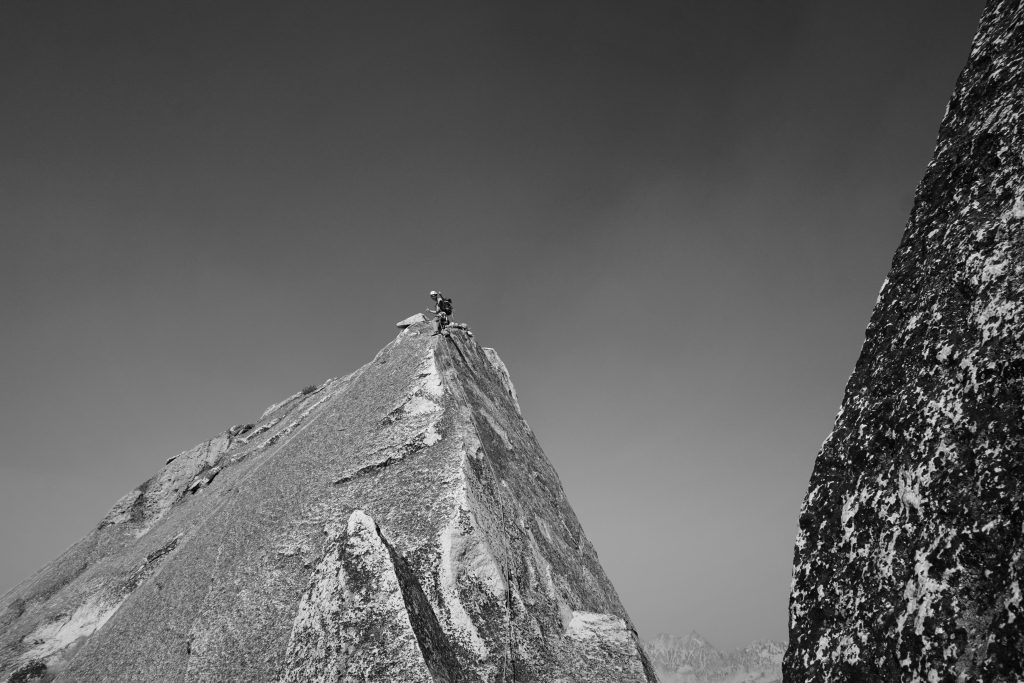
Jacob, on the other hand, did not have so much recent alpine rock experience and felt a little more taxed by the end of the crack battle. He led us up to a ledge where we could put away the rope and begin scrambling. The route did not say much beyond the end of the technical climbing, but it was obvious we were nowhere near the summit and on the wrong side of the mountain for the descent. We traversed leftwards around a few corners until a spotted a slabby gully that looked like it would lead to the summit. I began scrambling quickly up the slabs, darting from one hold to another. One section got a little slick with gravel covering, but I kept moving and was soon just beneath the summit. I looked down, and saw Jacob struggling at the gravely part. Unfortunately, I was hundreds of feet above by this point and he had the rope, so there was not really anything I could do to help him. He ended up having to down climb hundreds of feet to find another way around the rocks and head towards the descent route. I quickly tagged the summit and then ran down some slabs towards him to help spot him through the scramble.

When we finally met up, he was frustrated, tired and had some critical words for me, namely that (1) I should never assume a partner’s comfort level on more difficult scrambles like those slabs, (2) I should stay closer to my partner, and (3) I should have the rope if I am going first so I could help him out. I agreed with all these observations and apologized for running off to the summit. What I love about my partnership with Jacob is that we can be so critical with each other because we both want to just constantly improve as a climber and partner.
At the descent gully, we met two other climbers who had just finished Beckey Direct (5.11+), another route on the Perch. The gully was very loose and we had to communicate well about falling rocks, but at least it went quickly. They showed us the rappel anchor and we were soon back at camp just after lunch. We packed up, said goodbye to the Perch, and descended down to the main trail. We reached the dock around 5pm, just as a few afternoon showers were falling. Our boat driver on the way back was the same guy who we rode with on the way out two days earlier. He congratulated us on our climb of Warbonnet and remarked that maybe he will just have to make a one day push on it sometime. After the boat ride back, we had some delicious celebratory burgers at the Lodge before departing and going our separate ways.
Although I had been in the Sawtooth twice in the previous days, I feel like I saw the Sawtooth for the first time during this trip. The jagged ridges, soft pine trees, dot-sized lakes, and overall rockiness encompassed what makes the Sawtooth Range unique. There is indeed an incredible amount of potential for alpine rock in this range, and climbs have a great wilderness feel. After a summer of doing classic climbs in crowded spots like Tulomne Meadows, the Cirque of Towers, and the Grand Teton, it was fun to get off the beaten path and visit a gem like the Sawtooth.
Thanks for making the drive down to Stanley, Jacob!
Notes:
- Of the two climbs, Warbonnet felt more like an adventure and the Perch was more of a technical rock climb. Both were excellent climbs. Because the views were better from Warbonnet, I’d give the overall edge to Warbonnet.
- Elephant’s Perch would be a great place to come as a 5.11 climber. Nonetheless, the Mountaineer’s Route is a worthy day trip, definitely possible in the 7am-7pm time frame the the boat runs.
- We brought singles of .4, .5, 3 and doubles of .75-2, plus nuts and tricams. Worked well for us. I wouldn’t want much less on the Mountaineer’s Route.
- Bead and Feather Lakes are incredible even just if you’re an adventurous backpacker.
mislabeled Elk Peak as reward peak..
Ah good catch! I’m not too familiar with this area.