
An Adventure to Remember
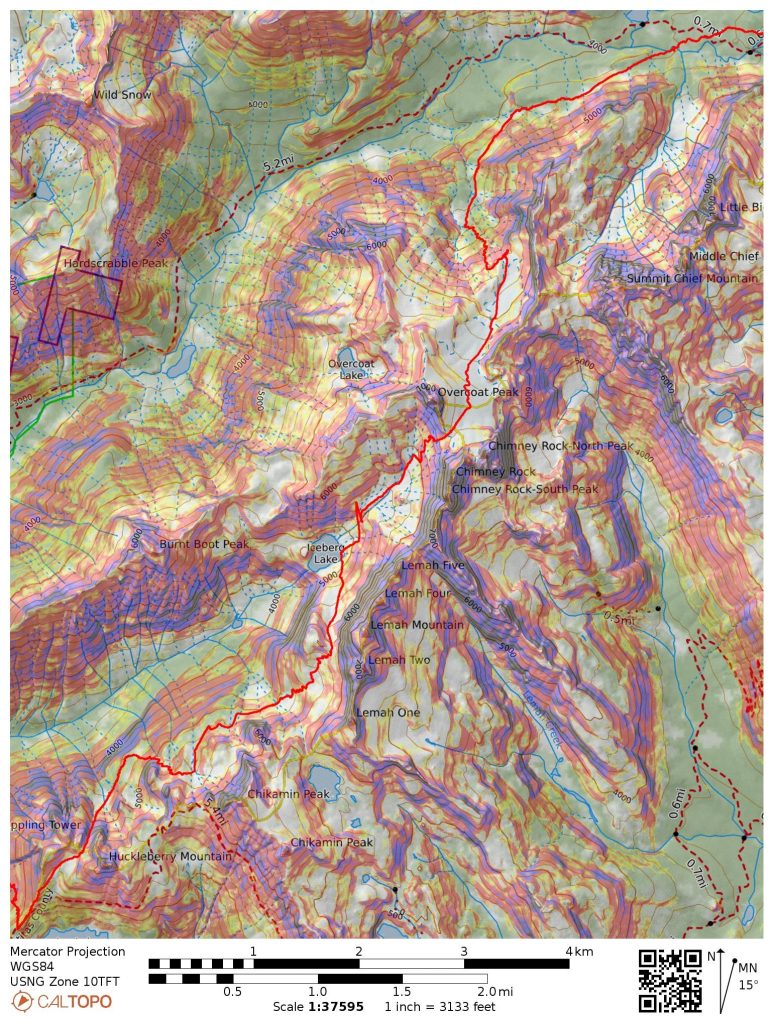
The Snoqualmie Haute Route is the general term for a ski traverse from Snoqualmie Pass to the summit of Mt. Hinman. It was coined and made famous by local Swiss guide Martin Volken. I first read about the route in his excellent ski touring guidebook. In the book, it is described as a 6 day tour with 20,000 ft of gain. Over the course of 18 hours, Anthony, Will, Nick, Adam and I completed a variation of the Haute Route from Snoqualmie Pass to the Necklace Valley Trailhead, covering 31 miles and nearly 14,000 ft of gain.
Back in 2017, I ran into Will and Anthony while doing Glacier Peak in a day. It was not until last spring when we finally got out together, dropping a huge day on the Isolation Traverse. Over the winter, Anthony finally left the Wasatch Boys and moved out here, becoming a Skagit Bro. But his boys Nick and Adam planned a trip to visit from the Wasatch in late May and I was consulted for my local knowledge of another big ski traverse to test our limits. Naturally, I suggested a variation of the Snoqualmie Haute Route.
During the summer of 2019, Logan and I completed the Alpine Lakes Crest Traverse, from Snoqualmie Pass to the summit of Mt. Daniel, over two days on foot. It was very similar to the Haute Route, but utilized the PCT and other trails where applicable. During the route, I could not help but imagine all the incredible fall line skiing on the route and surprisingly big terrain. The main problem was that the Mt. Daniel trailhead was not really accessible during ski season. The traditional Middle Fork exit seemed too long and unappealing for a day trip. But last fall, I came up with the idea to exit the Necklace Valley after Hinman. When I mapped it out, it seemed surprisingly doable.
As we neared the weekend, we debated the merits of the route. A good amount of fresh snow had fallen, ruining the corn cycle. Weather looked suspect, with rain coming in the late afternoon. But it was the last full day with the Wasatch Boys in town and they had yet to even leave Zone 1 on their multiple casual ascents of Baker, amongst other trips in the last week. Nick and Adam are vert addicts and routinely bag 50k vert per week in the Wasatch. Nick once did 300k in a single month. So the crew was strong enough and the Snoqualmie snowpack was still fat, so we decided it made sense to take a risk and go big.
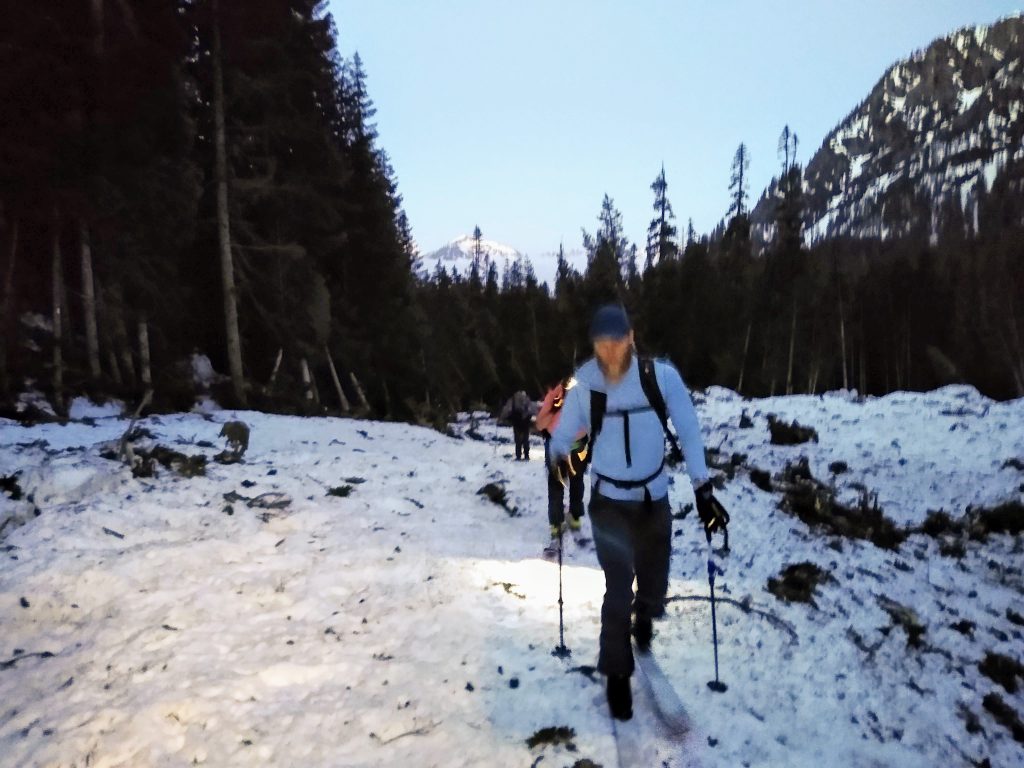
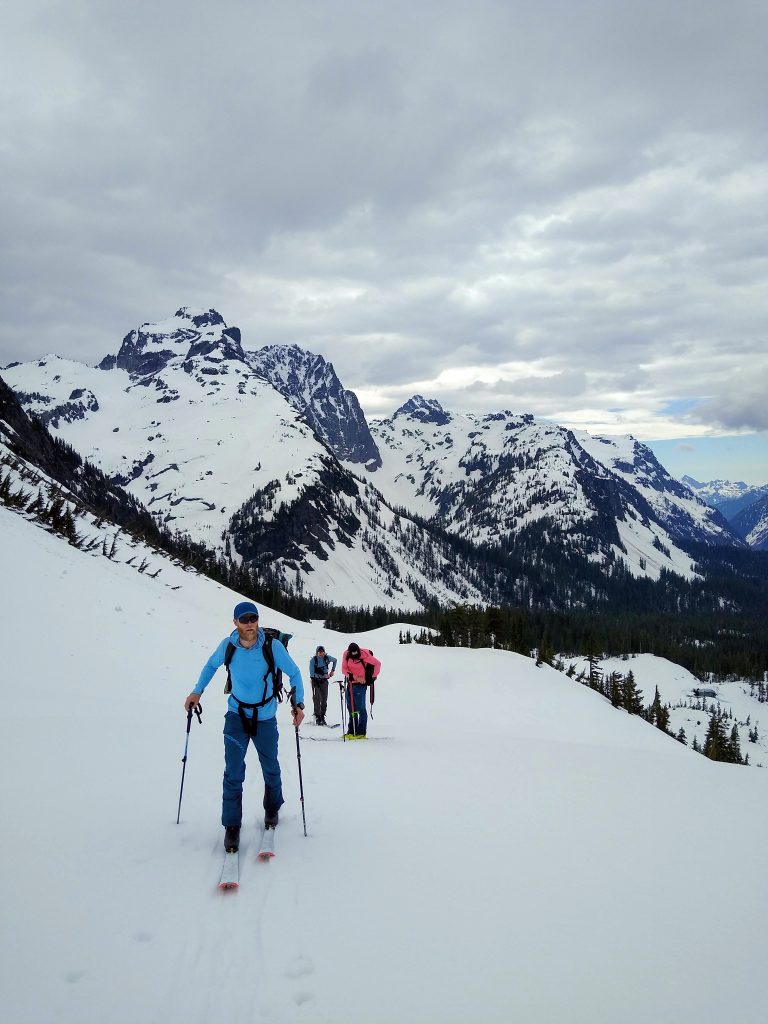
We met up in Bothell and then all crammed into my car for the ride up to Snoqualmie Pass. As we put on our gear in the dark, a trucker passed us and commented how happy he was to see some “motivated recreators”. I guess that describes us!
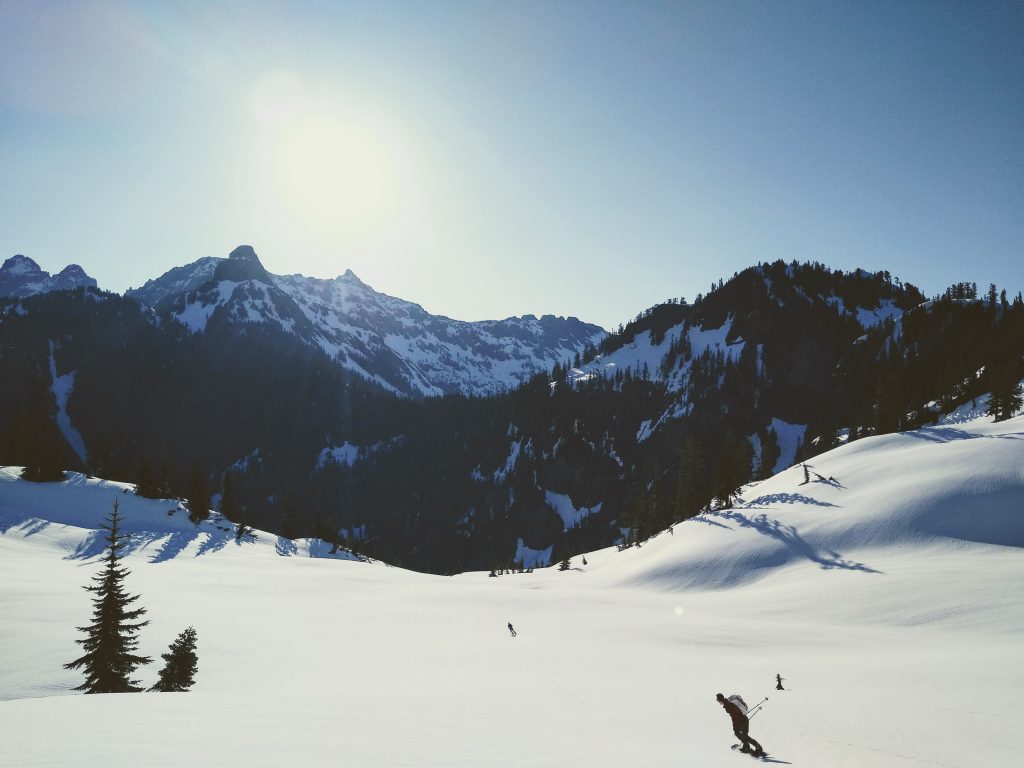
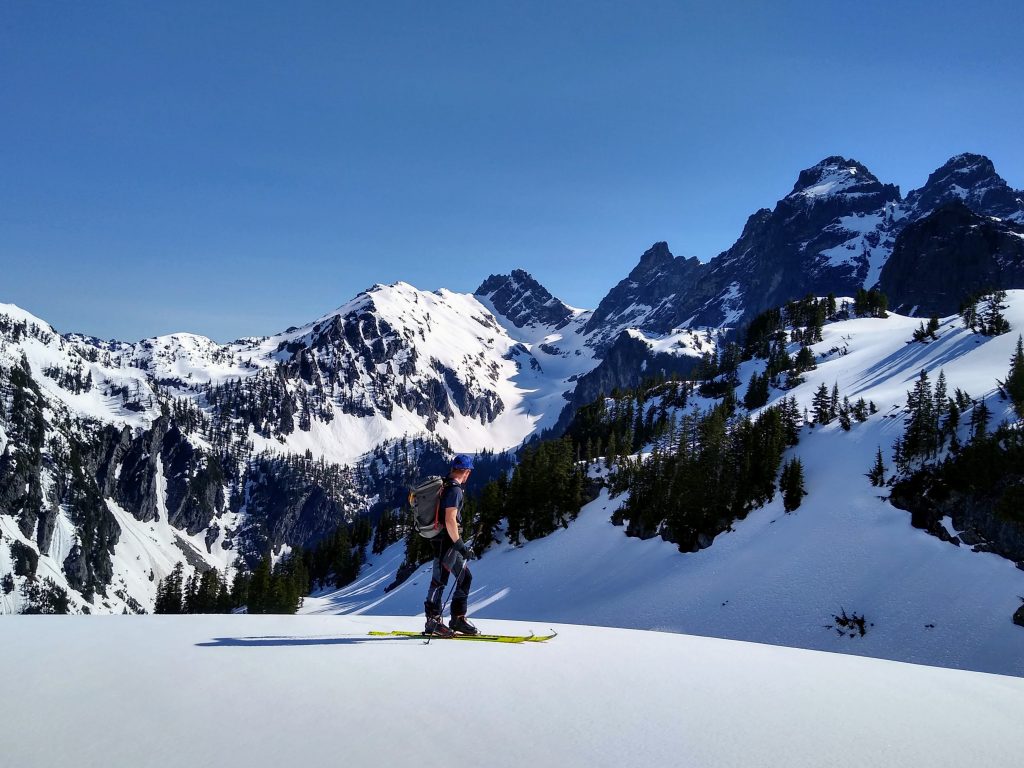
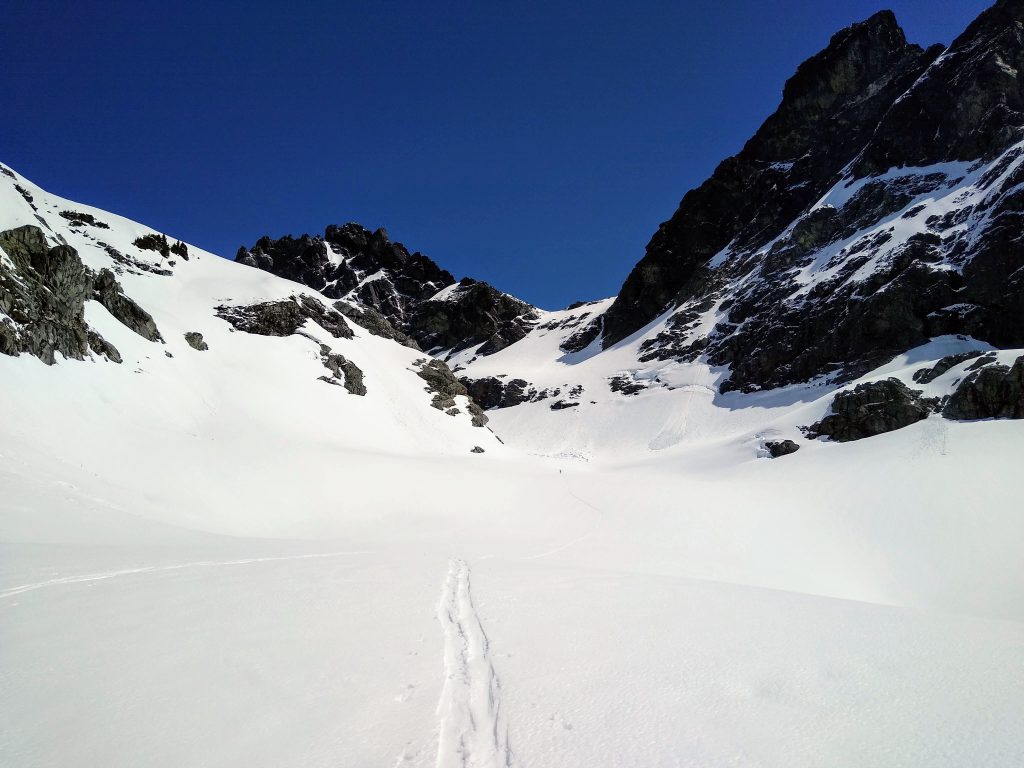
We passed under the highway, crawled up a snowbank next to I90 covered in black asphalt and ducked into the forest. In the 4 am darkness, Adam, Anthony, and Nick had no real idea where we were and what to expect. But quickly we left the noise of the highway and starting skinning through a still-deep snowpack in the Commonwealth Basin amongst old growth threes. From Snoquompton to Snoqualminix, the transition was quick.
The snowpack is remarkably fat in Snoqualmie this spring. Creek crossings were fully covered and we made quick progress. The giant avalanche on the south face of Red Mountain, which ripped through a substantial swath of trees, has made this approach even easier and soon we were climbing to the Kendall Katwalk.
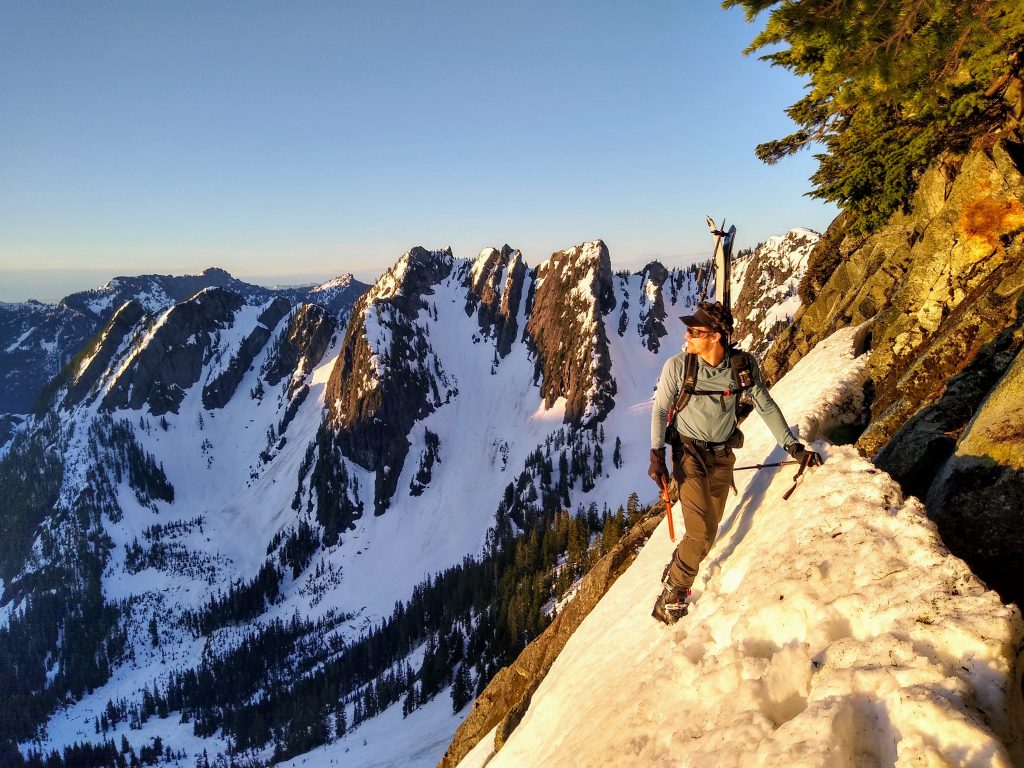
We hit the ridge a little too far south and had to schwack our way to the Katwalk. The Katwalk was one of our big concerns, but fortunately the really exposed section was completely dry and melted out. There was a bit of steep snow at the end, but it was quick and easy to cross.
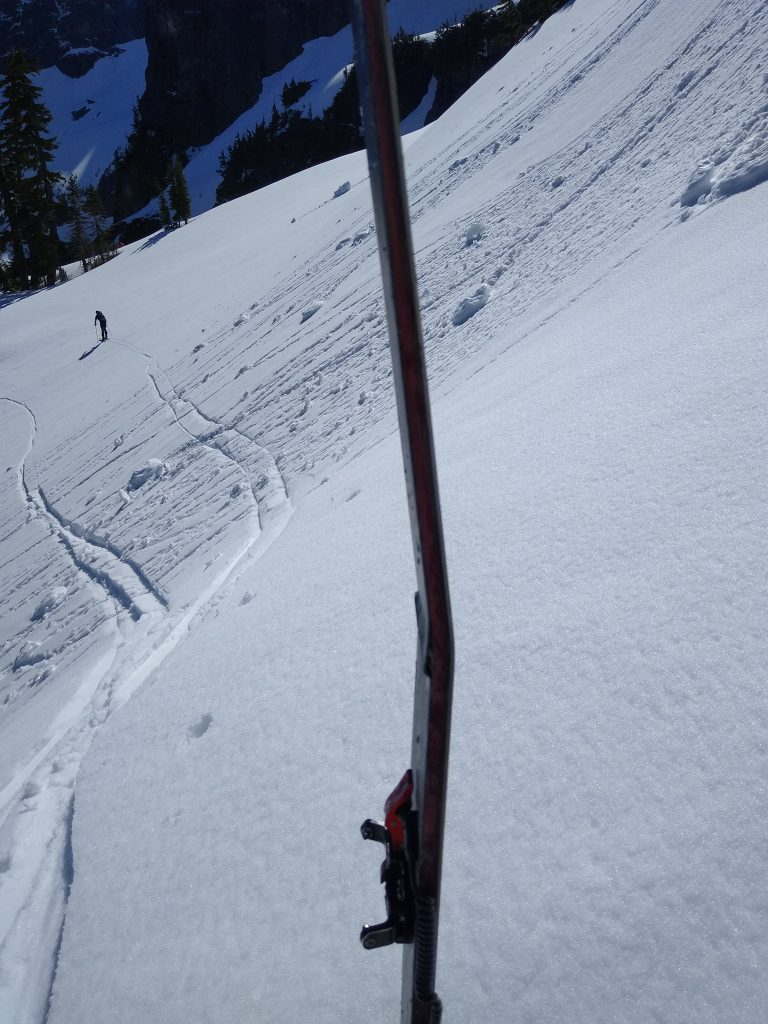
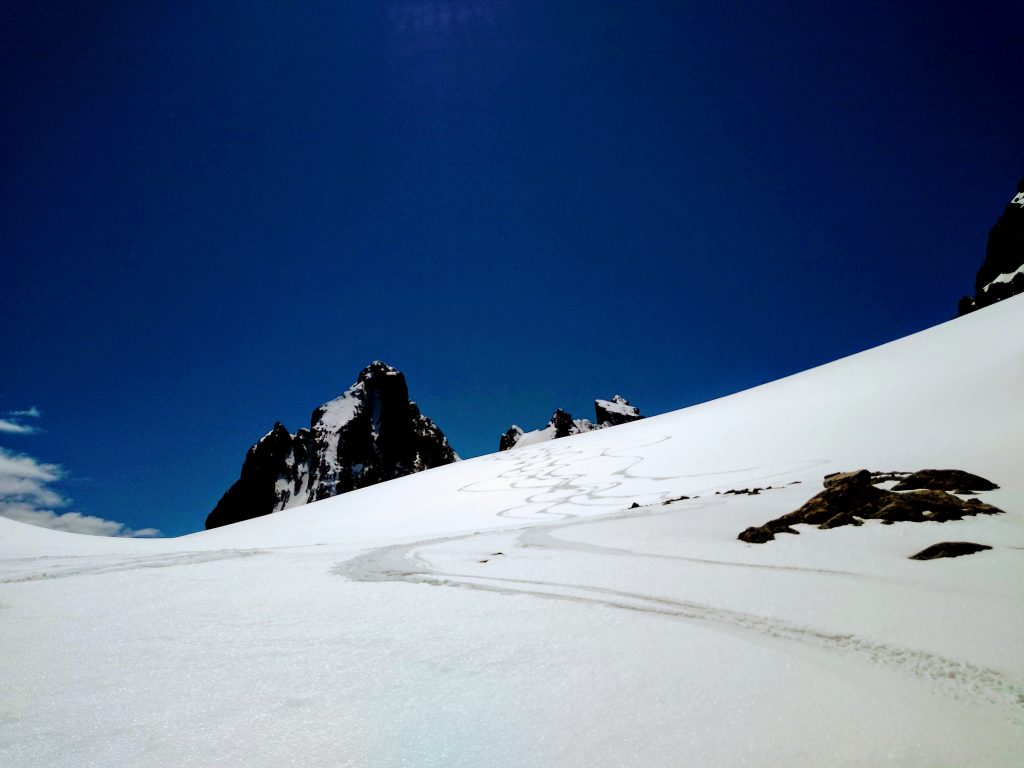
We continued to traverse around Collar Mountain and then descended down to Gravel Lake. This is where our route begin to really deviate from the traditional Haute Route. I felt that staying mostly on the west side of the crest would be less traversing, better skiing, and keep us in the morning shade. We booted directly up the ridge and were greeted with a great view of Mt. Thompson.
The bowl above Edds Lake is east facing and had already corned up in spots. The run down to the lake was long and really fun.
From the far side of the lake, we climbed up a gentle bench to the pass separating Joe Lake from Edds Lake. From there, we angled towards a col just west of Huckleberry Mountain. So far, things were going super well: too well, one might say…
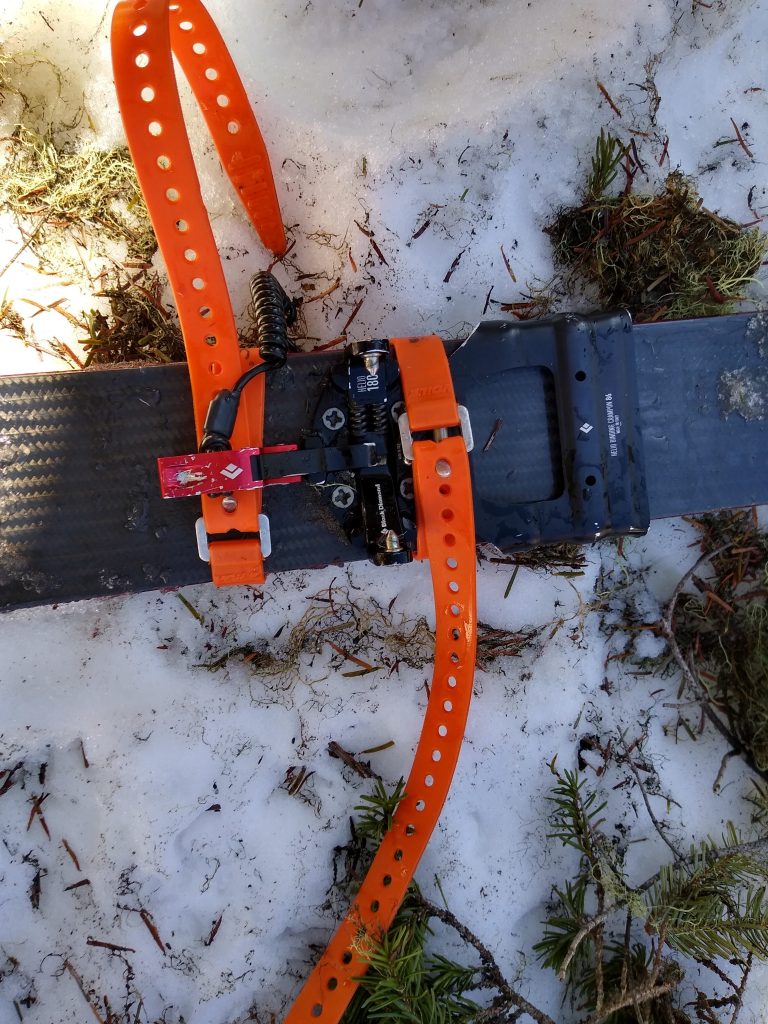
As we neared Huckleberry, Adam commented from behind that my ski looked funny. I took it off and discovered the my toe piece had ripped out of the ski! This was literally one of the worst failures (only worse one I can think of might be the toe pins shattering) on one of the biggest tours I had ever attempted. Definitely a bad spot for a gear failure. That might be an understatement. This was a literal disaster.
At this point, we were only about 1/3 of the way through the tour. It was a difficult decision to go forward or turn back. On the one hand, I would feel selfish if I continued and held the group back or caused more problems. But I also knew that if I turned back, the whole group might turn back because I was the only one familiar with the terrain and the group was still in a morning crabby mood. Turning back would still require traveling through pretty steep terrain. The terrain going forward was actually less steep, with low angle descents and generally easy skinning. There was the Middle Fork Exit if things got worse and I could go directly over La Bohn Gap to save vert. But really, the biggest factor was that I had seen this problem before on a tour and knew that if we babied the ski and torque we put on the toe piece, it should not get too much worse. I knew I could boot the steep sections and utilize the ski on flatter terrain. Onwards we would go.
Our initial fix was to ski strap in front of and behind the toe piece so that the straps held the top sheet to the core. It worked well, but removed my edge hold on the firm snow, so we added a ski crampon.
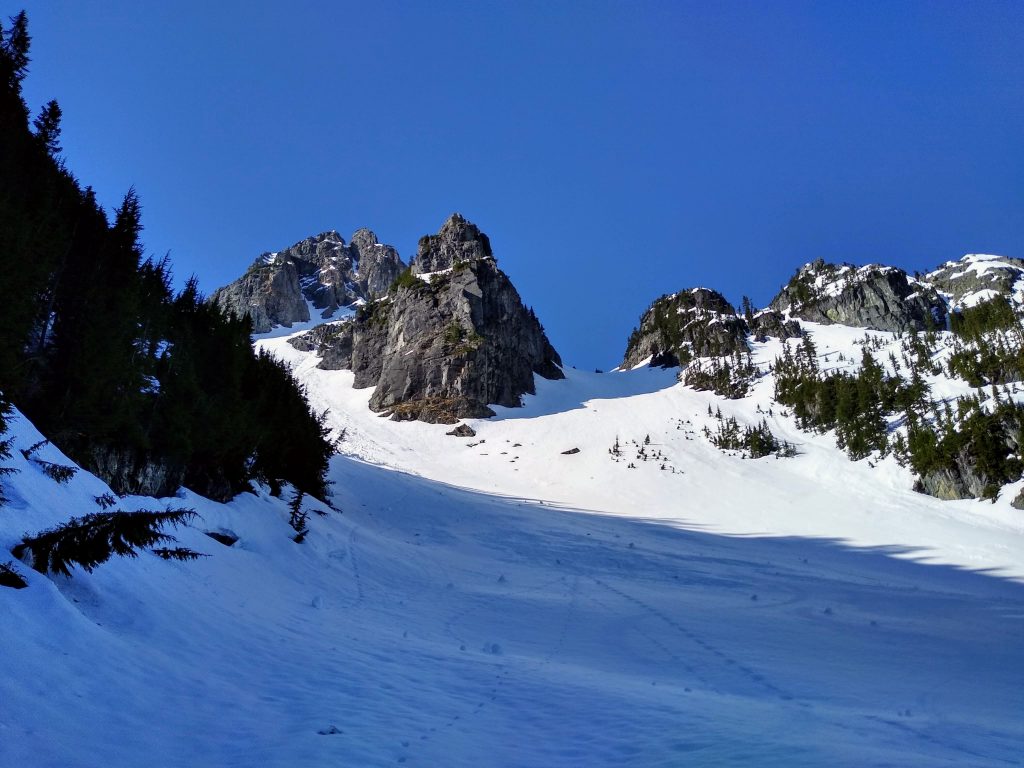
The north facing chute near Huckleberry was wide and beautiful, with great views of Burntboot Peak, but I had the joy of booting down it.
Apparently the apron was even corn, but how would I have known?
The main reason I drew our route to bypass Chikamin Peak to the west was to reduce total vert and make it a manageable day trip. We started skinning up and down through a series of benches that took us around the impressive west face of Chikamin. The terrain here was a little confusing and we definitely went up and down more than necessary, but it was never that challenging. My skinning was slow, with extra drag on one leg, but at least I could tell that the ski straps were taking all the load from the binding.
On one descending traverse, I got going a little too fast on one ski and had to balance with my bad ski. The voile straps caught on the grabby snow and my good ski got buried into the crust. My binding should have released but did not, causing a lot of twisting. When I looked up, my “good” ski was bent.
The ski was snapped about a foot in front of my toe piece. It was added insult, but honestly, did not really matter for the rest of the day because I was not going to be skiing with any speed again. Just another smack down from Snoquompton.
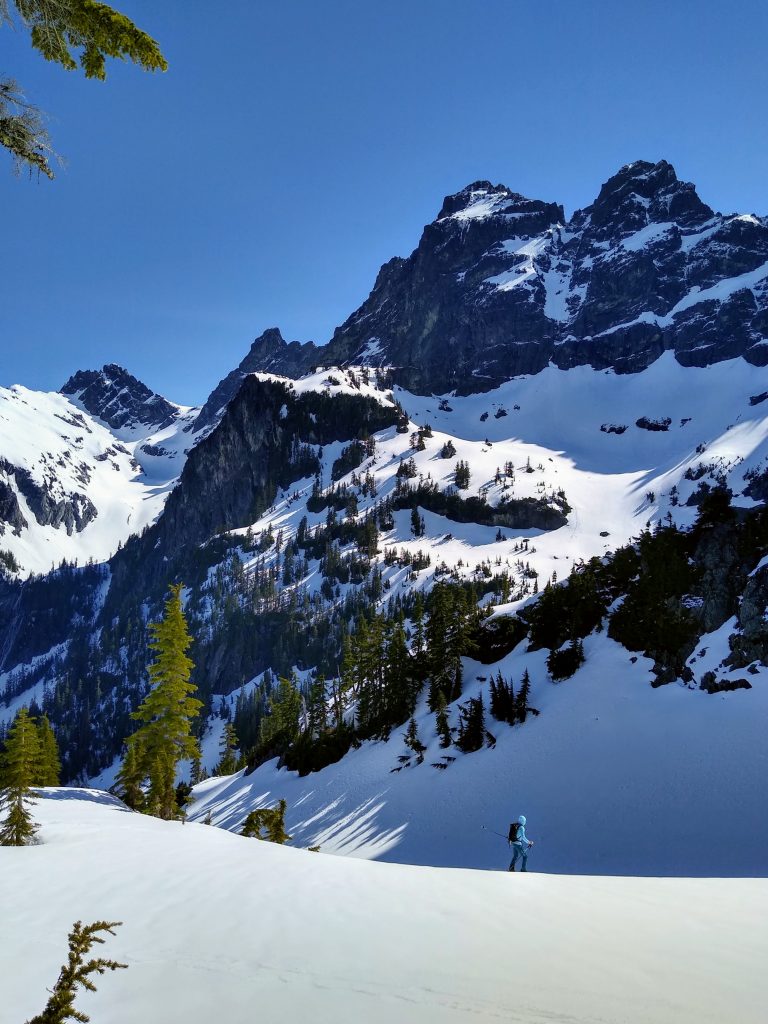
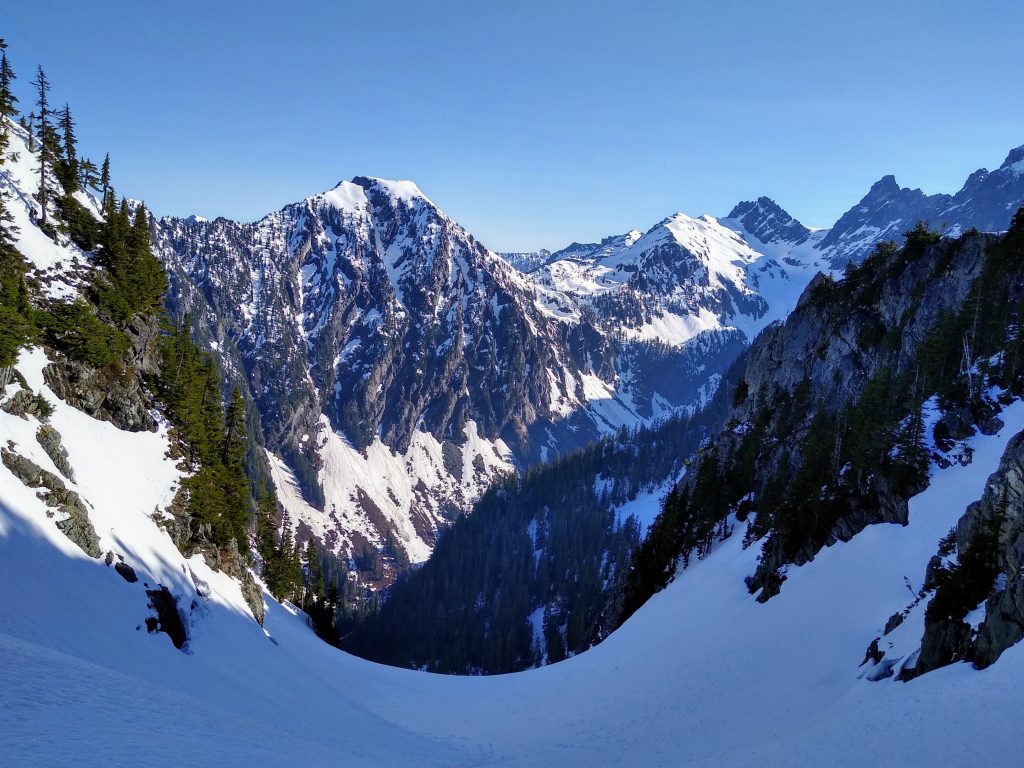
Our next goal was the snowy col due south of Iceberg Lake. This col gives access to the hidden gully that descends to Iceberg Lake. Here we rejoined the route I took two summers ago and we were once again in familiar terrain.
I lagged on the climb and lagged even more on the descent to Iceberg Lake. I had to side slip virtually all of the run because the Voile straps would grab on the firm, crusty snow. It absolutely destroyed my right leg and I was cramping badly when I reached Iceberg Lake. I needed a good break here, drinking from the tiny bit of accessible water, before continuing to chase them up towards Overcoat Col. I realized that I was going to need to actually ski the next few runs, or my legs would not survive these descents. Fortunately, I knew the next two descents would be much easier and with softer snow.
The climb up to Overcoat Col was really rough. We were already 8-9k into the day, the sun was out in full force, one ski dragged through the snow, and the other leg cramped nearly every step. The previous descent had ruined my quads and glutes on my right leg for the day. To make matters worse, my heel pieces had refused to rotate all day, forcing me to skin flats in the high riser mode, making my hip flexor fatigue even worse.

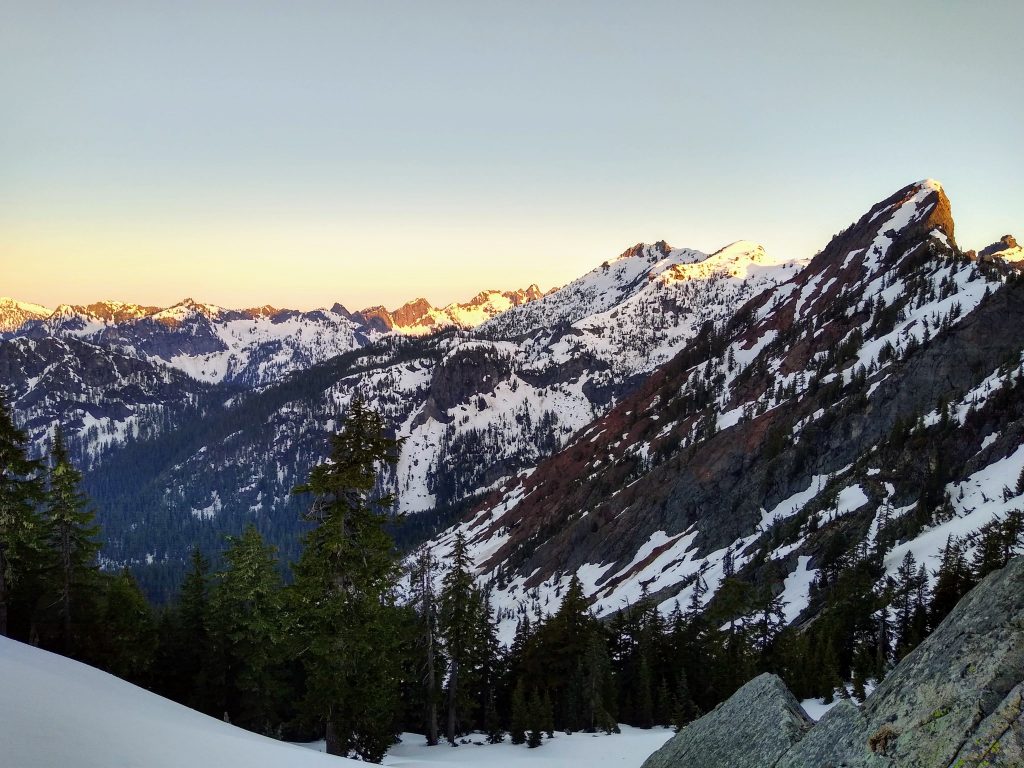
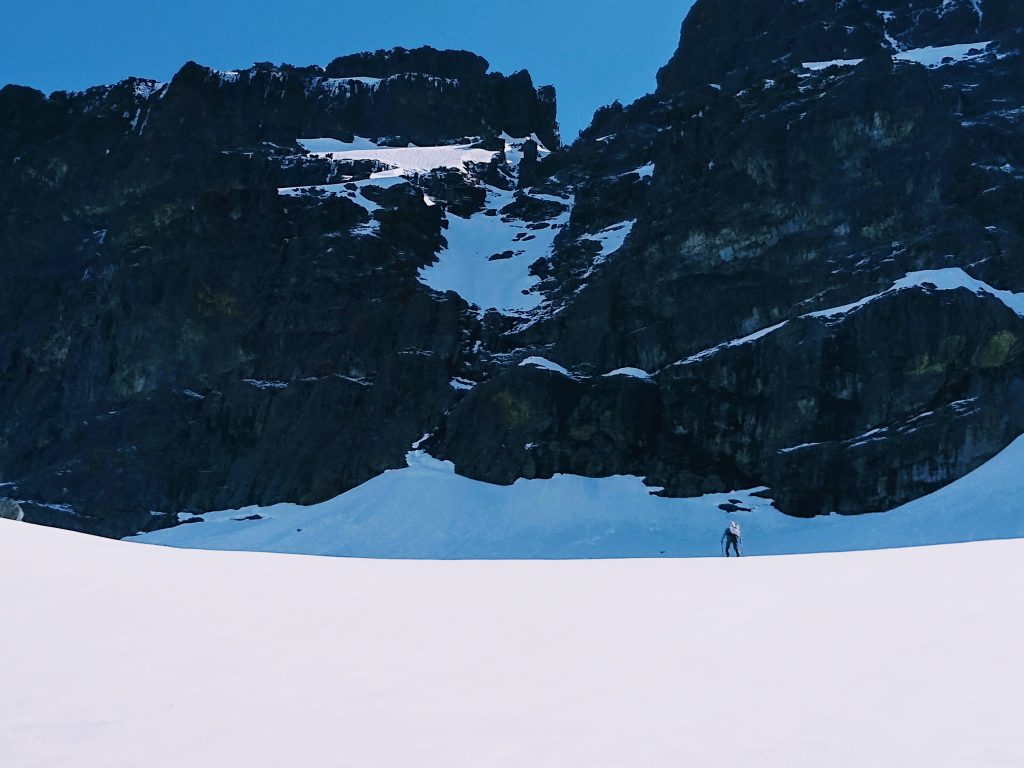
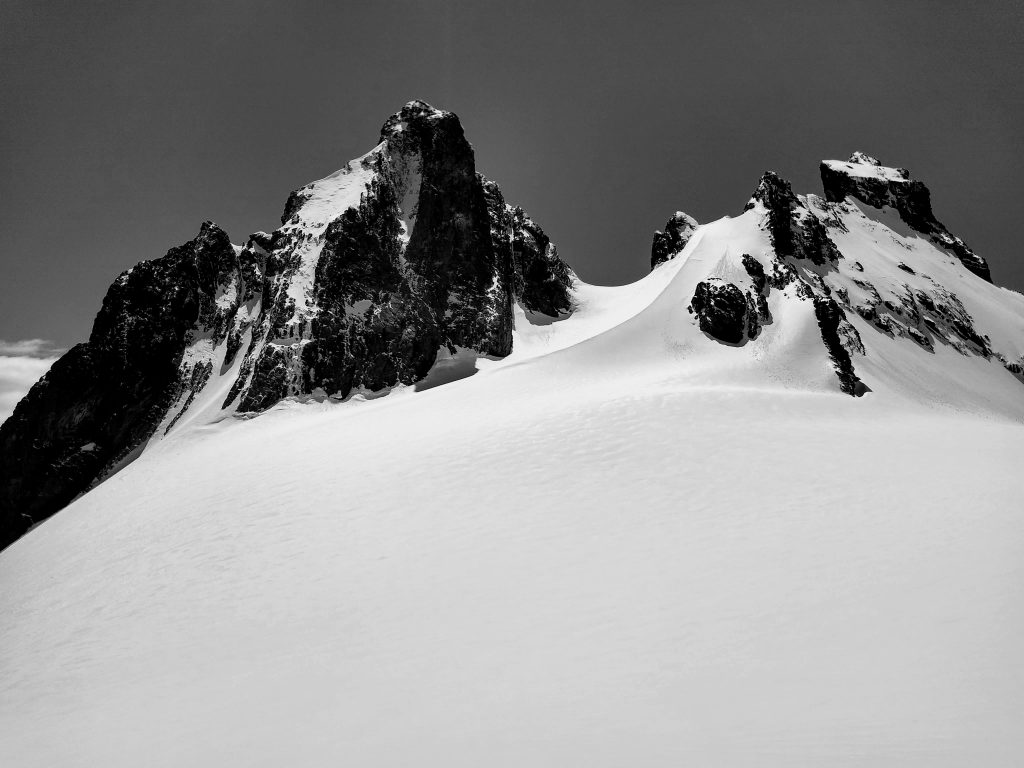
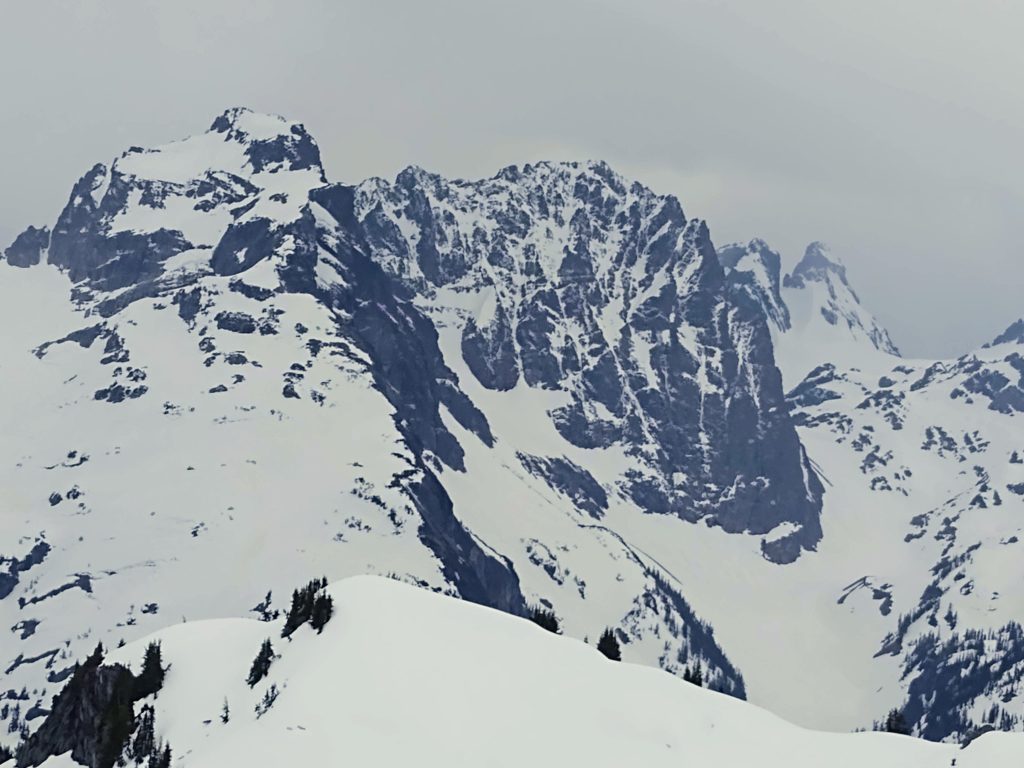
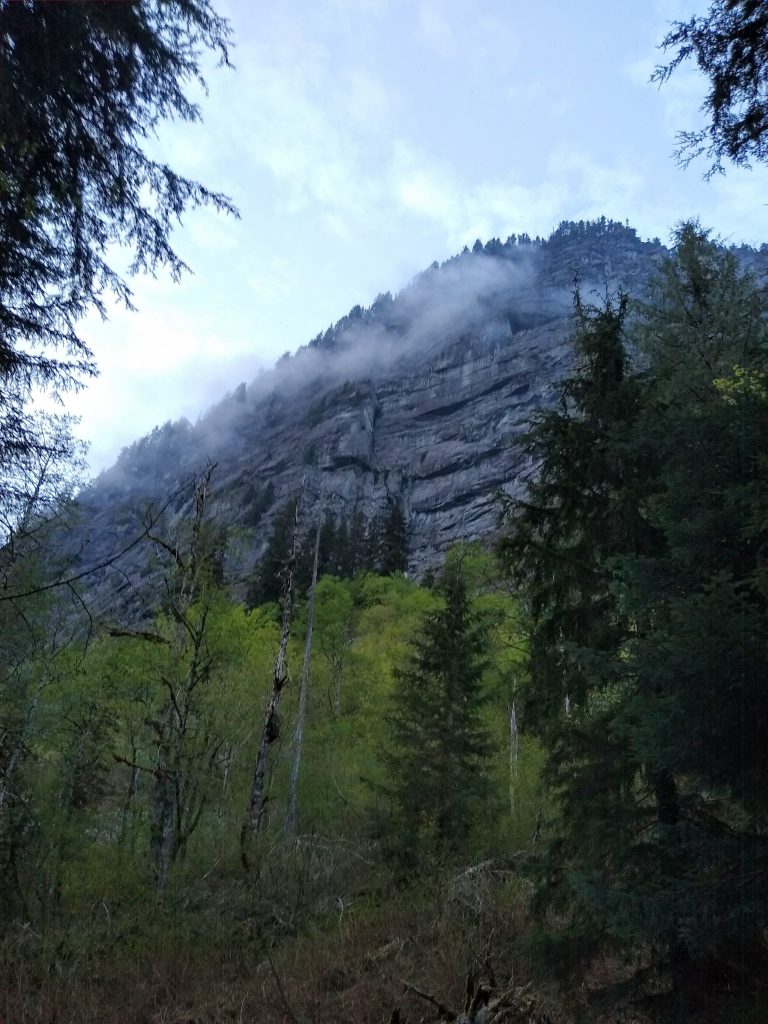
This is the part of the trip where the scenery becomes truly grand. The massive cliffs of the Lemurs tower over Iceberg Lake. And upon cresting Overcoat Col, we stepped onto an island of ice in the sky, the sprawling Overcoat Glacier. Don’t tell me this is Snoqualmie, Snocrummy, or Snoquompton. It’s Snoqualminix.
I demanded a solid lunch break and the boys complied. I got the good idea to replace the ski straps with some duct tape, which would allow my ski to slide much better in the snow. I did not have much tape with me, but I wrapped the top sheet and base twice in tape and prayed it would last.
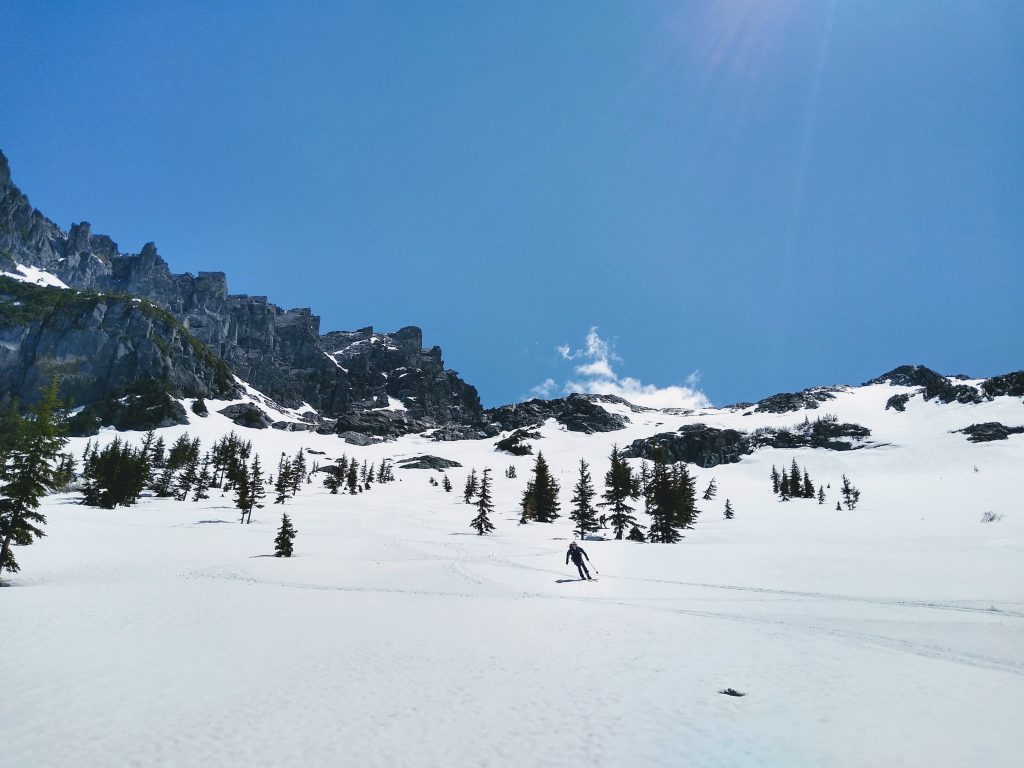
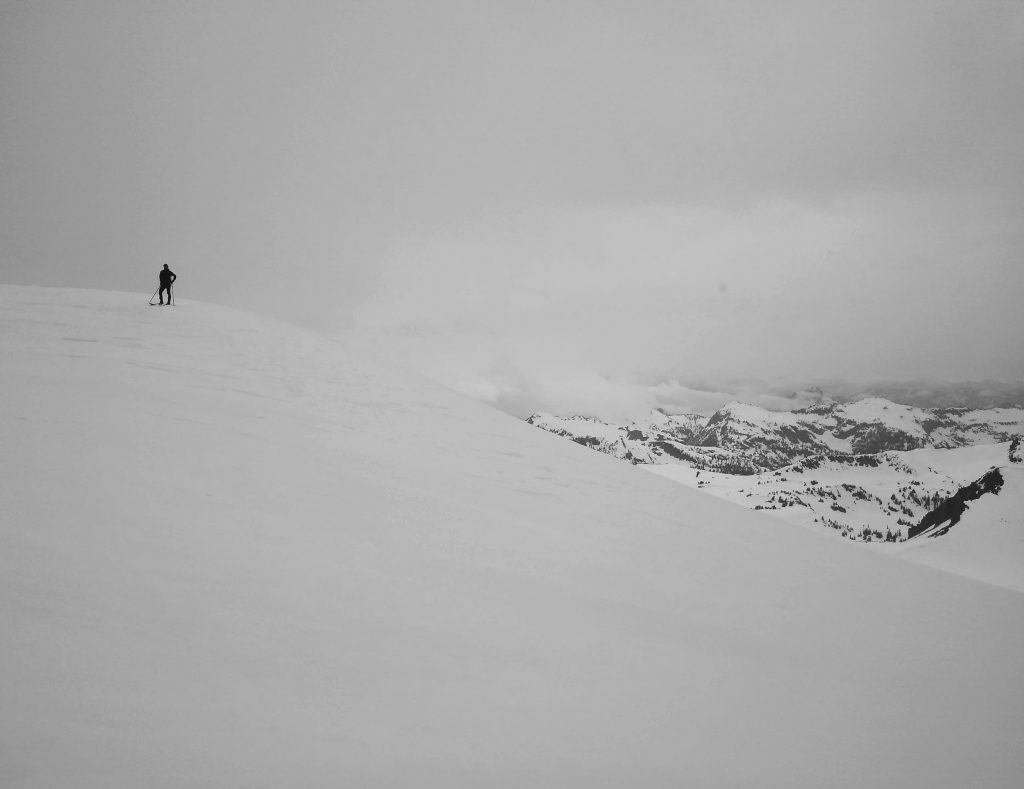
The Overcoat Glacier is a long 3k descent down to the headwaters of the Middle Fork. This was the ski descent I had most looked forward to, so I was slightly heartbroken to not really be able to ski, but really, I was so grateful to have a moderately functioning ski again. With the duct tape, the drag was not too bad and I could ski very cautiously, making giant pizza turns across the slope.
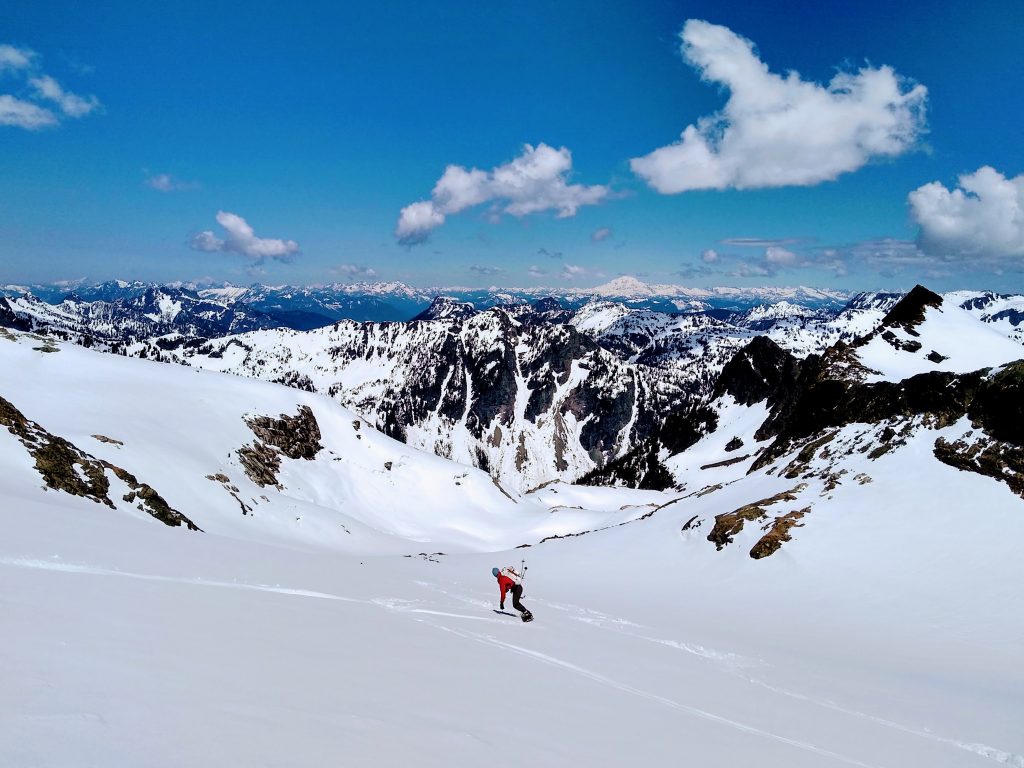
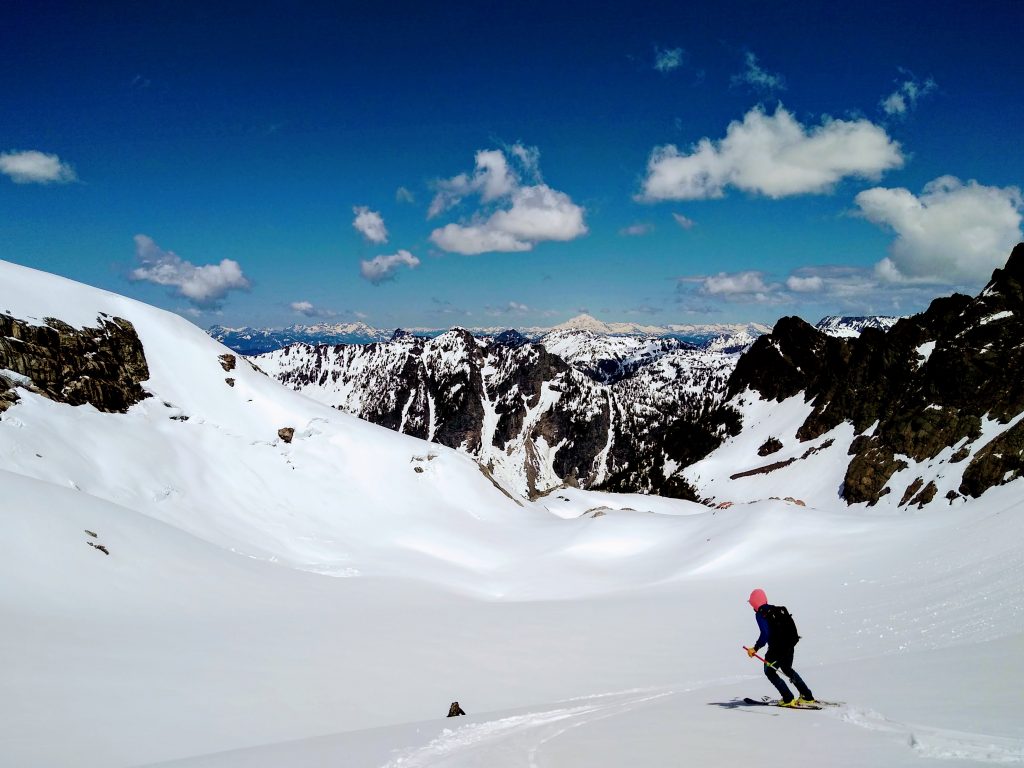
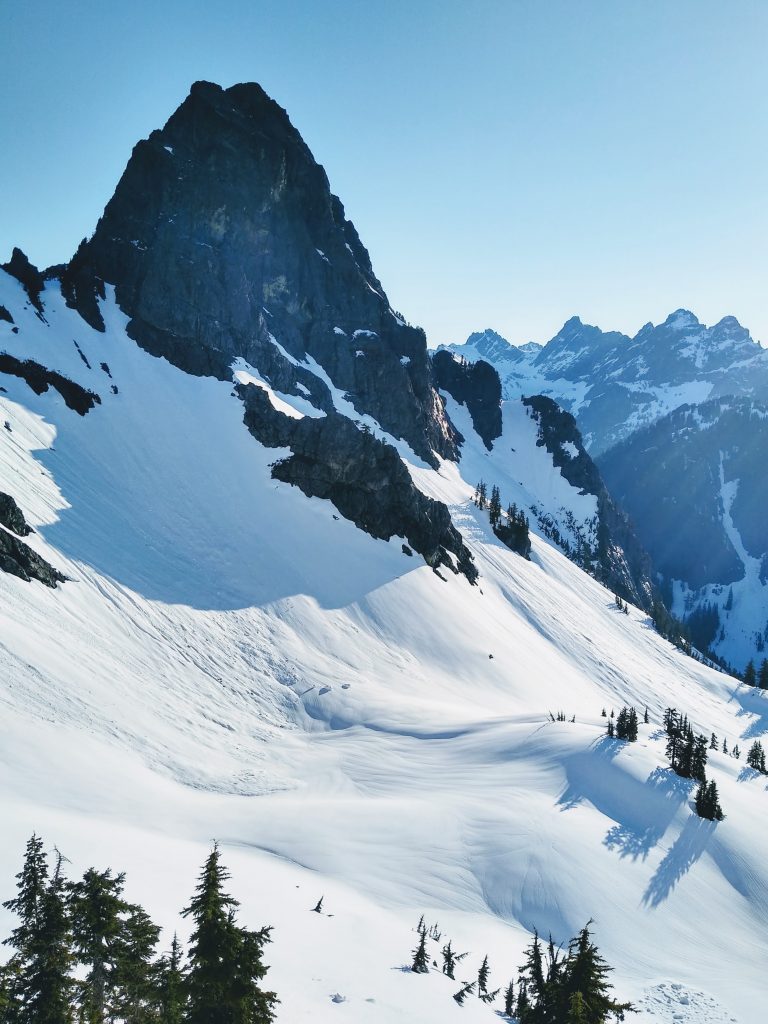
The Overcoat Glacier reminded me a lot of the Neve Glacier on the Isolation Traverse: long, low angle, and absolutely epic. The boys made it look like heli-ski terrain, arcing smooth turns in the creamy snow. There is so much inspiring terrain in this area, and so much corn to harvest on a year like this.
We actually strayed too far skier’s right on the glacier and got cliffed/slabbed out as the terrain steepened. We had to hike back uphill a ways and find a way through the slabs. Below, we found perfect corn and I watched the guys zoom by at 40 mph.
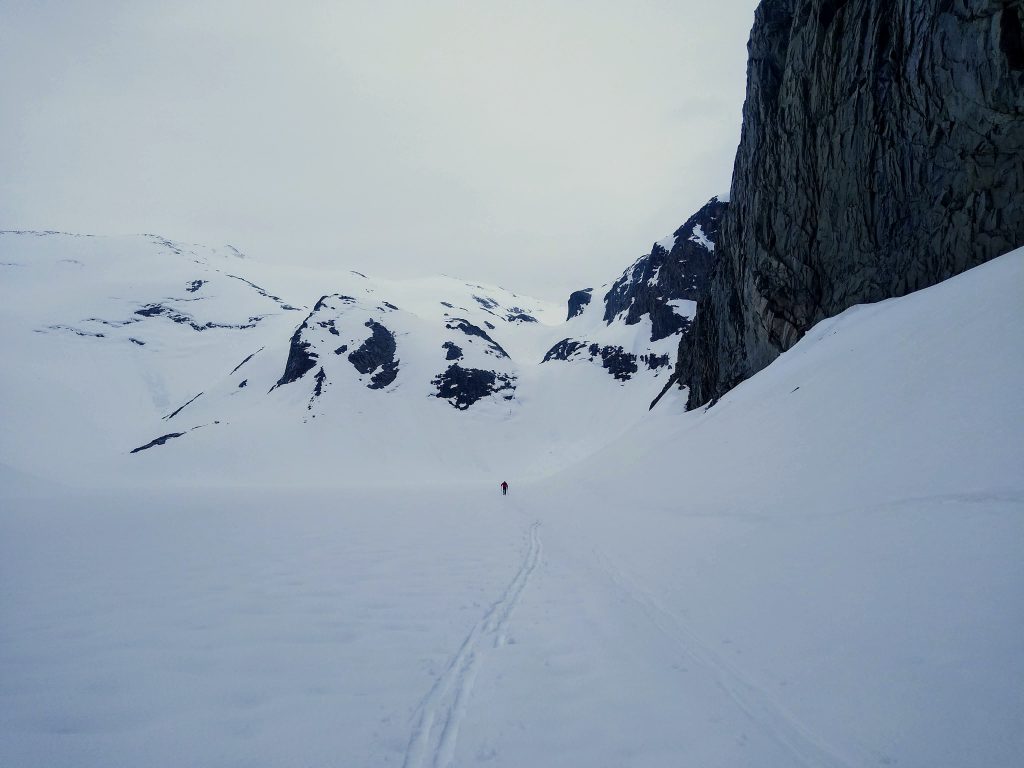
We utilized a long rightward traverse to get us further up the Middle Fork Valley. But eventually, we had to start skinning. As promised, afternoon clouds began to build from the east, cooling us down.
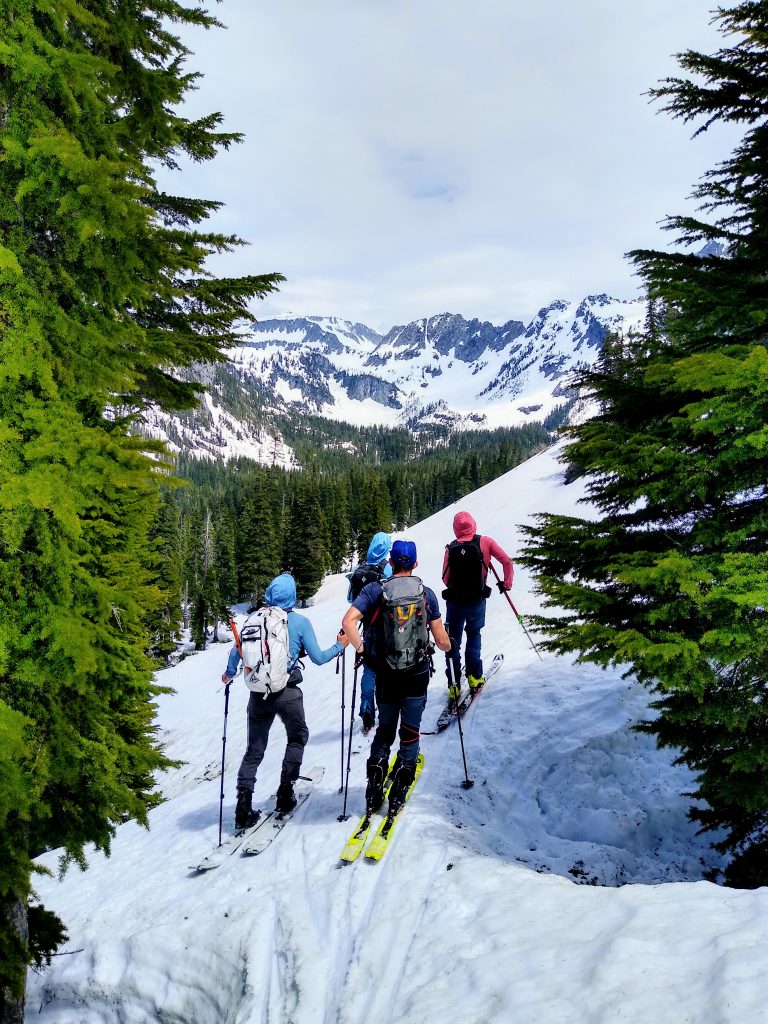
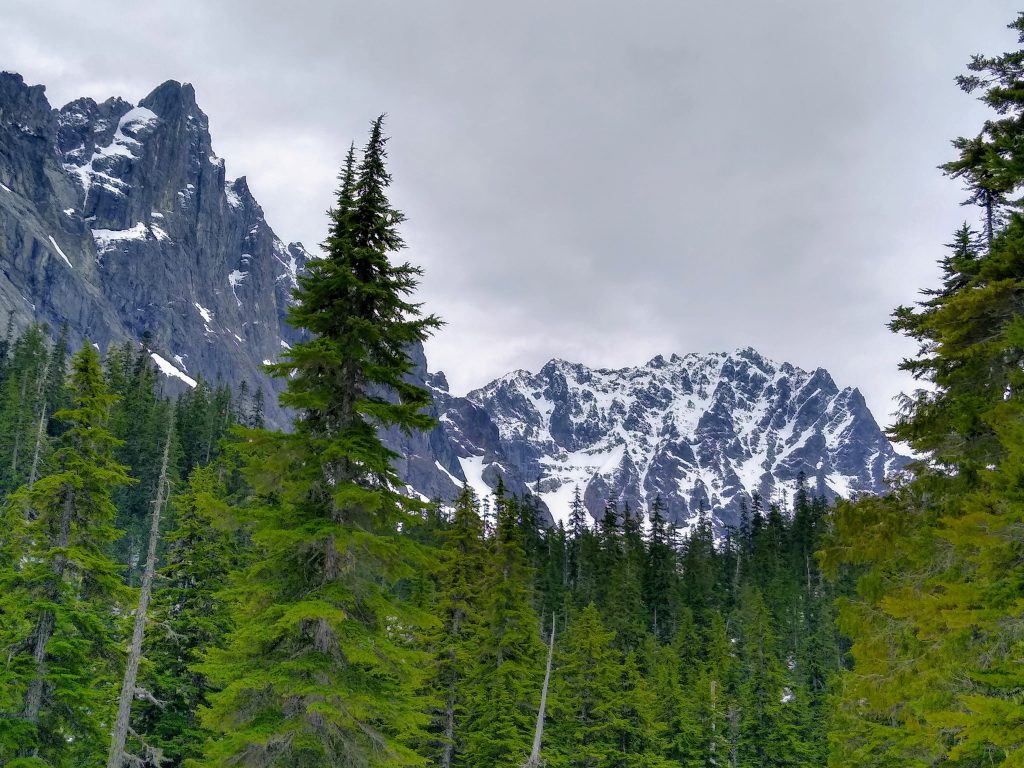
The area around Wilmans Lake and the headwaters of the Middle Fork is magical place. Giant rock walls from Hinman, Iron Cap, and the Chieftains tower above sparse old growth cedars. In the summer it was a bit boggy and buggy. But in the spring, it felt like a magical land of ski lines, big peaks, and calming trees.
With the duct tape and my skin covering the tape, I was finally able to skin with less resistance. Slowly, I felt my strength returning and I was able to keep pace on the long, 3k climb to Hinman. Adam and Nick looked hardly winded and broke trail for us the entire way. The Wasatch Boys truly carried the load during this long day.
As we neared La Bohn Gap, it started drizzling. As long as it did not start pouring, I enjoyed the cooling at what would have been the hottest time of the day. I could have bailed at the gap down the Necklace Valley, but the skis were holding up just fine and my energy once again felt solid, so I made the decision, with the encouragement of the team, to continue up Hinman with them. They were not going to let me sell myself short, and I appreciate that.
Above 6,000 ft, the drizzle turned to a light snow. It was my third time getting snowed on in the last two weeks in the Cascades and really, I have loved it each time. As the world fades into a sullen gray, I feel a certain peace wash over me – a calmness that the blazing sun of spring can never provide.
Somewhere near the summit of Hinman it begin to dawn on me that we were going to make it – despite all the gear failures, the inclement weather, the route finding troubles. I have not had to dig this deep in a long time, but all along, part of me knew I would make it, because I have been there before. Once you return from the abyss, you can do it over and over. Pushing through is just another learned habit, something you practice, something you remember.
A little over 12 hours after leaving the pass, we reached the summit ridge of Hinman. The ski down the Hinman Glacier was WAP (wet ass powder) and the frozen glacial recession lake was a slog, especially for Will as a splitboarder.
We continued down the drainage to 5000 ft. Here was the final quirk of my route: we planned on bumping over the ridge to the west and skiing down to the Necklace Valley trail around 3300 ft. It was a short easy climb to the ridge, but the other side looked troubling.
We started down the other side and could tell the whole hillside was just littered with cliffs, gullies, and generally poor snow coverage. What had looked like just 35-45 degree trees on the map actually was steep trees interspersed with 100 ft cliffs, slabs, and other problems. Traversing the ridge line was basically impossible, so we had to pick our way down.
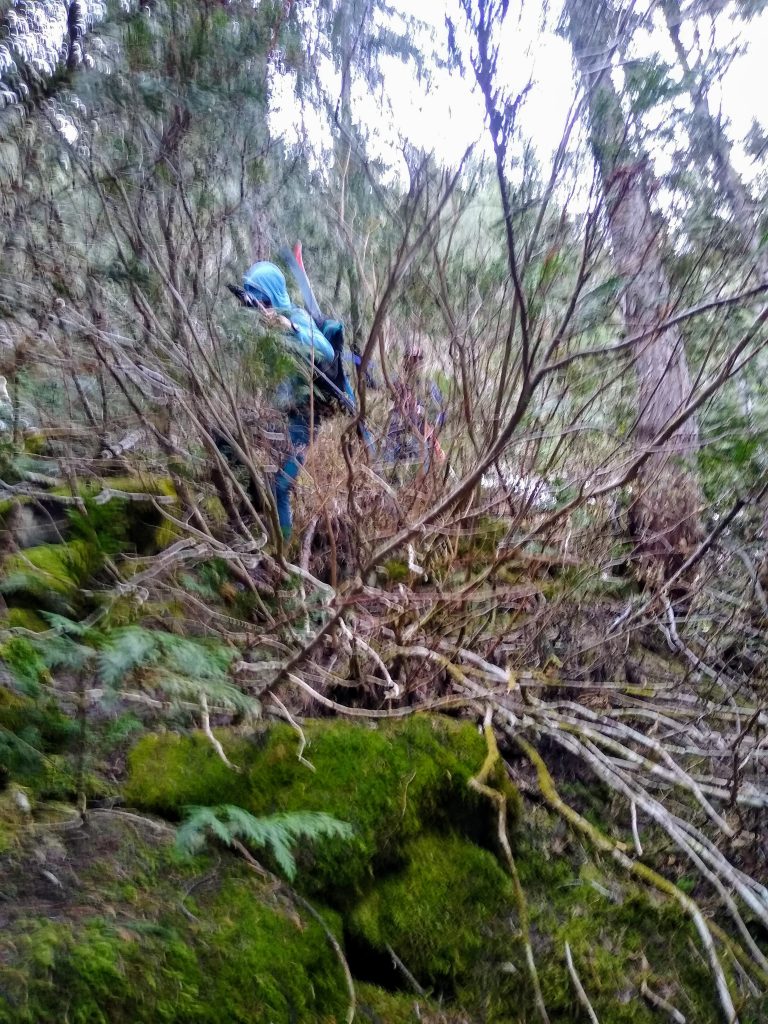
We found an improbable linkage of gullies through the cliffs and then continued down boulder fields, jumping holes, until we entered the forest. At this point, I was going all out on my skis, sending it, broken binding and ski and all. Then we unexpectedly ran into a giant cliff band that seemed to run across most of the valley. The snow ran out and we booted down the edge of the cliff band, wondering if it would ever give us passage. I went first, navigating snow patches suspended ten feet in the air above blow downs. It is a Cascadian skill to know where to step and not disappear into one of the holes. Anthony broke through chest deep at one point. He always seems to suffer more through these sections than the rest of us. And it is funny, because Anthony hates it the most.
Finally, we end ran the cliff band and followed a stream of alder down to the valley bottom. I have never been so relieved to find alder.
The fun was not over yet, and we had to find a way to cross the raging creek.
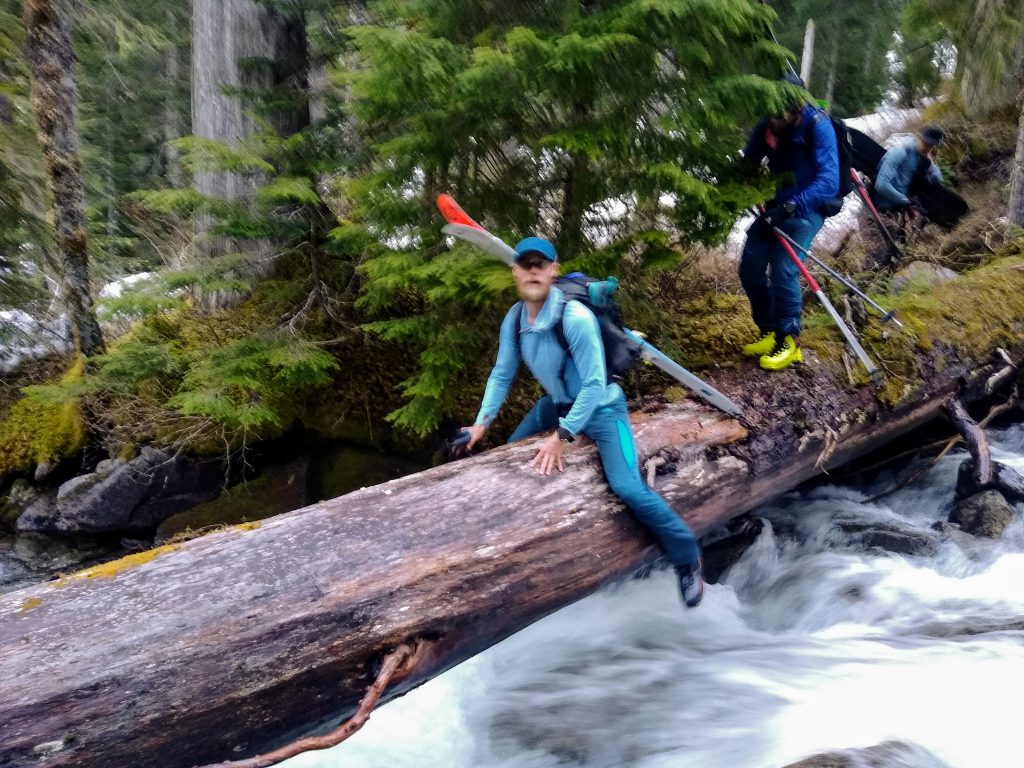
Finally we found human prints in the snow and started walking down valley. As the snow ran out, the brush began and the trail nearly disappeared in avalanche paths. Only when we reached the valley floor of the East Fork Foss River did the trail become more civilized.
It eventually got dark as we slogged out the valley trail that, like so many Cascade river trails, seemingly went uphill on the way out and was nowhere near the actual river. Near the finish, Will alerted me we had a chance to break 18 hours if we jogged, so jog we did.
We started hollering when we saw the trailhead and Lindsey, Adam’s wife, honked the horn of her truck. Our exit had taken so much longer than expected that she had been waiting for us for nearly three hours! She had beer, fast food, and Gatorade. Lindsey, you are the real MVP!
This was not just an adventure to remember, but an adventure I will never forget. Even if everything had gone well, it still would have been a big accomplishment, to cover so much ground and explore new terrain. Just looking at the map, realizing we had skied from Snoqualmie to US2 in a single day, felt so absurd! For me personally, it was an incredibly challenging day mentally and physically. Going into the trip, I was nowhere near tip top shape because of my knee problems and my resulting inability to train. On top of that, the gear problems made the trip even more challenging and exhausting, but I am honestly so proud of how I powered through and maintained a positive attitude. Despite all that went wrong, this was still an incredibly fun day. Will, Anthony, Nick, and Adam deserve so much credit for believing in me and helping each other through the epic day. But now I must start to wonder… what will we do when the Wasatch Boys come to town next year?
Route Beta
If you are turned off by detailed beta, stop reading now.
Even though I knew the potential of this route, the quality of the descents and general flow of the route still exceeded my expectations. For Nick, Adam, and Anthony, who thought Snoqualmie meant Mailbox, they were simply blown away. I honestly believe the Haute Route deserves all the accolades of the Isolation Traverse and other great North Cascade traverses. It is worthy either of a long day or many days to explore the vast terrain.
Speaking of the Isolation Traverse, I would like to make a few comparisons between the two routes:
- The technical stats are very similar. The Isolation was about 27 miles and 14k ft gain. The Haute Route was about 31 miles and just under 14k ft gain. Both took 17-18 hours.
- The terrain of the Isolation is a bit more technical and rugged. There are real glaciers to cross and a rappel mid route. The climbs and descents are a little steeper. The terrain is more continuously above treeline. The Haute Route is generally very gentle, making more of the vert skinnable. It also drops below 5k multiple times, which is nice for finding running water.
- The Haute Route descents are generally more fall line and higher quality. Almost every descent was high quality and good terrain. There was no leg burning traverse like Backbone Ridge. Because of this, the Haute Route was easier on our splitboarder, Will. There were still many times he fell behind because of his board, but it was nowhere near as bad as the Isolation.
- The Isolation has an entrance and exit fee, while the Haute Route only has an exit fee. The Snoqualmie start was so easy.
- Objectively, the scenery on the Isolation Traverse is a little more grand, but how can you compete with the North Cascades?
Both are fantastic routes. I cannot decide which I enjoyed more. It would be easier to say if my skis had not broken.
Here are some general thoughts about timing and the Haute Route:
- The Haute Route drops down close to 4k multiple times in the route. On lower snow years, you might not have good snow coverage down low or back at Snoqualmie Pass by the time the snow is adequately consolidated up high for classic spring traverses. For this reason, a fat Snoqualmie snowpack is really helpful. That was part of our motivation to go this year. We could wait for the snowpack to transition while still being able to skin from the car.
- Our variation worked super well as a single day push with aspects. All of the climbs until Iceberg Lake are on western and southern aspects in the shade. The early descents are largely east facing and soften quickly. We had such great uphill travel conditions because we stayed in the shade for so long. The long climb up Hinman could be hot, but at least the terrain is very mellow.
- The Kendall Katwalk was a worrying point, but was basically dry for us. This is another reason to wait until mid to late spring for this route.
- At least during this spring, the snowpack was more than adequate. The route would still go smoothly in another week or two!
Now I will go over some specifics on the route itself:
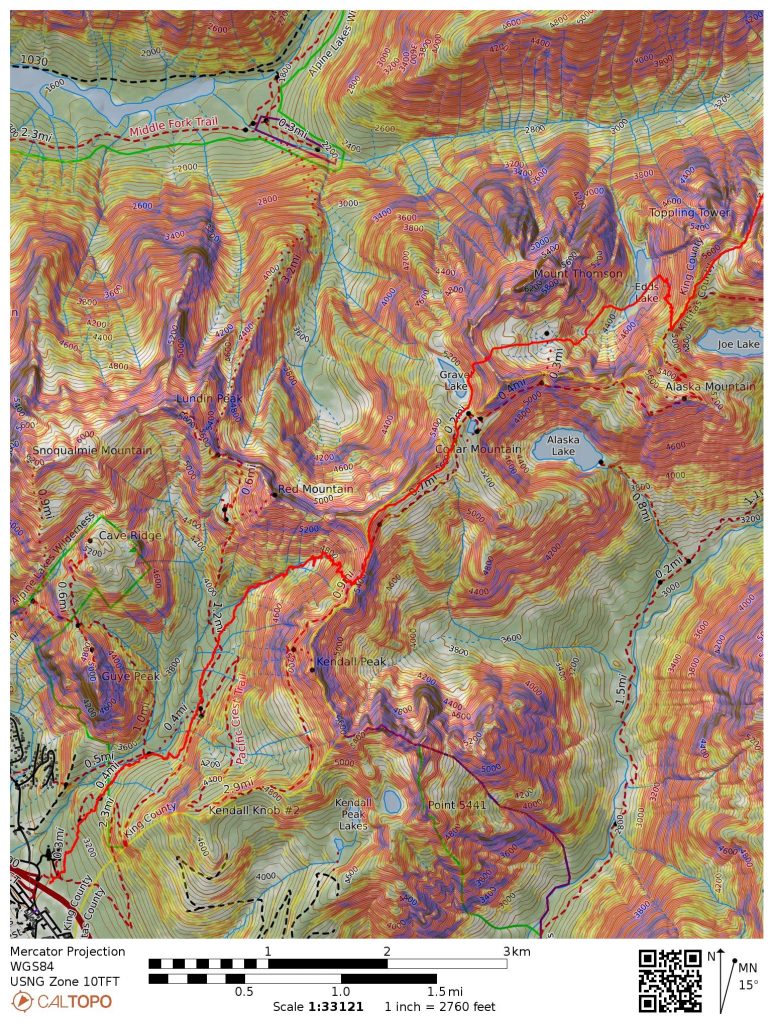
This section has the most transitions. We hit the Katwalk too far south and should have tried to hit the col more directly. We were probably a little higher on Collar Mountain than necessary.
The traverse to the west of Chikamin takes longer than expected. We went up and down a bit more than necessary and could have saved some vert if we had paid attention to the map more carefully. On the Overcoat Glacier, you can see where we got cliffed out and should have stayed more in the center of the glacier.
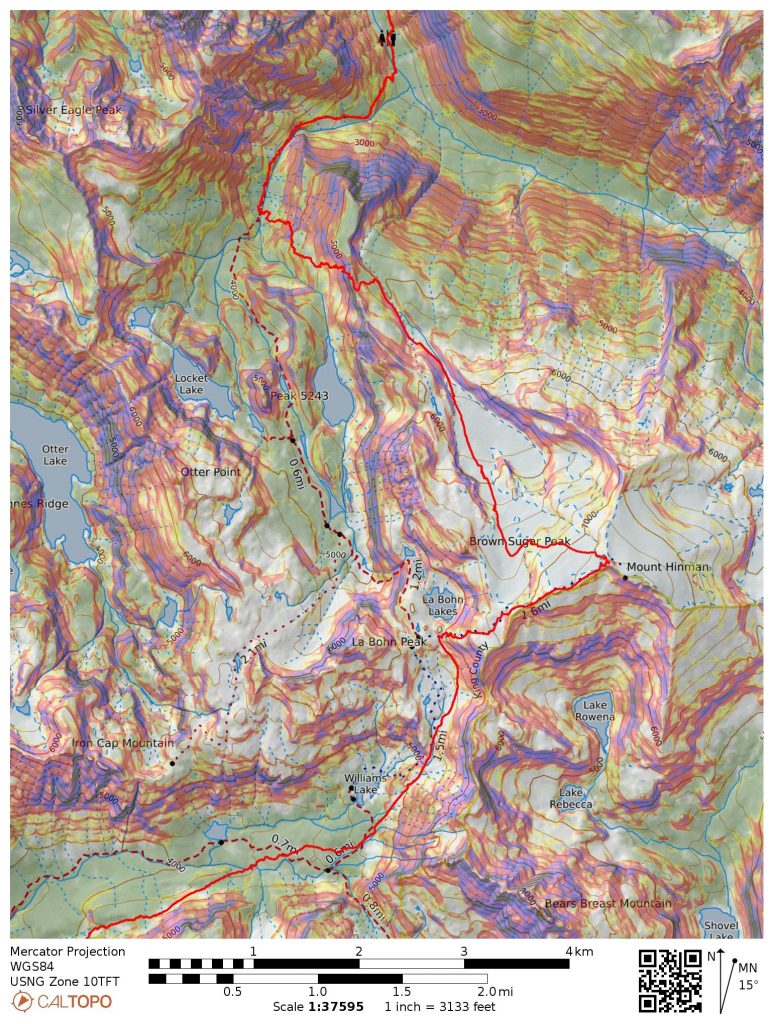
The big mistake we made here was the exit. It took us far longer than expected and I could not recommend the maze of cliffs and boulders we made it through. Honestly, it would be hard to repeat. Instead, I think there are two better exit alternatives:
- Continue skiing/hiking north from Hinman through moderate trees all the way to the valley floor at 2200 ft. Then just schwack your way along the East Fork Foss for about a mile to the northwest to join the trail.
- After skiing the Hinman Glacier, climb to Lake Lepul and then descend a gully down to Lake Liswoot. It looks very cliffy, but Jason Hummel assured me you can get down there. Then you can just follow the Necklace Valley trail down the valley.
There are of course, the Daniel and Middle Fork exits if you have more time.
With the knowledge of the route finding, a better exit, and no gear malfunctions, we think this could be reasonably done in 15-16 hours, instead of our 18.
Ski Repairs
I also want to share some of the lessons I learned about ski repairs. This was a massive day and nearly the worst spot to break a ski, but we managed. The key piece of gear was duct tape. I should have had more, but even just a foot or so allowed me to wrap the ski and ski on the ripped out binding. I also used some athletic tape, although it was not as sticky or strong.
Looking back, there are some additional pieces of gear or things I could have done:
- The duct tape eventually got cut by my ski edges. I could have dulled the edges with a rock where the duct tape was going to cover before applying the tape.
- Metal hose clamps can also be used in place of duct tape. They would catch more while skiing, but still not as bad a Voile strap and would last longer than duct tape. A bigger one that could encompass my entire boot would also be useful if I broke the toe pins on the binding and needed to keep my foot locked down while skiing.
- Some sort of epoxy or super glue could allow me to try to glue the topsheet back to the base.
Interestingly, I felt that the snapped ski had no significant impact on my day. I was skiing super cautiously anyways and the ski was still intact underfoot.
I have to thank Adam for noticing the binding problem. Who knows what would have happened if I had tried to ski down the icy Huckleberry Chute like that. I might have blown the binding completely out, beyond repair. Another reason to frequently inspect your gear, even mid tour.
If you do a lot of backcountry skiing, I really urge you to take a long look at your repair kit, envision everything that could go wrong, and think about how you would fix it in the field. I had just enough smarts to recover from my failures, but I will definitely be even better prepared next time!
Bummer about the equipment failures but what an adventure you put together! Where do I sign up for the comeback tour?
This weekend looks beautiful, go get it!
If this is what you’re capable of when youre injured, I can’t imagine you at your peak! Either way super inspiring and engaging trip report.
Ha only semi-injured Rio! My knees actually didn’t really complain much all day, even with the downhill hiking, so I’m stoked on that! Hopefully I can get back to running and training next month.
Great TR! Im another Wasatch skier but hope to come out to WA next spring and do something like this. Were you able to get your heelpieces to rotate later? I use the same bindings and definitely don’t want to end up in the same situation you were in. Also, with the toepieces ripping out, what do you think caused it? Mounting error? Not enough binding reinforcement in the ski? Its super impressive that you were able to slog it out despite the malfunctions.
Yeah when I got home I put the heel pieces in a vise and could rotate them. Then I used a qtip and detergent and cleaned out the little socket joints where the ball rotates in every 90 degrees to lock. It didn’t look dirty, but I guess some of that WA Pass sand had gotten in and messed things up. I will definitely clean this more frequently now.
From what I could tell, the binding reinforcement plate ripped out of the entire core of the ski. When we first noticed it, there was already a crack in the sidewall. So I wonder if the issue was more the entire core cracked and then the binding came out. I gave them back to the ski maker and hopefully they can figure out what went wrong.
“Joys of booting, cramping quads, and hip flexors fatique”, thee perfect ski day! Done variations from Snoq pass, middle fork, and east fork foss in 2-3 day trips, but 1 day, way da go ya beast. I thought about that west variation off the bottom of Hinman but looked cliffy. I carry Hardmans epoxy in little packets, it’s good stuff. That thursday the 21st the touring I was doing the snow was grabbier than a high school freshman on his first date.
Haha it wasn’t the perfect day but damn it was a day! I actually just ordered those epoxy packets and will carry them with me on all future trips!
Great to see people getting out to the Snoqualmie high peaks. If those mountains were in any other part of the country, they would probably be in a National Park- very underrated so close to Seattle. I’ve skied Snoq to Foss a number of times, single and multi day, and have thought about trying the direct exit from Hinman to down to Foss, but have always opted for the easy direct exit out the Necklace from Chain/ La Bohn lakes- not as ambitious as you and your team. Look forward to hearing when you get the Hinman exit dialed in!
Very cool! Such underrated mountains. Which route(s) have you taken around Chikamin?
I have always gone up the east side of Huckleberry and down the pass just west of the western Chikamin cliffs on the map. That connects to the route you went below the Lemahs- super easy. From there I’ve also taken a right and circuited up around the north side of Chikamin on the Gold Creek High Route, which is another great route through the Brothers, Alta Mtn, and down Rampart ridge back to Gold Creek parking – another tour that should be a classic since it’s right off the Pass and car to car.
The Gold Creek circuit sounds great, and has a very easy car shuttle!
Yeah, I’ve just parked at Gold creek to start and go over Kendall via Kendall Lakes, so no shuttlle even needed, just a short walk depending on how you come out from the bottom of Rampart. Very aesthetic finish with the Rampart Martini couloir!