The G-Skin is a narrow skin that can be used to get excellent glide on backcountry skis. While not a replacement for standard climbing skins, these skins can be particularly useful for flat and rolling terrain. If you are interested in how to make your own pair for only about $40-$50, you can skip ahead to “How to Make G-Skins”!
Table of Contents
Nordic Origins
Last year, Logan and I finished an incredible ski traverse in the Salmon La Sac region of the East Central Cascades. We had never explored this region because of its reputation for long road approaches that “require” a snowmobile to access. After our final descent, we still had 5 miles of net downhill (with plenty of small ups along the way) snowmobile road to get back to our car. At first, we tried skating, but it was too soft. Then we tried skinning, but without skins. Neither worked. Eventually, we gave up and just skinned the gentle downhill and rolling terrain, admitting defeat. But I knew there must be a better way.
Long before I skied downhill or backcountry, I learned to classic (nordic) ski. Growing up, I only classic skied a few times a year, but it was enough to learn how to glide on my $40 fish scale skis. When I first started backcountry skiing, I was astounded at how poor the glide was in comparison. Could there be a way to capture some of the nordic glide on backcountry skis?

I spent considerable time last summer ideating on different options to solve this problem:
- Snowmobile: A sled would be ideal, but I don’t have space to store one, nor the desire to make my primary hobby sled maintenance.
- E-Snow Bike: This could work for snowy road approaches, but is pretty costly and might not work if my partners did not have one also. They are definitely intriguing though!
- Nordic skis pulling my backcountry gear behind me in a sled: This only works for out and backs, not traverses. Classic skis can be challenging if grooming is poor. This also requires a gear change, and partners to have nordic skis.
- Kicker skins: This is the most common strategy used by backcountry nordic skiers. Kickers skins are typically 50-60cm wide and only cover the underfoot section of your ski. But the attachment mechanism seems prone to building up snow, and reviews indicate that they do not work well with wider skis.
The kicker skins seemed closest to what I wanted – a modular system that could be used on specific tours when there was a long flat approach or descent. However, they seemed like an imperfect solution. I was particularly concerned about the front interface, which seemed prone to building up snow.
While deep down an internet rabbit hole, I found an old school backcountry telemark forum where people mentioned an alternative to the kicker skin – a thin strip of skin material 25-40cm wide that attaches to the tip like normal but ends behind the heel. This would solve the problem of snow buildup on the front and create a secure attachment.
I contacted the good folks at SkimoCo about this solution, and they encouraged the idea and pointed me to the parts I would need. So I bought some material and starting cutting, testing out different configurations and different usages. The rest of this article covers what I have learned about what I am calling the “Glide Skin”, or “G-Skin”, for short.
G-Skin Performance
How Fast Can You go on G-Skins?
This depends on the user and conditions, but I have found that I can comfortably skin 4-4.5 mph (30-50% faster) on flats for an extended period of time. On slight downhills, I can approach 6 mph. There is a learning curve, particularly if you have never nordic skied before. While this may not seem much faster than the typical 3 mph on normal skins, consider that if you have 5 miles of rolling roads to skin, this could save you 20-30 minutes!
Overall, G-Skins glide a bit worse than fish scale classic nordic skis, and grip slightly better. There are other performance differences due to the differences in backcountry versus nordic boots.
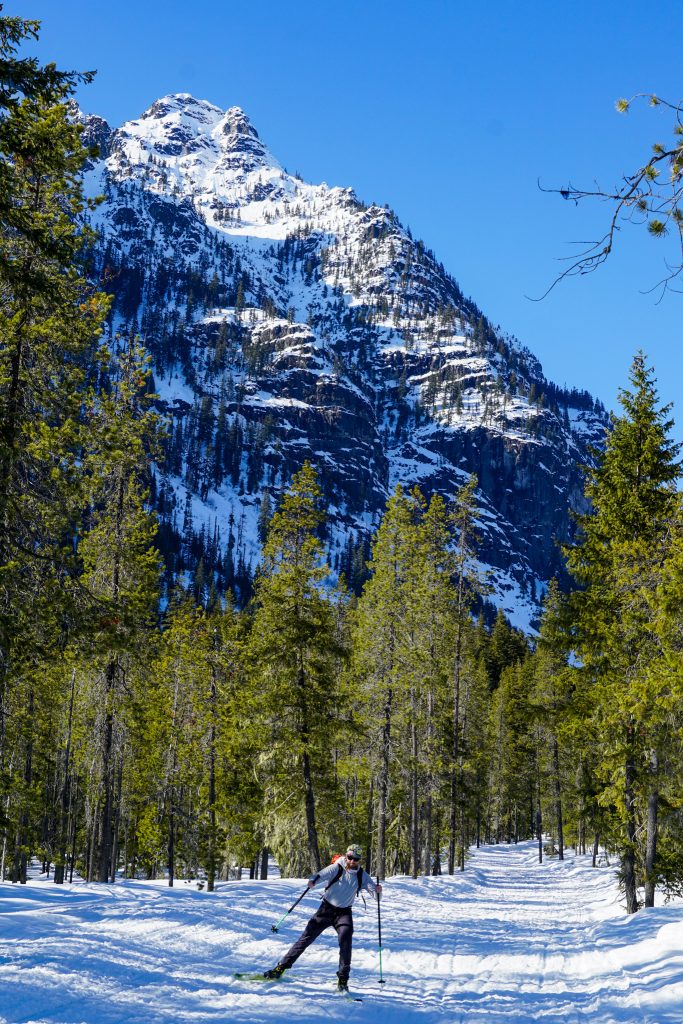
In addition to the improved speed, I also find G-Skinning so much more enjoyable and relaxing than skinning on my normal skins, frustrated by the lack of glide. This enjoyment alone has changed my attitude towards long road skins and made me consider longer routes that I previously never would have, like the Rampart Hibox Traverse.
How Steep of a Slope Can You Ascend with G-Skins?
In perfect conditions, with good technique, I can ascend a typical lower angled skin track with the G-Skin. However, conditions can greatly affect grip.
- If the surface is uneven or icy, then grip is reduced.
- If breaking trail through deeper powder, the effective slope angle is higher, so that can cause some issues.
- If any firm side hilling is required, then there is basically no grip because of the skin location in the center of the ski.
The best conditions are an existing skin track on a flat road-like surface with continuous skin to snow contact.
Do G-Skins Stay Attached?
They sure do! The lack of a tail clip might be suspicious, but I have never had an issue with the G-Skins coming off, except for when breaking trail through deep powder off roads, which is not a common use case for them. Make sure to clean off your bases well when applying the G-Skin and they will stick well!
When are G-Skins Useful?
G-Skins are most useful on routes that require skinning rolling terrain and gradual downhills on the way out. I still bring normal climbing skins for the off-piste backcountry terrain.
The G-Skin allows for better glide on flats and downhills, while still gripping well enough for gradual uphills. This is helpful for routes that have substantial sections of flat and rolling terrain. Usually, they are most helpful on roads, since the narrow skin can be troublesome to get grip if encountering any icy sidehilling off-piste.
Here are a few guidelines of when a G-Skin might be useful:
- Is the exit so flat that you have to skin on the way out? If so, then G-Skins will help expedite your exit. The efficiency gains of G-Skins mostly come on the way out rather than way in. G-Skins do not enable you to skin much faster uphill, because glide is limited when ascending.
- Is the flat / rolling section at least one mile? If shorter, then any gains from the G-Skin would be offset by extra transition time.
Examples of tours where G-Skins are very useful:
- Tours that require skinning flatter sled roads out of Salmon La Sac.
- Tours up the Icicle Road like the north side of Cashmere.
- Venturing up the Teanaway in winter.
- Roaring Ridge from Hyak.
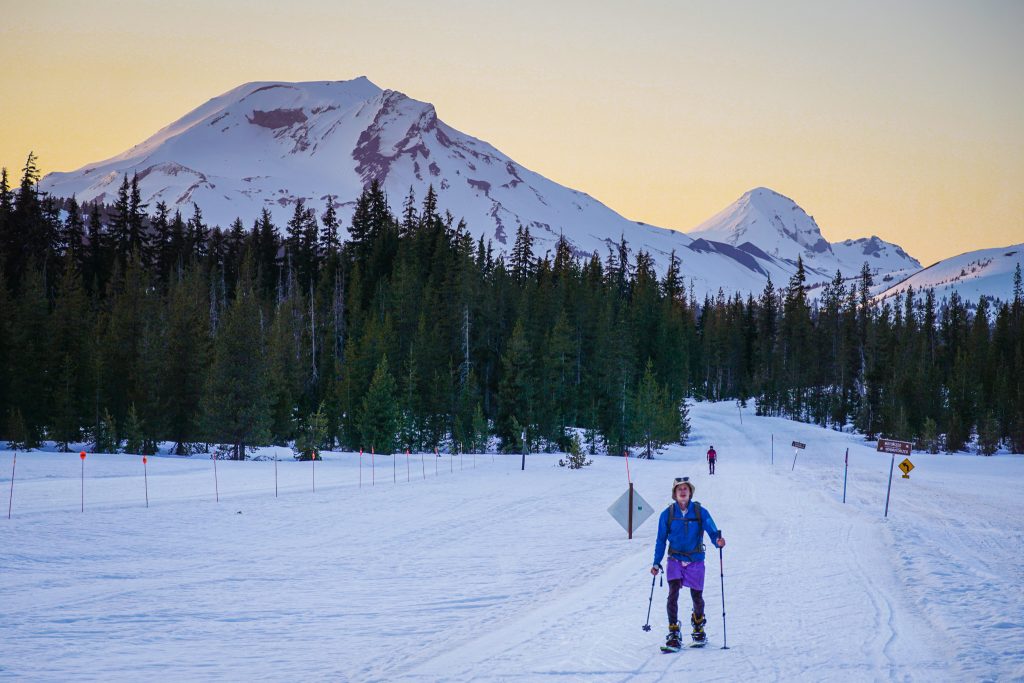
- South Sister (OR) in winter from Dutchman Flats.
- Approaching Mt. Stuart in the spring when there are still many miles of snow covered roads to the Esmerelda Trailhead.
Examples of tours where G-Skins might be helpful:
- Mt. Margaret (only one mile of flat, so maybe not worth it).
Examples of tours where G-Skins are typically not helpful:
- Smithbrook Road, unless conditions are very slow on the downhill (too steep).
- Twin Lakes Road towards Winchester (too steep).
- Source Lake (too short of an approach, and there are steep sidehill sections).
G-Skins are incredibly light and take up minimal pack space, so if there is at least a mile or two of flats, they are a no-brainer to throw in the pack!
Another note is that G-Skins are more effective when paired with a boot that walks well and a mid to lighter weight ski. I discuss these boots and skis in my How to Get Into Backcountry Skiing post. If I am doing a long-distance mission where G-Skins are useful, I will probably be using my lighter skis and boots anyways.
How to Make G-Skins
If you have an old pair of skins you are ready to toss, you can cut them up to make G-Skins. If you want to make a fresh pair, it is also quite easy!
Note: This post contains affiliate links. I earn a small commission on sales via these links at no additional cost to you. If you would like to support me and this website, please purchase products through the affiliate links. Thank you!
Skin Length
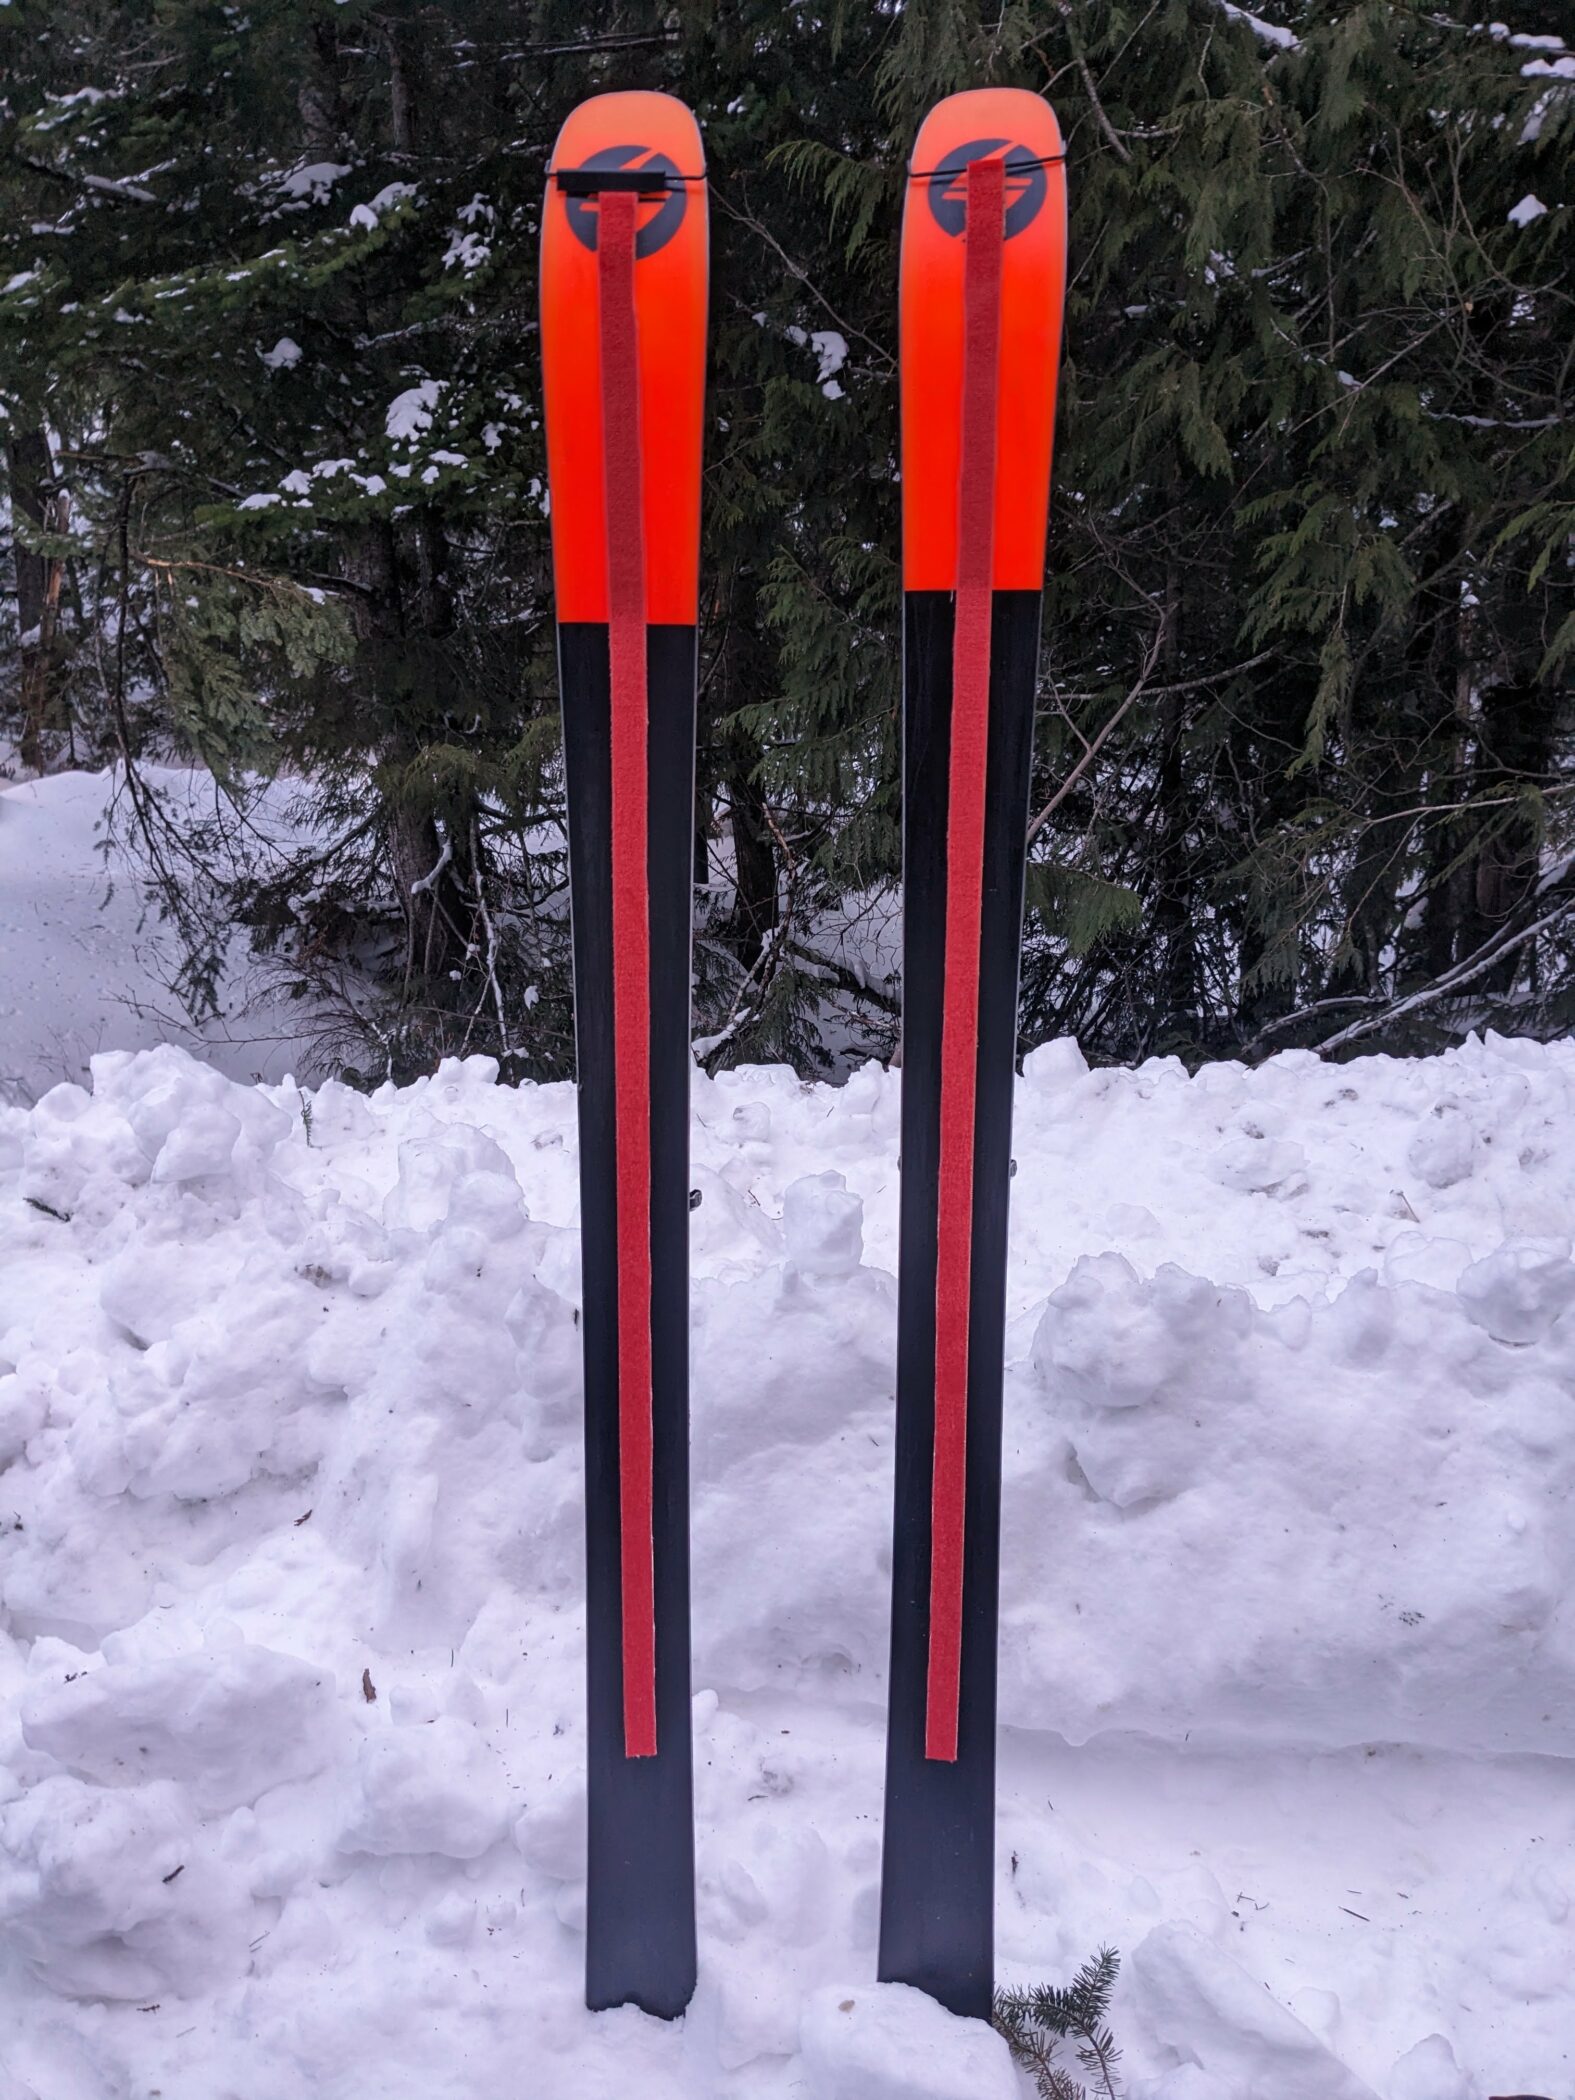
Measure from the tip of your ski to the back of the your binding heel piece. Add maybe 5-10 cm extra. That is the approximate length of material you need for a G-Skin. For my 180cm skis, that was about 120cm of skin material.
If you have multiple pairs of skis, find the longest measurement and use that.
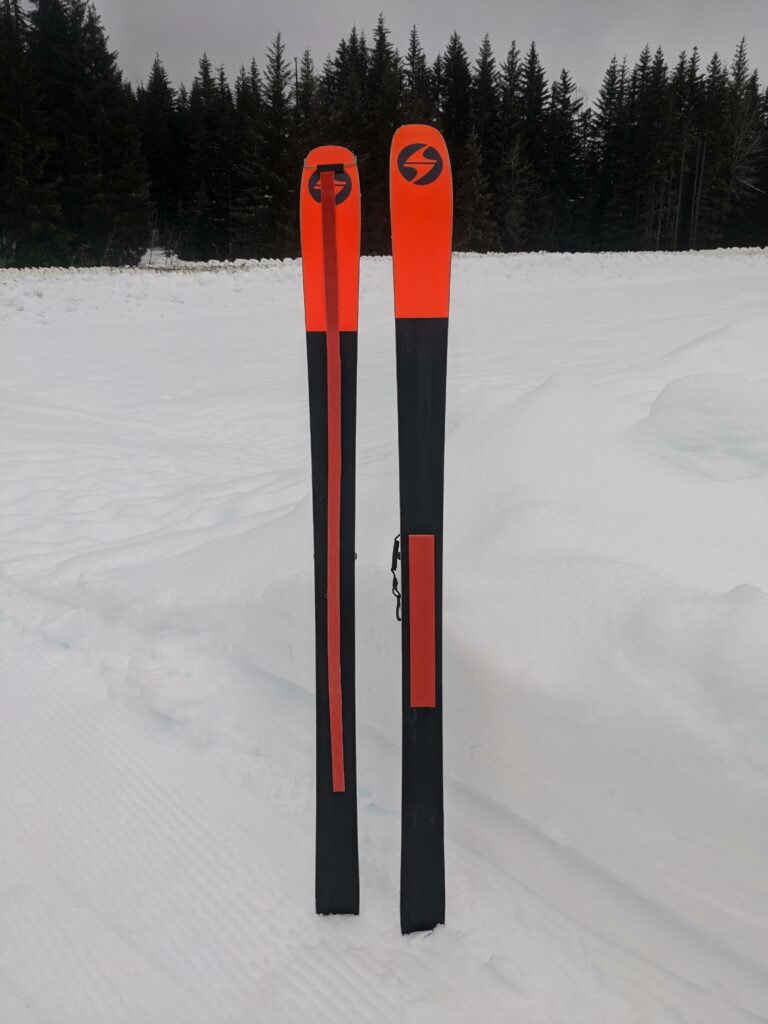
Skin Width
Generally, 25mm to 35mm width is probably ideal. On the lower end, you will get better glide and slightly worse grip. Personally, I have been very happy with my 25mm skins, but I also have experience with classic skis so my technique allows me to get away with worse grip. A partner went for 31mm and noticed that he cannot glide as well on downhills as me.
Once you get towards 50mm width, the glide is significantly compromised and not that much better than normal skins. Remember, G-Skins are a complement to your existing skins, not a replacement.
Tip Attachment
For the tip attachment, I bought skin tips and a folding clip to keep the skin folded over the tip. However, the clip fell off on one of my skins during usage and I did not even notice, so it seems that the skin glue by itself is strong enough with a few inches of overlap sticking to itself. The clips might be good peace of mind however!
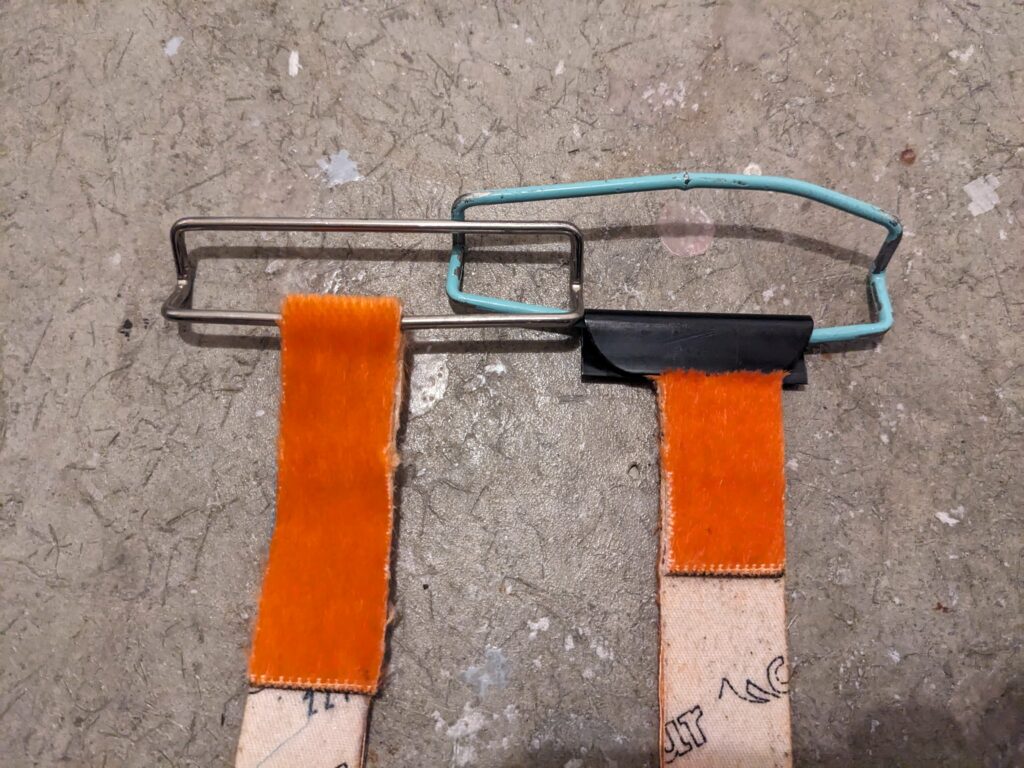
Buying the Parts
To build one pair of G-Skins, you will need:
- Approximately 120cm of 50-70mm skin material. You will cut it in half down the center to have two narrower strips. Mohair is best since you are optimizing for glide. Here are a few suggested skins:
- Contour 105mm Vario Buckle (Skin Tips). The 105mm tip attachments work well for both my 108mm and 85mm underfoot skis.
- Contour 75mm Folding Clip. These are the clips that will help secure the skin to the tip attachments.
In total, this should only cost $40-$50! It’s not a bad idea to buy enough material for two pairs so you can loan a pair out to your buddy. Or maybe you’ll just have to dust them on the road to make them realize what they are missing!
Once you have the parts, assembly is quite easy!
- Cut the skin down the middle with scissors.
- Fold 1-2 inches of material over the tip attachment.
- Place the folding clip over the end. Make sure the orientation is correct (the wider part should be against the snow).
G-Skin Alternatives
There are a few other alternatives to G-Skins, which each have their tradeoffs.
Fish Scaled Backcountry Skis
Voile and some other brands make fish scaled backcountry skis. They have a “kick” section underneath the foot with “fish scales” that allow for grip on low angle terrain, much like the G-Skin. However, they have a few significant drawbacks.
- The fish scales add drag when skiing down low angle terrain.
- They are not removable / modular for when you only want them.
- If your partner does not have them, they are not that useful.
- A pair of fish scale skis cost just as much as a typical backcountry ski ($700-$1000).
It seems that fish scale skis are a niche tool mostly used by backcountry nordic telemark skiers. Their only real advantage over G-Skins is that they do not require transitioning if staying in low angle terrain. However, for the applications where I use a G-Skin (road approach and exit), transition time is relatively insignificant over the course of an entire tour.
Kicker Skins
Black Diamond Kicker Skins are the most direct competitor to the G-Skins. Admittedly, I have never used them, but based on experimentation and research, I think they have a few issues:
- The attachment strap supposedly does not work for fatter powder skis.
- The metal plate in the front creates an interface that is prone to snow buildup.
- The glide is substantially worse than the G-Skin. I have tested 50mm wide skins underfoot and the glide is closer to a full width skin rather than 25mm G-Skins.
Kicker Skins seem to be a good “climbing skin” for backcountry nordic skiers on fish scale skis. In other words, they have good grip and are enough for almost any skin track, but have relatively poor glide. For my application as a backcountry skier who is already carrying full width skins, they seem to be subpar.
“Pastie Skin”
You might be wondering – why bother with the tip attachment at all? Well I have tried just slapping some skin on my bases, aka the “Pastie Skin”.
If I applied the Pastie Skin when my bases were dry, it stayed on surprisingly well. But if there was any bit of moisture (realistic), I could not get it to stick. I think a tip attachment is necessary.
In this head-to-head comparison, I also found the 25mm G-Skin to glide much better than the shorter, but wider 50mm Pastie Skin. This shows how grip / glide is more a function of width rather than length – the only skin material that really matters is that which is underfoot.
G-Skinning Away
If you are read this far, then thank you for indulging me in a very niche gear discussion. While I do not consider myself a typical gear head, testing the G-Skin this winter has been very fun because of how it blends my origins as a nordic skier with my newer passion for backcountry skiing. It has changed my perspective for what is possible in terms of accessing the deeper mountains in the winter.
Got any feedback on the G-Skins? Questions? Let me know in the comments!
What type of efficiency gains could we expect by adding a full Lycra suit to the G-skin setup? 🤔
Easily another 20%! Plus you’ll get style points.
I love your ingenuity and thoughtfulness!
Have you tried or does even narrower than 25mm glide better and still get grip? And can the skin hairs be removed from the tip to increase glide, just keeping it underfoot?
I love my scaled skis but now I’m going to try this with some of my non-scaled skis and use it with co-skiers that don’t have scaled skis.
Awesome idea and write up dude!!!
I haven’t tried narrower, but narrower might work well on perfectly flat surfaces like a frozen lake! I would guess the ski itself has a decent amount of drag at some point so there are probably diminishing returns as you go narrower. You could probably remove skin hairs to increase glide.
Kyle: thanks for the detail, i’ve been wondering about this “g skin” since you first wrote about it, but couldn’t find any info, now i understand why!
ok, my question; if i have an old set of skins, why not just leave the tip attachment oem and cut the skin to 25 just below the factory set up? what if i did the same at the end? seems most (basing this on my POMOCA’s, Black Diamond & G3’s) have a narrow attachment already or one that could be cut to 25-35. any reason not to have them attached at the back?
appreciate your travel stories and great pictures, David
If you have an old pair, then yeah just cut them narrower. You could keep the tail clip, but could also save a little weight by cutting it off behind the heel! It’s up to you!