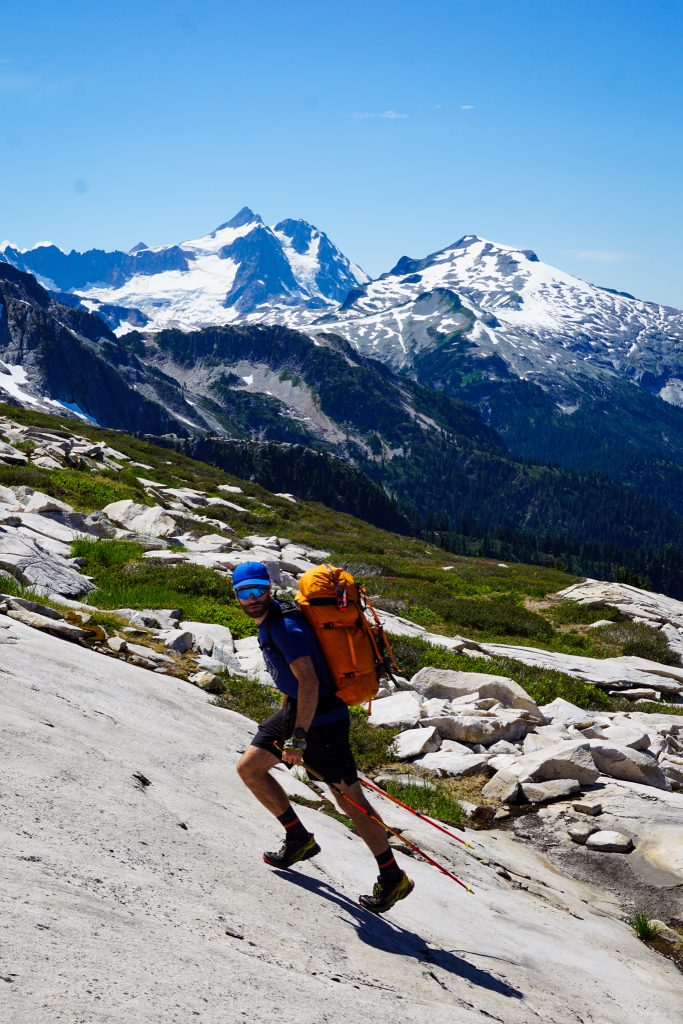
On high routes that cross a variety of terrain and require diverse skills, you inevitably ask a lot of your gear. This post covers the gear I use for single day and multi day trips in the Cascades, tuned from many years of trial and error.
Over the last decade, I have been developing in parallel many different skills – alpine climbing, backcountry skiing, and trail running, to name a few. This post represents a synthesis of many different but related domains: trail running, ultralight backpacking, and alpine travel. People have been doing high routes for decades, but I have noticed that my background in a diversity of these activities has allowed me to use non traditional mountaineering gear to great success in the alpine. In this post, you will see all of those influences coming together.
For trip ideas, see my huge list of Washington High Routes and Traverses!
Note: This post contains affiliate links. I earn a small commission on sales via these links at no additional cost to you. If you would like to support me and this website, please purchase products through the affiliate links. Thank you!
Table of Contents
Footwear
I generally use a few different pairs of trail runners depending on the high route:
- La Sportiva Ultra Raptors (men’s, women’s): These are my go-to burly off trail shoes. They kick steps in snow, protect my feet on rocks, and accept crampons well. They are not good for actual running. But for multi day trips where durability and protection are paramount, I know I can trust these shoes.
- La Sportiva Akasha (men’s, women’s): This is my favorite all around high route shoe for both running and off trail. They scramble really well, have good protection, but can still run decently. Durability is not quite as good as the Ultra Raptors.
- Brooks Cascadia (men’s, women’s): These are very comfortable on trail shoes with remarkable durability. They perform sufficiently for easier and less burly off trail.
- Waterproof socks can help with trail runners on snow.
Curious why I did not include any burly mountaineering boots? In the summer season here in the Cascades, it is not usually cold enough to warrant real boots below 9,000 feet. Trail runners have worked for me on a variety of routes with steep snow and even some glacial ice, but you have to know their limitations. They aren’t for climbing any steeper ice or super firm steep snow. They can get cold up on the volcanoes.
For a more in depth dive about footwear, see my extended post Footwear in the Cascades.
Clothing
Generally I am doing these routes in good weather, but sometimes there might be a chance for worse weather. Still, I always want to carry enough to spend a night out unsheltered.
Upper Body
On my upper body, I typically wear:
- Outdoor Research Echo T-Shirt (men’s, women’s): This is my favorite wicking shirt, super light.
- Outdoor Research Echo Hoodie (men’s, women’s): If it is colder, I’ll use this as my base layer. Fit can be weird, but the material is amazing.
- Outdoor Research Sun Hat: These hats look dorky, but they do a damn good job of keeping you from getting sunburned. If I’m running a lot, I might go with a standard baseball cap.
- Sunglasses of some sort.
Additionally, I will typically bring along with me:
- Mountain Hardwear Airmesh Hoody (men’s, women’s): This thing is insanely light (5 oz?) and surprisingly warm when layered with a wind proof layer. Great active layer.
- Mountain Hardwear Ghost Whisperer (men’s, women’s): This is one of the lightest down jackets out there, and has survived 8 years of constant use for me. It rarely gets much below freezing in the summer in the Cascades, so this is typically enough. If I expect substantially below freezing conditions, I might bring something warmer.
- Patagonia Airshed (men’s, women’s): This light wind layer is great for active use. Breathability is moderate, but certainly better than a fully windproof Patagonia Houdini, which I might take for more sedentary activities like rock climbing.
- If I expect a little rain, I might bring a light rain jacket. The Helium Jacket is good for occassional rain, but for PNW type rain, a real 3L Waterproof like the Arcteryx Beta LT is more effective.
- Some light gloves for camp. If you need light gloves for snow, I highly recommend the uninsulated Showa 281 gloves.
Lower Body
On my lower body, I will typically wear:
- Shorts: I typically wear a running short like these Janji shorts, but sometimes wear synthetic underwear underneath. It is just a matter of preference.
- Ferrosi Pants (men’s, women’s): These pants are very light. The fit leaves something to be desired, but they get the job done at a decent price.
- Long underwear: I might bring both pants and long underwear if I’m expecting below freezing temperatures. In very warm conditions, or for day trips, I often bring just shorts and long underwear as a backup to save weight.
- Compression socks: I typically use compression socks because I feel like they decrease cramping, but they might not work for everyone. If nothing else, they help prevent your legs from getting all scratched up. I might bring an extra pair of normal socks for camp.

Day Trip Gear
Daypack
- Salomon Adv Skin 12 (men’s, women’s): This vest is great for non technical days. I can carry extra layers, tons of food, and even my camera in the front of the vest.
- Black Diamond Distance 15 (men’s, women’s): I’m not a big fan of this pack, but there are not that many other options for vests that can carry crampons, ice ax, and a helmet. Also comes in a 22 liter size.
Miscellaneous Equipment
- InReach Mini: This two way satellite messenger is great for SOS situations, live tracking, and communication. If the trip is any bit technical (meaning there’s a chance of separation), then everyone in the group should carry one. What happens if the one person carrying an InReach is the one that falls of the cliff?
- Bindi Headlamp: This headlamp is extremely light and provides enough light for emergency trail use or camp use. If I truly expect to spend time navigating in the dark, I will typically bring a second brighter headlamp.
- First Aid Kit: A different discussion, but make sure you are familiar with the contents.
- Small roll of duct tape.
- Toilet paper + trowel (although if I have an ice ax, that’s a much better digging tool!)
- Small knife if I might need to cut cord or shoes or anything.
- Sunscreen / bugspray if necessary. I usually put sunscreen in a smaller container to reduce weight. That’s an easy 5 oz savings!
- Water treatment: generally I do not filter and am just selective with my sources, but the Katadyn BeFree filter is convenient. Keep in mind that these filters do not treat viruses, so you should use chemical treatments like AquaMira in more popular places.
Poles
- Black Diamond Distance Z: I generally buy the non-carbon versions because they are cheaper and more durable, but carbon can be nice.
- If you need super long poles for a mid styled tent, check out Portland-based Diorite Poles. Note I did receive a free pair to test out from them.
Camera Gear
- Sony A6000 with kit lens. This can fit in the front of my vests, although the Distance 15 doesn’t carry it well. For backpacking trips, I take the 18-135mm lens, which would not fit in the front of a running vest.
- Peak Designs Camera Clip: I use this with a non-vest pack like a backpacking pack.
Snow Travel / Technical Gear
Oftentimes in the Cascades, snow travel is required late into the summer. Sometimes just poles and shoes are enough, but other times more specialized gear is warranted.
Basic Snow Gear
- Black Diamond Neve Crampons: These are light aluminum strap on crampons that work well with running shoes. Camp makes very similar crampons that also work. You can save a few more grams with the Petzl Leopards, but the lack of a rigid linking bar will cause the crampon to not work as well on a soft flexible running shoe.
- Petzl Ride Ice Ax: This is a short but sturdy ax with a steel head that still works well. I like the length for attaching to a running vest in self belays in steep terrain. This is not the ax for walking up a traditional glacier route on Mt. Rainier.
- Microspikes: On very specific occasions, I might bring microspikes instead of crampons. If I’m expecting firm snow, but only low angle, microspikes can be a lighter and more packable alternative to crampons. In the Cascades, where almost everything is steep, this rarely happens. I’ve had good experiences with the Kahtoola Microspikes.
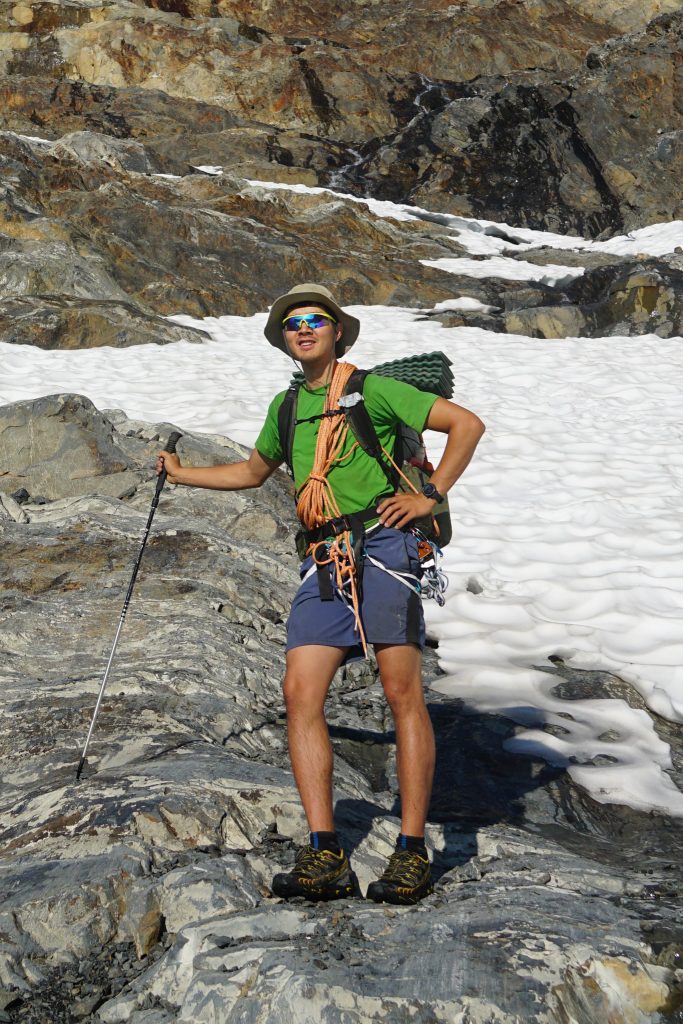
Glacier Gear
As you have probably noticed, I do not always bring glacier gear on glaciers. I do not mean to condone that. That comes from lots of research into late season imagery and my personal risk tolerance, although I also acknowledge that risk is difficult to objectively evaluate in this situation, much like rock soloing. When in doubt, I would recommend roping up for any real glacier. In nearly any situation, roping up is always safer than not roping up. This gear can be pricy, but a dialed glacier kit weighs less than two pounds per person in a two person team.
- Petzl RAD Line: This line is so light and handles so well, but is very expensive. If you do not want to drop the money on it, there are 30m 8mm dynamic ropes that cost a fraction and still work well.
- Petzl Microtraxion: Yes, you can do rescue with prusiks, but these things work much better on skinnier ropes and have less friction, providing for an easier haul. They are also useful for hauling packs, simul climbing, and many other purposes.
- Petzl Tibloc: This replaces another prusik in the rescue system.
- Any pulley: Not strictly required, but a pulley instead of a biner in your 3:1 will work better.
- A few extra biners, a single length, and a double length sling.
- Blue Ice Choucas Light Harness: The lightest (3 oz!) glacier harness out there!
I typically do not bring ice screws or pickets, although that can depend on the conditions. If I expect a lot of blue ice, then an ice screw would be good for each member. If there are serious snow bridges to cross and I am in a smaller team, then pickets might be a good idea. There is a big difference between traveling on the Emmons Glacier and say, the Cache Glacier.
Rock Gear
- Petzl Sirocco Helmet: Of course there are cheaper helmets, but this one is so light that it’s a no-brainer (pun intended) to bring it along when scrambling anything loose.
I am not going to dive into technical rock gear. For my purposes, I typically consider a high route to not include fifth class. If I do have to rappel, I will bring 20-30 ft of 5mm bail cord, a knife, my RAD line, and a rappel device. If a short fifth class lead is required, then I will swap out the static Petzl RAD line for an 8mm 30m dynamic rope that can be led on.
Overnight Gear
Shelter
There are a few types of shelter systems:
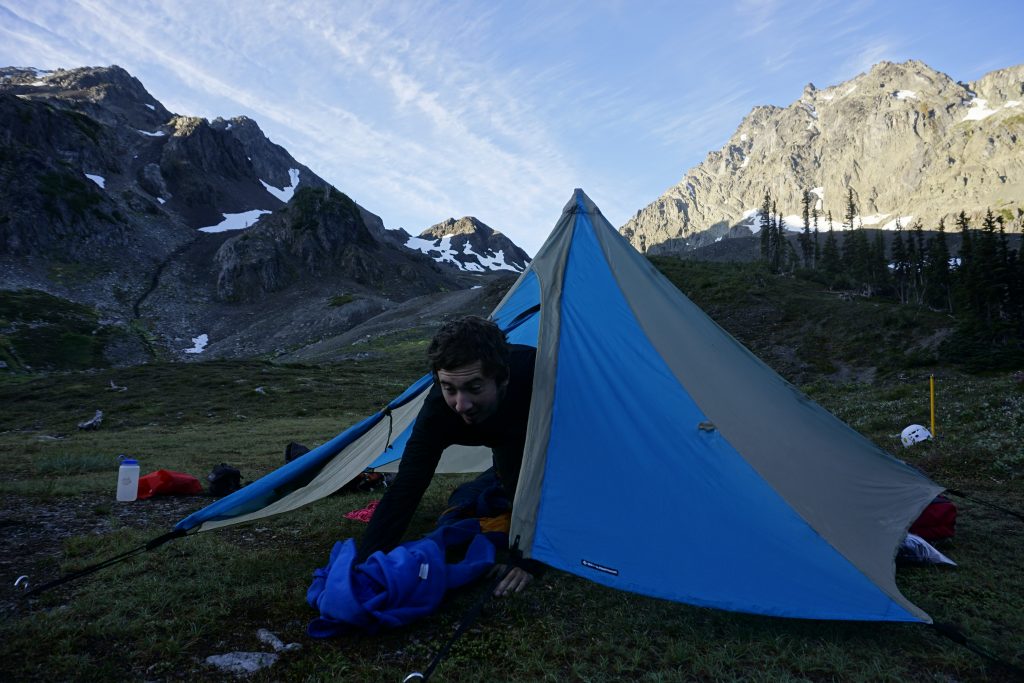
- Traditional double walled tent: These are the familiar tents of your childhood. They are generally pretty storm proof, idiot proof, and can be set up most places. The main downside is that they are heavier.
- Trekking pole supported tent: These have most of the amenities of traditional tents, but use trekking poles for support, and are thus lighter. They have to be staked out for structure and support, so they can be more difficult in alpine rocky environments. When properly pitched, they are as strong as traditional 3 season tents.
- Tarp: A true tarp does not have a floor or bug netting and is just a rain / condensation protector.
- No shelter: Some people use bivy sacks, but I have tried many and all produce terrible condensation to the point they soak my sleeping bag. If you want to go ultralight but are concerned about condensation, it is better to just select a proper campsite in the trees or use an ultralight tarp. Also, two single person bivies weigh basically as much as an ultralight two person tent and are far less weatherproof.
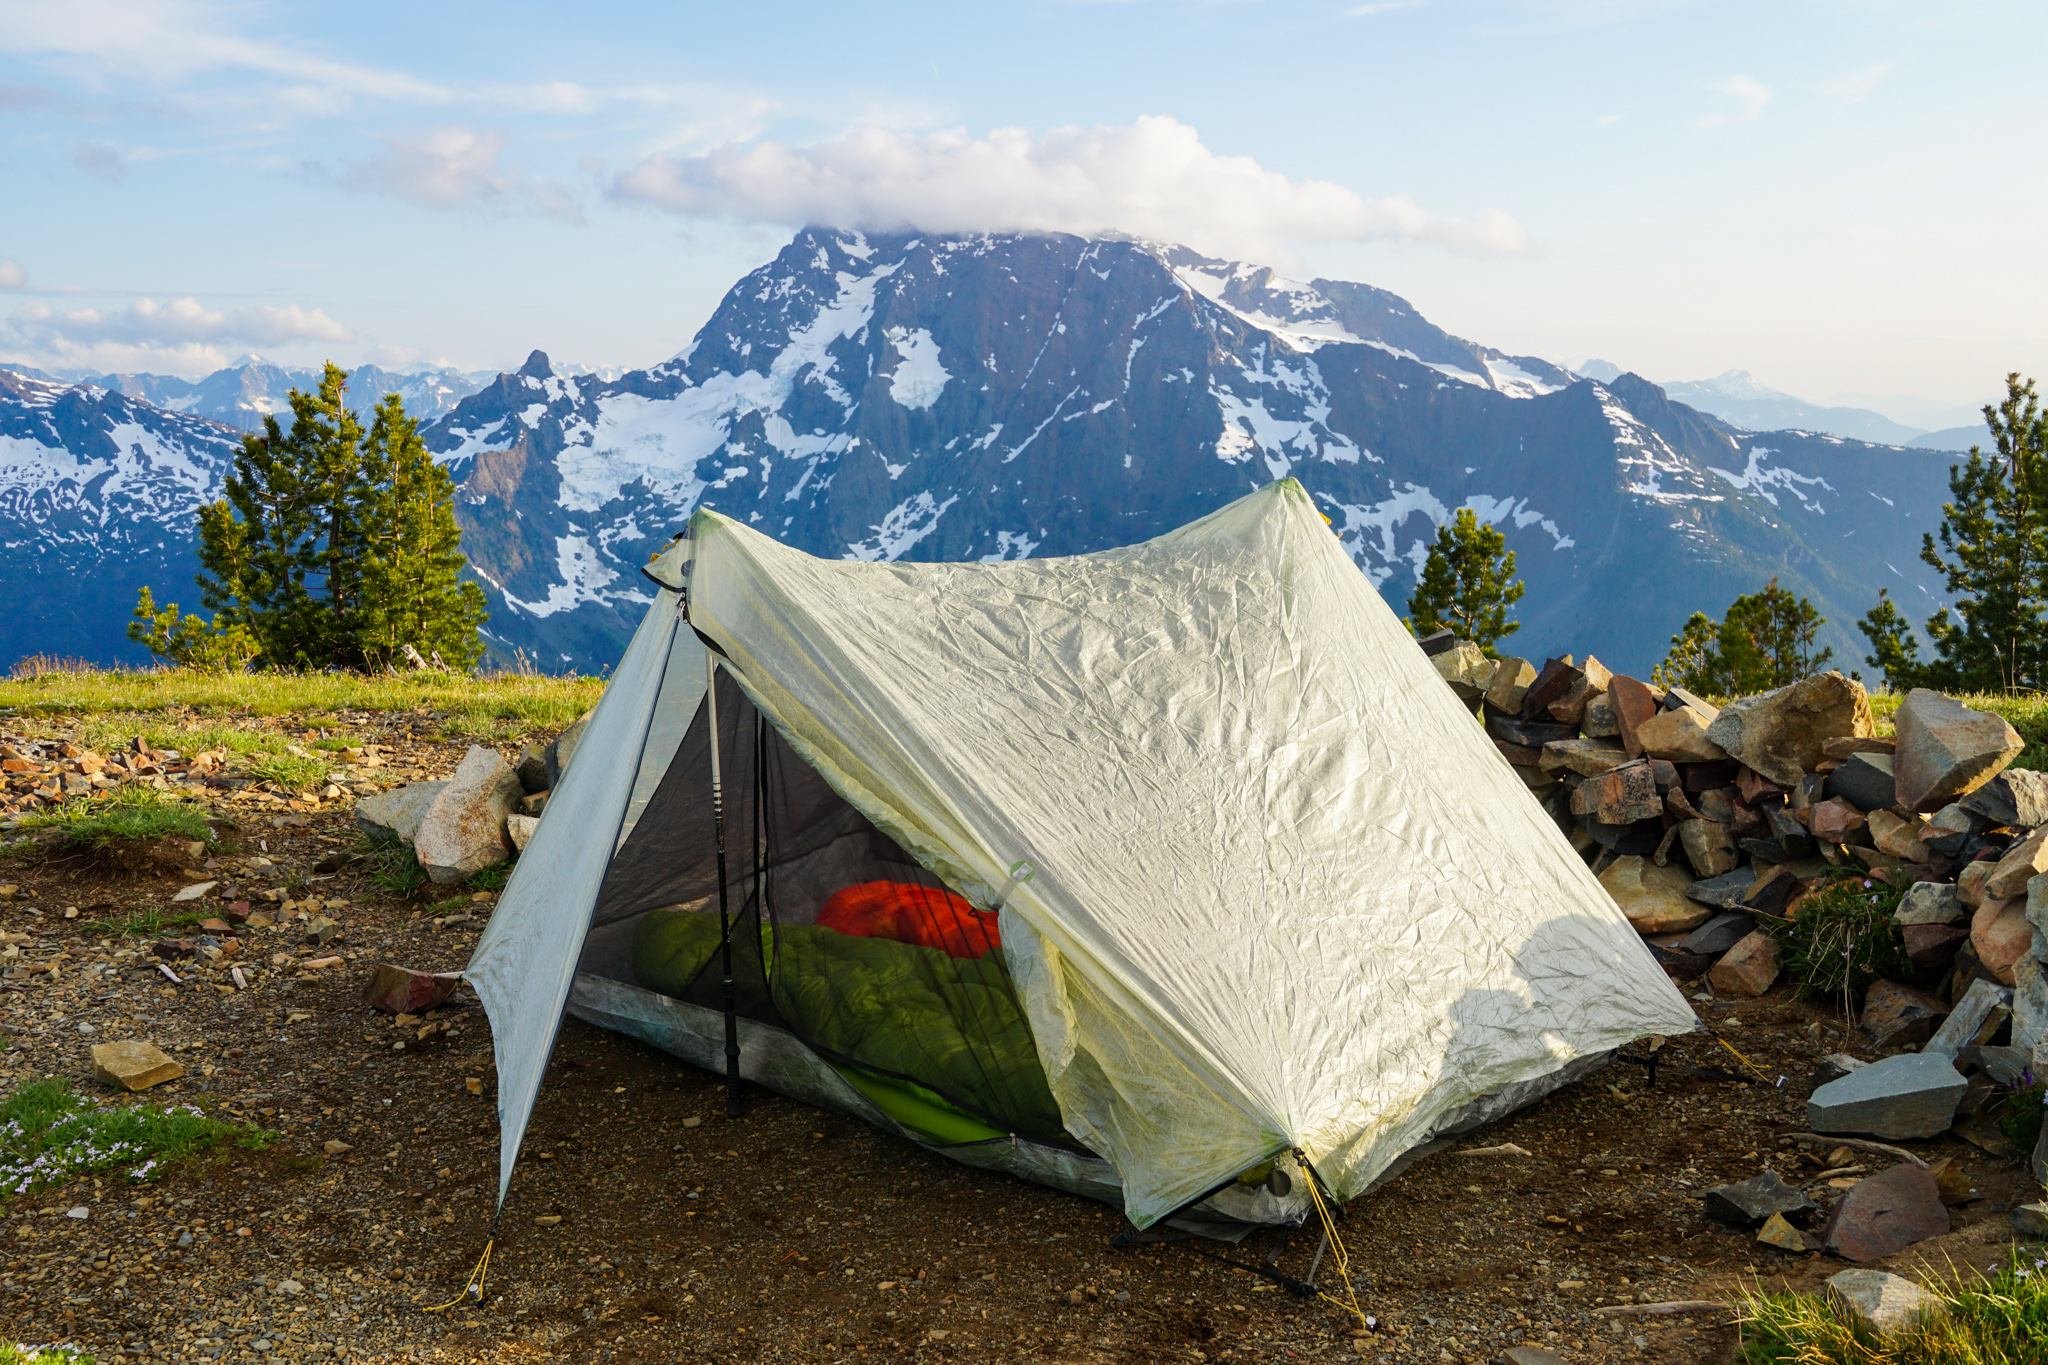
For most trips, I use a trekking pole supported tent (the Tarptent Stratospire Li). It weighs under two pounds and comfortably sleeps two people. However, I would not recommend this style of shelter to everyone.
Trekking pole supported shelters can be finnicky to pitch in tight areas and require good stakes. I have always been able to make it work, but sometimes in alpine settings it takes 20 minutes to anchor the stakes with rocks. Setup can be tricky when not at established campsites, as often is the case for high routes.
If trekking pole supported shelters sound too complicated for you, I would recommend one of the many lightweight 3 season traditional tents. 4 season tents are definitely overkill for summer and fall use in the Cascades.
On short trips with good weather, I sometimes leave the tent behind. The Stratospire Li has the advantage of decoupling so I can take just the rain fly (16 oz) or just the bug net (10 oz) depending on the conditions I expect.
Tent footprints are a hilarious proposition to me. After spending $500 on their ultralight tent, brands have convinced people to drop another $75 on a piece of plastic that weighs 8 oz, making their ultralight tent not so ultralight. Instead, I use thin window insulation kit and cut it to fit my tent’s footprint. This costs about $10 and weighs 2 oz.
Sleeping Insulation
I use the term “sleeping insulation” because I actually use down quilts more than sleeping bags. Why? Quilts are more weight efficient and keep me plenty warm in the mild summer temperatures that we have. I typically use the Enlightened Equipment Enigma 40F Quilt (13 oz!), paired with a warm hat if needed. The Thermarest Vesper Quilt is a comparable option if you want something with a shorter lead time. Remember, you can always wear your warm clothes while you sleep if you are pushing the limit of your insulation. Think of your clothes and sleeping insulation as a system that work together.
If a quilt is not for you, there are plenty of down sleeping bag options. I would never consider synthetic sleeping bags in our summer climate because of the extra weight and size and decreased lifespan of the insulation. However, I would recommend a waterproof stuff sack for your bag!
Sleeping Pad
If you are among the people who can sleep well on a closed cell foam pad, then you are blessed. Unfortunately, I am not, so I carry an inflatable sleeping pad. My top choice would be the Thermarest Neoair XLite, but really any option is fine. I have had so many inflatable pads leak on me that I sometimes carry a 2/3 length old Z foam pad as a backup on longer trips. It also makes for a nice pad to lie around on at camp.
Backpack
I think 40L is the right size for multi day high routes. I have used my 40L pack on a 7 day Wind River High Route and 5 day Bailey Range Traverse, where we carried glacier gear and a bear can. If you cannot fit it all in a 40L (maybe 50L) pack, then you are probably carrying too much.
My favorite pack is the Dan Durston 40L pack (now called the Kakwa), made by Massdrop. At an affordable price point, it has nearly every feature perfected, like a water bottle pocket that is accessible with the pack on, durable water resistant fabric, pockets everywhere, and good carrying capacity. If this pack does not suit you, there are many other small brands producing great backpacking packs in the 2lb range that can carry 35-50L capacity. The Granite Gear Crown is a good pack I have used that feels much smaller than its 60L listed capacity. I have yet to find a big name brand that can design a good ultralight backpacking pack.
A high route pack should be comfortable to wear and be so convenient you never need to take it off. With my pack on, I can access my camera, phone, snacks, and water easily. This will save significant time over the course of a day.
The pack is the last place you should cut weight. If you do not have a lightweight sleeping system or carry 3 pairs of clothes, then your shoulders may not appreciate an ultralight backpack. Most of these packs only can carry up to 30-35 lbs comfortably, but I almost never exceed that weight, even on a weeklong trip.
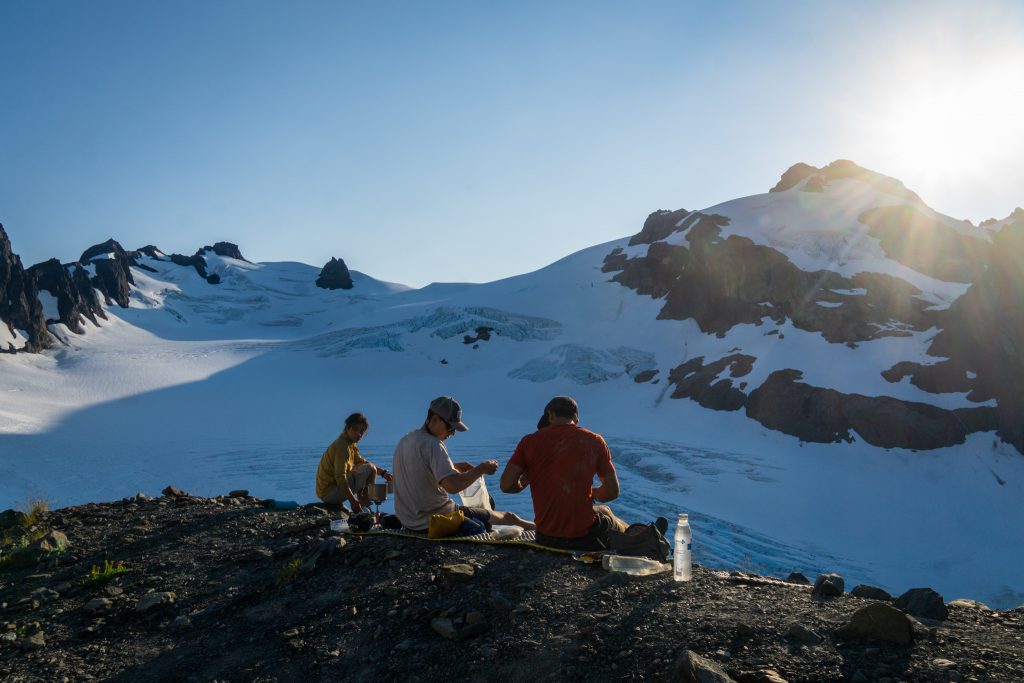
Cook System
For most trips, I use a standard lightweight canister stove like the Pocket Rocket. You do not need too much fuel to boil water for a dehydrated dinner, so one canister can last a group many days. I like the lightweight Toaks pots.
I have experimented with Esbit solid fuel tab stoves. At only 4 oz for the stove and some fuel tabs, they do save a significant amount of weight. However, they are only suitable for getting water close to a boil, can be finnicky to start, and do not handle wind well. For a few days, they can be a decent way to save some weight, but be warned they are less convenient.
For single night trips, I often will just cold soak my food so I can leave behind the cook system altogether, saving a full pound.
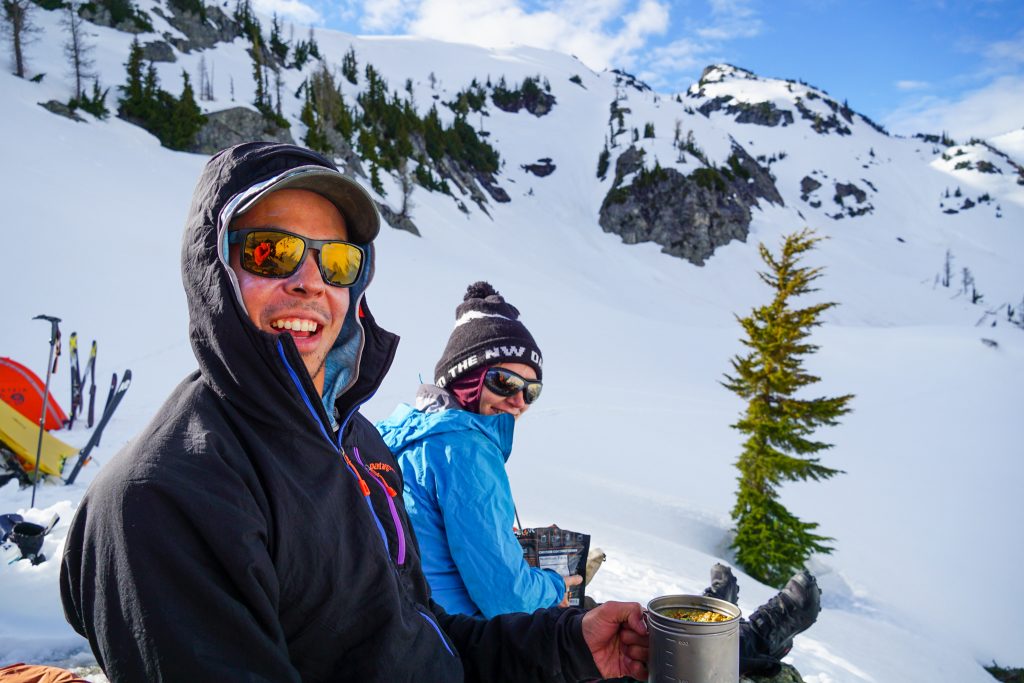
Food / Nutrition
Nutrition is very important for hard efforts in the mountains. On a multi-day trip, I aim for 3000 calories (although I don’t count calories), or typically 1.5-2 lbs of food per day. On a typical high route where I am only moving for 8-10 hours a day, 1.5 lbs is enough. But on something like the Glacier Peak High Route, where I was moving for 14 hours a day, I carried about 2 lbs per day.
For me, it is important to keep food accessible so I can eat frequently instead of eating in large amounts periodically. I keep trail mix and other snacks in the hip pockets of my pack or vest.
Day Food
During the day in the mountains, I mostly eat normal food – trail mix, sandwiches, and granola bars. I usually reserve some simple carbs like shot bloks, gels, and pure candy for later in the day when I need an input of fast energy.
On multi day trips, I try to introduce a little more variety with dried fruit and beef jerky. I typically pack peanut butter tortillas because they take up very little space and preserve well over a few days.
Electrolytes
Electrolytes are the single most underrated component of success in the mountains. A bit of an over-exaggeration? Possibly. But before I started adding electrolytes to my water, I could not break through about 9k ft gain in a day without bad cramping. The sky is the limit now.
My preferred electrolyte is Nuun simply because it is easy to carry in small amounts, as opposed to a powder. I add it to almost all of my water.
I have also tried Tailwind, which has a lot of calories in addition to electrolytes. The taste is pretty neutral so this is a great option if you struggle to eat enough, especially on faster paced activities.
Finally, I carry a handful of electrolyte tablets. You can down them at anytime to replenish electrolytes. These weigh almost nothing and have been a trip saver in a few instances when someone cramps up badly. So underrated!
Dinner
Nothing crazy here. For most people, I recommend the typical backpacking dinner meals. I personally use the Knorr’s Pasta Sides since I am cheap. I’ve discovered you actually do not need to cook them – just pour boiling water in and let is soak for about 10 minutes.
I often bring some pepperoni or olive oil to mix in for some extra calories.
Breakfast
I usually do either granola with powdered milk (which turns into a cereal like consistency after adding water) or oatmeal, which is a little more calorically dense but requires a stove.
Food Storage
For food storage, I mostly use an Ursack. This bear and critter resistant bag weighs about 10 oz and packs well. I have never had anything get into it as long as I plug the top with a rock. In more alpine environments where bears might not be a concern (although they have been spotted on the Boston Glacier!) a mesh critter sack is lighter and could be sufficient. You can always do a food hang, but it is often hard to do a bear resistant hang up high with smaller trees and the Ursack is much simpler.
If a bear canister is required, I have found that the most comfortable way to carry it is to put all your food in a bag in your pack and then just carry the empty bear can outside the pack. It is unconventional, but it is much more comfortable than trying to fit a hard sided bear can in a lightweight pack.
Putting the Pack Together
To help visualize the different weights of each category of gear, I have created a lighterpack. I did not weigh all of my pieces of gear, so some of the weights are estimates.
For this list, I included 4 full days of food, crampons, ice ax, helmet, and all other gear I would need. I did not include gear that I would wear like clothes, hat, and trekking poles. Note that typically I go with at least one other person, so I would be able to share the group gear like tent and cookware.
My “base weight”, which I would categorize as overnight equipment, emergency / misc, and extra clothing, is about 11 lbs, which is distinctly above the common 10 lb threshold to be considered “ultralight”. There are certainly trips where my base weight is lower, if I leave behind the extra battery, a tent, or cookware, but in reality, one or two pounds is not a big deal typically. Ultralight is not an end in itself, but rather a means to an end. But for many ultralight backpackers, ultralight truly is the end. I do not count grams and measure each piece of gear, but I do try to keep my gear slim to be able to move efficiently in comfort.
Philosophies and Tips
Light isn’t always right.
It seems that mountain sports these days are overrun with the adage “light is right”. Stripping pounds is certainly important and can help you move faster and more comfortably, but there is a point where there is diminishing returns. Sure, you can shed a few more ounces with a lighter sleeping bag, but is it really worth shivering through the night? Do you want to be hungry the entire time you are out? Unless you are truly pushing the boundaries of what is possible, a certain amount of comfort is typically worth a small weight penalty.
Prioritize sleep.
If I am doing an overnight trip, I will always make sure I bring enough gear to sleep well – that is not a compromise. I can try to cut weight with lighter electronics, ditching the stove, or cutting it close on food, but I absolutely need to get a good rest while I am out there. That means bringing warm and comfortable enough gear to get good sleep. It also means being thoughtful about where I sleep to reduce wind and exposure.
Speed doesn’t always mean safety.
“Speed is safety” is perhaps the most overused motto in the community these days. You might be surprised hearing that from someone like me, who moves through technical terrain with unusual speed. But I’ve seen too many people justify rock soloing, unroped glacial travel, and huge one day pushes with the phrase “speed is safety”. True, I do all of those things, but I realize that they are actually sometimes less safe than traditional style, but still within the range of risk I am willing to accept.
This phrase originated from alpine climbing, where speed allows you to reduce your exposure time to objective hazard, such as serac falls, natural avalanches, and impending storms. This can be a great strategy in alpine terrain. But to say “speed is safety” to justify a single day run of the Ptarmigan Traverse (as I have seen people do) is completely ludicrous. The Ptarmigan Traverse has no real serac hazard, minimal rockfall hazard, and our stable PNW summer weather is not typically a major concern (or can be planned around). The main hazards are probably injuries and falling in a crevasse, both of which are reduced by a slower, more traditional approach.
I am not saying speed is unsafe – just that speed does not necessarily mean safety. Everyone has a different risk tolerance. Stick to what you are comfortable with, whether that means taking an extra day, bringing a helmet, or roping up.
Carry less water.
Trying to cut weight? You could spend $500 on a dyneema tent to shave off one pound, or you could simply carry a half liter less of water. Substitute a plastic Gatorade or Smart Water bottle for your Nalgene and that saves 4 oz. In the PNW, we typically have frequent water sources so I rarely carry more than 16-32 oz. Frequent refills are largely why I don’t use a hydration bladder – the inconvenience of refilling causes you to carry far too much water. Instead, be opportunistic, drinking more when you are at a water source. This is such an easy way to save a few pounds.
Tune your gear to the conditions.
I have a core kit of gear for high routes, but I adjust things for each trip. I might ditch the rain jacket and leave behind the rain fly if the weather is good, or just sleep outside with no tent. Each trip will have slightly different demands on your gear, so you can both decrease your weight and increase the effectiveness of your gear by reevaluating depending on the conditions.
If it ain’t broke, don’t fix it.
The most important thing is that you stick with the gear you know you can rely on. For example, I start most multi-day high routes with a near fresh pair of the reliable Ultra Raptors. While it can be tempting to try out something shiny and better, the last thing you want on a big high route is blisters, chafing, or issues with new gear. There are so many things that can go wrong on a high route, so make sure your gear is not one of them. Use shorter trips as opportunities to test out new systems.

High Routes in the Cascades
Moving through the wonderful high terrain of the Cascades is truly special. I hope this article has given helpful insight into the gear I use on these trips. While many of the choices are highly personal, the underlying concepts should be helpful to all, regardless of ability level!
Knowing your trips, this is probably (to me) the most valuable and appreciated post yet. I’ve been dialing in my load for longer scramble days (~20 miles, 8k gain), but this is very useful for me to sanity check and look critically at my approach, so a huge THANK YOU for this (and all your other work).
When you say you bring a kit lens with your camera and keep it in the vest pocket, I’m guessing you’re referring to the 16-50 lens? I have an 18-135 for my Fuji that I love for nature since it’s so versatile, but it’s too big to use with the Peak Design clip if I’m running (which I frequently try to do for stretches) and the Hyperlite pods just haven’t proven to be a good solution. Do you use the wider lens and just crop in if needed?
Thanks in advance and keep up the amazing work.
Yeah, when I am running, I just use the kit lens. On multi day trips, then I will typically bring the 18-135mm with the Peak Design clip.
Great post! To add on to your “Light isn’t always right” philosophy, Part of “light and fast” is “fast.” I think your stove and pack examples illustrates this. Gear should not be so light that it take an inordinate amount of time to use for its intended purpose.
Agreed! Those esbit stoves can be quite frustrating after a long day.
In the world of shoes, I’m a big fan of the La sportiva Tx Guide; way tougher than running shoes, great grip. The main downside is they run narrow and I have to size up to get the width I need. Amazing all around shoe though.
I have yet to try them, but the TX3s were far too firm and uncomfortable for extensive hiking for me. The Ultra Raptors are as rugged of a shoe as I ever really need, but I could see some people preferring the firmness of the TX Guides.
Any particular reason for picking womens gear?
The main links were men’s gear, and then I added women’s after. I guess it wasn’t clear to people! I’ve adjusted to be more clear.
Great stuff!
One thing that I’m curious about is the shoes. I agree that full mountaineering boots are overkill for most Cascade outings, but don’t trail runners seem like, I don’t know, kind of underkill for trips featuring snow/glacier travel, off-trail travel, and scrambling instead of running? Is there any situation where you prefer something in between, like approach shoes or hiking boots?
I think if an approach was really short then approach shoes might be nice for their added stiffness on snow and rock. Hiking boots do not really offer any notable advantage except for warmth. Rigid trail runners like Ultra Raptors do pretty dang well on snow and rock though, while hiking much more comfortably than approach shoes.
There might be steep snow sections that are not appropriate with trail runners and crampons. I have yet to encounter such a situation on my high routes, but I also am thoughtful about that sort of thing and try to cross steep snow when it will be softer later in the day.